background image

Sloan Electric

Loveseat Recliner

A S S E M B LY   G U I D E

V1

Содержание Sloan Electric Loveseat Recliner

Страница 1: ...Sloan Electric Loveseat Recliner A S S E M B LY G U I D E V1...

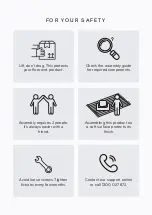
Страница 2: ...duct Avoid loose screws Tighten xtures every few months Assembly requires 2 people It s always easier with a friend Contact our support online or call 1300 027 672 Check the assembly guide for require...

Страница 3: ...dren with physical sensory or mental challenges Please always provide supervision and instructions for persons with disabilities 6 Children should be supervised to ensure that they do not play on the...

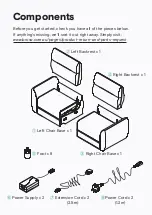
Страница 4: ...ow If anything s missing we ll sort it out right away Simply visit www brosa com au pages product return and parts request Power Supply x 2 Extension Cord x 2 2 5m Power Cord x 2 1 2m Left Chair Base...

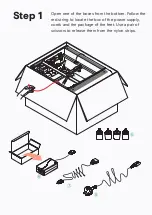
Страница 5: ...Step 1 Open one of the boxes from the bottom Follow the red string to locate the box of the power supply cords and the package of the feet Use a pair of scissors to release them from the nylon strips...

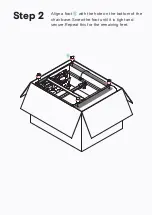
Страница 6: ...Step 2 Align a foot with the hole on the bottom of the chair base Screw the foot until it is tight and secure Repeat this for the remaining feet...

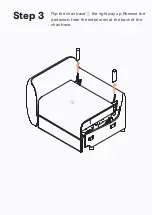
Страница 7: ...Step 3 Flip the chair base the right way up Remove the protectors from the metal arms at the back of the chair base...

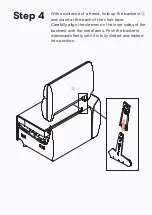
Страница 8: ...end hold up the backrest and stand at the back of the chair base Carefully align the sleeves on the inner sides of the backrest with the metal arms Push the backrest downwards rmly until it is fully s...

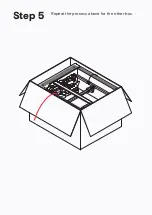
Страница 9: ...Step 5 Repeat the process above for the other box...

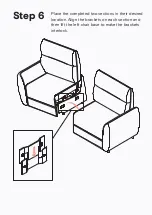
Страница 10: ...Step 6 Place the completed two sections in their desired location Align the brackets on each section and then lift the left chair base to make the brackets interlock...

Страница 11: ...male plug at the back of the chair Grab the extension cord and pick the female plug with the cap Flip up the cap and connect the plug to the male plug rmly Flip down the cap and hook it to the knobs...

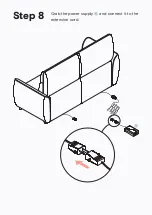
Страница 12: ...Step 8 Grab the power supply and connect it to the extension cord...

Страница 13: ...Step 9 Finally grab the power cord and insert the female plug of it into the socket of the power supply...

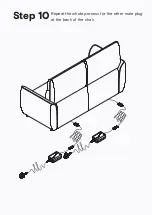
Страница 14: ...Step 10Repeat the whole process for the other male plug at the back of the chair...

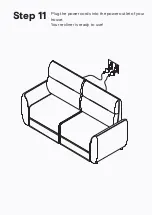
Страница 15: ...Step 11 Plug the power cords into the power outlet of your house Your recliner is ready to use...

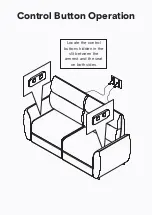
Страница 16: ...Control Button Operation Locate the control buttons hidden in the slit between the armrest and the seat on both sides...

Страница 17: ...Press the front button to recline your chair Release the button once reaching your desired position Press the back button to restore your chair Release the button once reaching your desired position...

Страница 18: ...weight capacity for each seat is 150kg Staying within the weight limit keeps you safe Keep your hands and feet clear of the mechanism and gaps DO NOT sit on the footrests DO NOT sit on the armrests MA...

Страница 19: ...ways use the controls to adjust their position DO NOT allow children to play on the recliner Ensure children or pets are not in the way when operating the recliner DO NOT allow children or pets to cra...

Страница 20: ...tedly sitting in the same spot 7 Don t jump or apply sudden force to the furniture This may damage the frame or suspension 8 When moving furniture from one place to another lift don t drag 9 Do not si...

Страница 21: ...recommend attaching felt pads to the bottom of furniture legs This prevents squeaking and protects your oor from scratches 7 Fabric Variation There may be di erences and very slight variations betwee...

Отзывы: