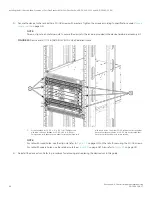


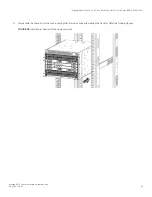


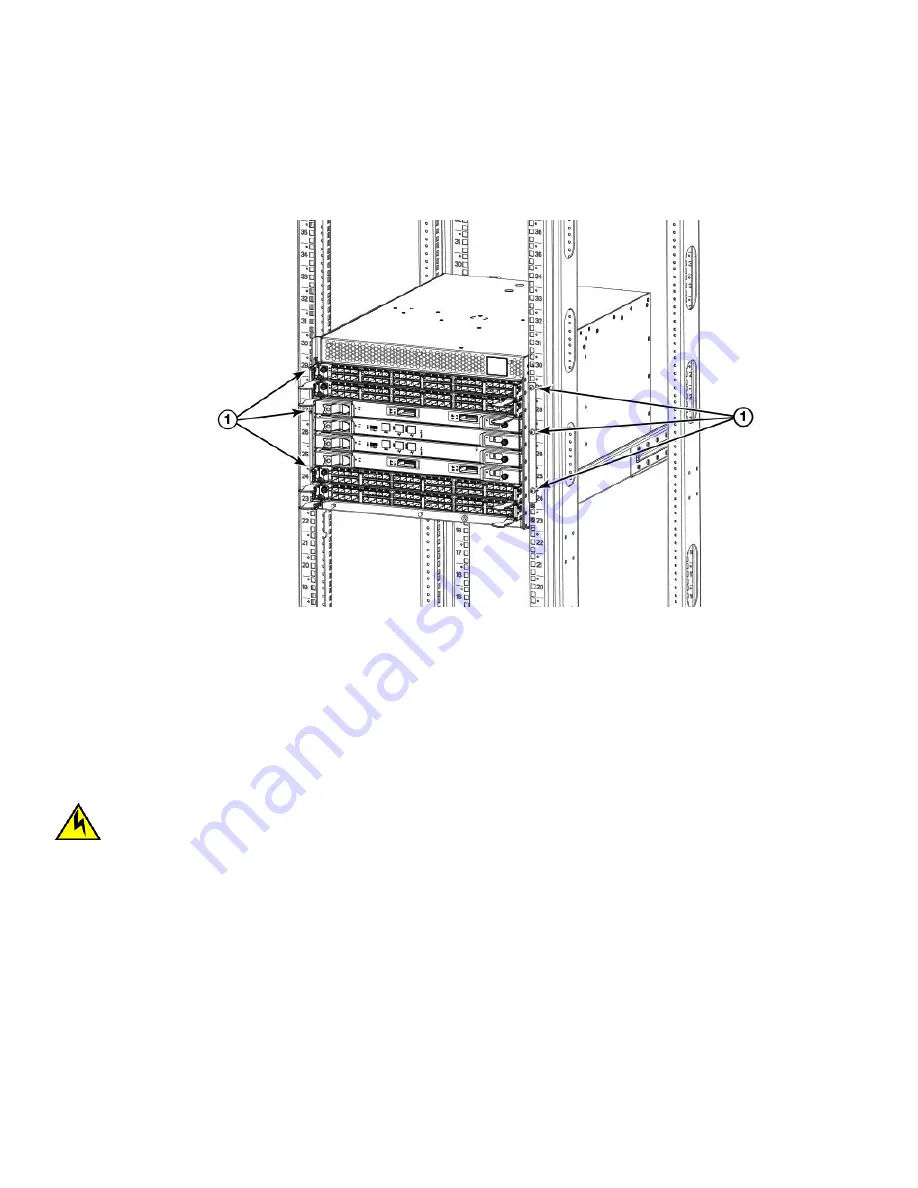
6. Secure the device to the equipment rack racks with six 10-32 x .63 screws with square-cone washers, three screws on each
side. Tighten the screws to a torque of 80 in-lb (92 cm-kg). Refer to the following figure.
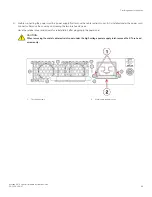
FIGURE 27
Chassis installed in equipment rack
1.
10-32 x .63 in.(1.60 cm) Phillips screw with square cone
washer
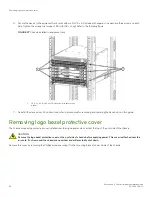
7. Reinstall the device door. For instructions, refer to procedures for removing and replacing the device door in this guide.
Removing logo bezel protective cover
The chassis ships with a protective cover installed over the logo bezel and air vents at the top of the port side of the chassis.
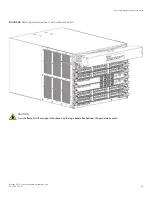
CAUTION
Remove the logo bezel protective cover on the port side of chassis before applying power. This cover is attached over the
air vents. If not removed, the chassis can overheat and will eventually shut down.
Remove this cover by removing the Phillips screws securing it to the mounting bracket on each side of the chassis.
Removing logo bezel protective cover
Brocade X6-4 Director Hardware Installation Guide
62
53-1004106-07
Содержание X6-4
Страница 12: ...Brocade X6 4 Director Hardware Installation Guide 12 53 1004106 07...
Страница 20: ...Brocade X6 4 Director Hardware Installation Guide 20 53 1004106 07...
Страница 28: ...Brocade X6 4 Director Hardware Installation Guide 28 53 1004106 07...
Страница 64: ...Brocade X6 4 Director Hardware Installation Guide 64 53 1004106 07...
Страница 86: ...Brocade X6 4 Director Hardware Installation Guide 86 53 1004106 07...
Страница 102: ...Brocade X6 4 Director Hardware Installation Guide 102 53 1004106 07...
Страница 130: ...Brocade X6 4 Director Hardware Installation Guide 130 53 1004106 07...
Страница 140: ...Brocade X6 4 Director Hardware Installation Guide 140 53 1004106 07...
Страница 166: ...Brocade X6 4 Director Hardware Installation Guide 166 53 1004106 07...
Страница 196: ...Brocade X6 4 Director Hardware Installation Guide 196 53 1004106 07...
Страница 200: ...Brocade X6 4 Director Hardware Installation Guide 200 53 1004106 07...
Страница 204: ...Brocade X6 4 Director Hardware Installation Guide 204 53 1004106 07...
Страница 210: ...Brocade X6 4 Director Hardware Installation Guide 210 53 1004106 07...
Страница 224: ...Brocade X6 4 Director Hardware Installation Guide 224 53 1004106 07...
Страница 238: ...Brocade X6 4 Director Hardware Installation Guide 238 53 1004106 07...