background image

• le siège auto soit toujours fixé dans 

la voiture même si aucun enfant ne 
l'occupe.

Pour protéger votre véhicule

• Sur certaines housses de siège de 

véhicule recouvertes d'une matière 
délicate (velours, cuir, etc.), 
l'utilisation de sièges auto risque de 
laisser des traces. Pour éviter cela, 
vous pouvez mettre en dessous une 
couverture ou une serviette, par 
exemple.

3.1

Montage du 
siège auto

Þ

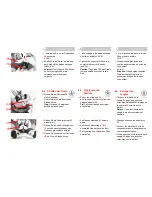
Enclenchez les deux 
guides d'insertion* 

1

, en 

dirigeant l'évidement vers 
le haut, sur les deux points de 
fixation ISOFIX 

2

.

Astuce ! Les points de fixation 
ISOFIX 

2

 se trouvent entre la 

surface d'assise et le dossier du 
siège du véhicule.

* Les guides d'insertion facilitent le montage 
avec l'adaptateur ISOFIX et évitent 
d'endommager la housse de siège. Il est 
recommandé de retirer ces guides d'insertion et 
de bien les ranger. Dans les véhicules à dossier 
rabattable, les guides d'insertion doivent être 
retirés avant de rabattre le dossier.

Les dysfonctionnements sont généralement dus 
à la présence de saletés au niveau des guides 
d'insertion et des crochets. Pour y remédier, 
éliminez les saletés.

• the child safety seat is always 

secured when it is in the vehicle, 
even if no child is being transported.

To protect your vehicle

• Some vehicle seat covers of 

sensitive materials (e.g. velour, 
leather, etc.) may develop wear 
marks when child seats are used. 
This can be avoided by placing a 
blanket or towel under the child seat.

3.1

Installing the 
child safety seat

Þ

Clip the two insert guides* 

1

, recess facing upwards, 

to the two ISOFIX 
fastening points 

2

.

Tip! The ISOFIX fastening points 

2


are located between the surface 
and the backrest of the vehicle seat.

* The insert guides make it easier to install the 
seat using ISOFIX and prevent the seat cover 
from becoming damaged. When not in use, they 
should be removed and kept in a safe place. If 
your vehicle has folding backrests, remove the 
insert guides before folding them down.

Most malfunctions are caused by contamination 
in the insert guides and on the hooks. Remedy 
such malfunctions by removing this 
contamination.

• der Auto-Kindersitz im Auto immer 

gesichert ist, auch wenn kein Kind 
transportiert wird.

Zum Schutz Ihres Fahrzeuges

• An einigen Auto-Sitzbezügen aus 

empfindlichem Material (z.B. 
Velours, Leder etc.) können durch 
die Benutzung von Auto-
Kindersitzen Gebrauchsspuren 
auftreten. Um das zu vermeiden, 
können Sie z.B. eine Decke oder ein 
Handtuch unterlegen.

3.1

Einbau des 
Auto-Kindersitzes

Þ

Clipsen Sie die beiden 
Einführhilfen* 

1

, mit der 

Aussparung nach oben auf 
die beiden ISOFIX-
Befestigungspunkte 

2

.

Tipp! Die ISOFIX-
Befestigungsspunkte 

2

 befinden 

sich zwischen Sitzfläche und 
Rückenlehne des Fahrzeugsitzes.

* Die Einführhilfen erleichtern den Einbau mit 
ISOFIX und vermeiden Beschädigungen des 
Sitzbezuges. Sie sollten bei Nichtgebrauch 
entfernt und sorgfältig aufbewahrt werden. Bei 
Fahrzeugen mit umklappbarer Rückenlehne 
müssen die Einführhilfen vor dem Umklappen 
entfernt werden.

Auftretende Funktionsstörungen sind meist auf 
Verunreinigungen in den Einführhilfen und an 
den Haken zurückzuführen. Abhilfe kann durch 
Beseitigung dieser Verunreinigungen 
geschaffen werden.

Содержание SAFEFIX PLUS TT

Страница 1: ...AX R MER Kindersicherheit GmbH Britax Excelsior Ltd Table des mati res 1 Habilitation 2 2 Utilisation dans le v hicule 3 3 Montage dans le v hicule 4 3 1 Montage du si ge auto 5 3 2 D montage du si ge...

Страница 2: ...en entsprechend den Anforderungen der europ ischen Norm f r Kindersicherheits Einrichtungen ECE R 44 04 Das Pr fzeichen E in einem Kreis und die Zulassungsnummer befinden sich auf dem Zulassungsetiket...

Страница 3: ...is in no way suitable as a seat or toy in the home 2 Use in the vehicle ISOFIX fastening and top tether Fastening with ISOFIX and top tether is based on universal approval The seat may be used in all...

Страница 4: ...case of an emergency stop or an accident unsecured persons or objects may cause injury to other vehicle occupants Please always check that the backrests of the vehicle seats are locked i e that a fold...

Страница 5: ...t guides 1 recess facing upwards to the two ISOFIX fastening points 2 Tip The ISOFIX fastening points 2 are located between the surface and the backrest of the vehicle seat The insert guides make it e...

Страница 6: ...ther 46 out of the cloth bag Place the child safety seat facing forward on the vehicle seat in the direction of travel Place the top tether 46 behind the vehicle seat Press the grey safety buttons 5 o...

Страница 7: ...ntil the arms engage on both sides CLICK Caution The green markings 7 on the safety buttons 5 must now be visible on both sides Pull on the child seat to ensure it is engaged on both sides Press the o...

Страница 8: ...ing point recommended in your vehicle owner s manual e g on the parcel shelf on the floor or behind the backrest Tighten the strap 46 of the top tether until at least 1 cm of the green tension indicat...

Страница 9: ...the seat base 12 Tip This protects the locking arms 4 from damage 3 3 Checklist to ensure that your child seat with ISOFIX is installed correctly For the safety of your child please check that the ch...

Страница 10: ...the front seat forward far enough that you child s feet cannot hit the back rest of the front seat to prevent risk of injury The plastic parts of the child safety seat can heat up in the sun Caution...

Страница 11: ...9 are at the same level as your child s shoulders or slightly above To adjust the height of the headrest 20 to fit your child Loosen the harness straps as far as possible see 4 2 Tip the headrest 20 f...

Страница 12: ...child Loosen the shoulder straps see 4 2 Open the harness buckle 24 press the red release button Insert the buckle tongues 25 into the rubber holders 26 Place your child into the safety seat Unhook th...

Страница 13: ...your child s body see 4 4 Caution The hip belt 28 must lie as low as possible over your child s hips 4 4 Tightening the harness Pull on the strap end 36 until you hear a clear click from the harness a...

Страница 14: ...traps 19 are adjusted correctly the straps are not twisted the buckle tongues 25 are engaged in the harness buckle 24 the shoulder pads 23 are in the right position on your child s body 5 Reclining po...

Страница 15: ...rly check all important parts for damage Ensure the correct operation of all mechanical components To prevent damage or breakage ensure that the child seat does not become jammed in the car door seat...

Страница 16: ...pplied Remedy Wash out the harness buckle so that it functions properly once again 1 Removing the harness buckle Loosen the harness straps see 4 2 Undo the Velcro fastener on the crotch cushion 29 and...

Страница 17: ...e crotch cushion 29 Malfunction The buckle tongues 25 can no longer be inserted into the buckle housing 24 Remedy Press the red button to release the harness buckle 24 6 2 Cleaning Please be sure to u...

Страница 18: ...arate from the padding The plastic parts can be cleaned using soapy water Do not use harsh cleaning agents such as solvents The harness can be removed and washed in lukewarm soapy water Caution Never...

Страница 19: ...the crotch cushion 29 and remove it Slide the headrest 20 to the lowest position see 4 1 Remove the cover of the headrest 20 Open the snaps 43 at the left and right on the back part 44 of the cover Fo...

Страница 20: ...buckle 24 and the strap end 36 from the cover Pull the cover upwards a little and then put it with the recess over the headrest 20 6 4 Re fitting the cover Simply proceed in the reverse order of secti...

Страница 21: ...cendre les passants des pauli res 23 de la boucle 32 du syst me de r glage de l appui t te 21 D crochez les bretelles 19 de l l ment de liaison 42 Attention Une fois d croch l l ment de liaison 42 ne...

Страница 22: ...out 6 6 Installing the harness Engage the buckle tongues 25 in the harness buckle 24 see 4 3 Now thread the long strap loop into the outer side slot 38 of the seat shell 11 Caution Do not twist the be...

Страница 23: ...Caution Do not twist or interchange the straps Push through the shoulder straps 19 between the guide rod 39 and the base 32 of the headrest adjuster 21 Hook the shoulder straps 19 back onto the connec...

Страница 24: ...the waste disposal regulations in your country 8 Next child safety seat Disposal of packaging Container for paperboard Disposal of components cover garbage thermal utilisation plastic parts containerc...

Страница 25: ...bicyclette poussettes qui ont t trait s comme il convient et qui sont renvoy s propres et complets La garantie ne couvre pas les d fauts suivants l usure naturelle et les dommages dus une sollicitatio...

Страница 26: ...essing claims product specific depreciation rates will be applied Please refer to our General Terms and Conditions which are available from your retailer Use care and maintenance The car bicycle child...

Страница 27: ...__________________________________ Kaufdatum ____________________________________________ K ufer Unterschrift ____________________________________________ H ndler _____________________________________...

Страница 28: ...ur design _____________________________________________ Accessories _____________________________________________ Date of purchase ____________________________________________ Buyer signature ________...

Страница 29: ..._______________ Date de l achat ____________________________________________ Acheteur signature ____________________________________________ Revendeur ____________________________________________ Proc...

Отзывы: