FN-122397.2
Stand Ventilator (DE)
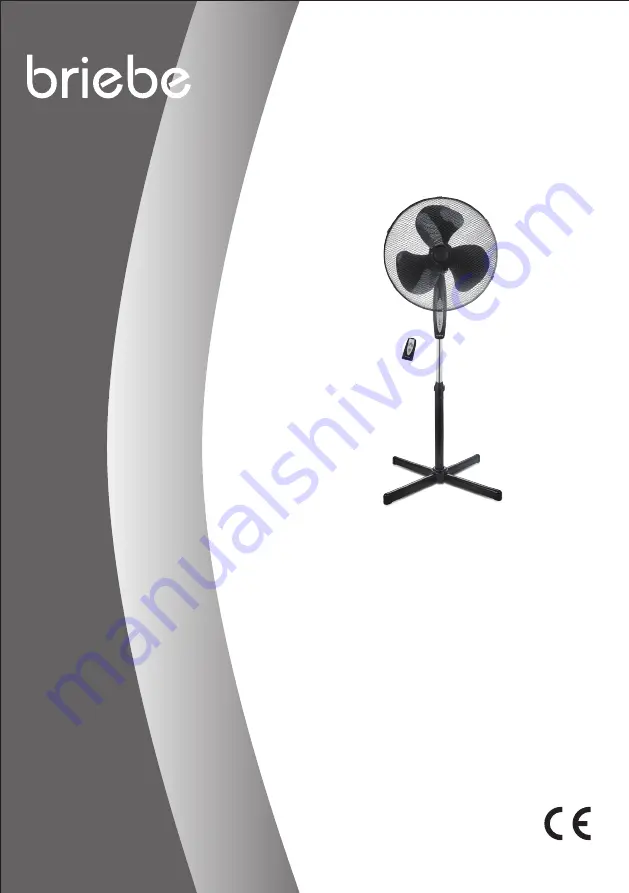
Stand fan (EN)
Ventilator op standaard (NL)
Ventilateur sur pied (FR)
Ventilador de pedesta (ES)
Ventoinha vertical (PT)
Ventola da con piedistallo (IT)
Podstawka wentylatora (PL)
Страница 1: ...FN 122397 2 Stand Ventilator DE Stand fan EN Ventilator op standaard NL Ventilateur sur pied FR Ventilador de pedesta ES Ventoinha vertical PT Ventola da con piedistallo IT Podstawka wentylatora PL...
Страница 2: ...tenuto Tre Bedienungsanleitung German 2 Instruction manual English 10 Gebruiksaanwijzing Dutch 17 Mode d emploi French 25 Manual de Instrucciones Spanish 33 Manual de instru es Portugu s 41 Manuale d...
Страница 3: ...leitung erfolgt verursacht wurden 1 Dieses Ger t kann von Kindern ab 8 Jahren und Personen mit eingeschr nkten k rperlichen sensorischen oder geistigen F higkeiten oder mangelnder Erfahrung und Kenntn...
Страница 4: ...er Ziehen Sie nicht am Kabel 11 Ber hren Sie das Ger t nicht wenn es ins Wasser gefallen ist Ziehen Sie den Stecker aus der Steckdose schalten Sie das Ger t aus und schicken Sie es an einen autorisier...
Страница 5: ...hutzgitter wenn der Ventilator l uft 23 Lassen Sie das Produkt niemals ohne das Ventilatorschutzgitter laufen da es sonst zu schweren Verletzungen kommen k nnte 24 Das Ger t muss vor dem Gebrauch komp...
Страница 6: ...d Geschwindigkeits Taste 20 Aus Taste 21 Timer Anzeigen 22 Geschwindigkeitsanzeige 23 Betriebsanzeige 24 Modusanzeige 25 Modus Taste 26 Timer Taste BATTERIEN EINLEGEN Batteriefachabdeckung von der R c...
Страница 7: ...eine Mutter und den Bolzen an der Unterseite des vorderen Schutzgitters befestigen Sie dann die beiden Schutzgitter mit der Mutter und dem Bolzen aneinander Sichern Sie die beiden Schutzgitter indem S...
Страница 8: ...digkeit nat rlicher Luftstrom mit kontinuierlich niedriger Windgeschwindigkeit 5 Timer Funktion Dr cken Sie die Timer Taste um die gew nschte Betriebszeit von 0 5 h bis 7 5 h 0 5h Intervalle einzustel...
Страница 9: ...tierende Folgesch den nicht haftbar F r Materialsch den oder Verletzungen aufgrund falscher Anwendung oder Nichtbefolgen der Sicherheitshinweise sind wir nicht haftbar Sch den an den Zubeh rteilen bed...
Страница 10: ...snorm f r die Ermittlung des Serviceverh ltnisses IEC 60879 1986 corr 1992 Kontaktadresse f r weitere Informationen Electroactiva Calle Huelva 6 28343 Valdemoro Madrid Espa a 0034 918 762 026 Erf llt...
Страница 11: ...ck of experience and knowledge if they have been given supervision or instruction concerning use of the appliance in a safe way and understand the hazards involved 2 Children shall not play with the a...
Страница 12: ...uring use 15 This appliance is not designed for commercial use 16 Do not use the appliance for other than intended use 17 Do not wind the cord around the appliance and do not bend it 18 Keep the appli...
Страница 13: ...d button 20 Off button 21 Timer indicators 22 Speed indicators 23 Power indicator 24 Mode indicator 25 Mode button 26 Timer button INSTALLING THE BATTERIES Open the battery cover on the back of the re...
Страница 14: ...he bottom of the front grille then fasten the two guards together with them Secure the two guards by closing the clips over the outer rim OPERATION Please press the buttons on the control panel or the...
Страница 15: ...Press the timer button to set your desired working time from 0 5h to 7 5h increment by 0 5h CLEANING 1 Before servicing the fan and after each occasion of use switch off the appliance and unplug the...
Страница 16: ...either can we hold responsible for material damage or personal injury caused by improper use if the instruction manual is not properly executed Damage to accessories does not mean free replacement of...
Страница 17: ...y c 3 24 meters sec Measurement standard for service value IEC 60879 1986 corr 1992 Contact details for obtaining more information Electroactiva Calle Huelva 6 28343 Valdemoro Madrid Espa a 0034 918 7...
Страница 18: ...vereenstemming is met de bepalingen van deze gebruiksaanwijzing 1 Dit apparaat mag worden gebruikt door kinderen vanaf 8 jaar en personen met beperkte fysische visuele of mentale vaardigheden of die e...
Страница 19: ...k 10 Om de stekker uit het stopcontact te halen dient u aan de stekker zelf te trekken Trek niet aan de stroomkabel 11 Raak het apparaat niet aan als het in water is gevallen Trek de stekker uit het s...
Страница 20: ...de ventilator in gebruik is 23 Neem het product nooit zonder correct gemonteerde beschermende roosters in gebruik aangezien dit ernstig persoonlijk letsel tot gevolg kan hebben 24 Het apparaat moet vo...
Страница 21: ...ampje 24 Modus controlelampje 25 Modusknop 26 Timerknop DE BATTERIJEN INSTALLEREN Open het batterijdeksel aan de achterkant van de afstandsbediening Plaats twee AAA batterijen in het vak zoals aangege...
Страница 22: ...gens vast met behulp van deze kleine moer en bout Bevestig beide roosters aan elkaar door de klemmen over de buitenrand te sluiten WERKING Druk op de knoppen op het bedieningspaneel of de knoppen op d...
Страница 23: ...en van 0 5u in te stellen REINIGING 1 Schakel het toestel uit en neem de stekker uit het stropcontact alvorens de ventilator te laten herstellen en na iedere gebruiksbeurt 2 Dompel het toestel nooit o...
Страница 24: ...g gebruik of het niet opvolgen van de veiligheidsvoorschriften zijn wij niet aansprakelijk In dergelijke gevallen vervalt iedere aanspraak op garantie Schade aan accessoires of onderdelen betekend nie...
Страница 25: ...ximale luchtsnelheid c 3 24 meter sec Meetstandaard voor servicewaarde IEC 60879 1986 corr 1992 Contactgegevens voor meer informatie Electroactiva Calle Huelva 6 28343 Valdemoro Madrid Espa a 0034 918...
Страница 26: ...1 Cet appareil peut tre utilis par des enfants g s de 8 ans et plus et les personnes ayant des capacit s physiques sensorielles ou mentales ou un manque d exp rience et de connaissances si elles ont t...
Страница 27: ...Ne touchez pas l appareil s il tombe dans de l eau D branchez la fiche de la prise lectrique teignez l appareil et rapportez le au centre de r paration agr pour le faire r parer 12 Ne branchez pas et...
Страница 28: ...t sans ses grilles assembl es car cela pourrait provoquer de graves blessures corporelles 24 L appareil doit tre correctement assembl avant d tre utilis 25 Faites attention aux cheveux longs Ils peuve...
Страница 29: ...Bouton d arr t 21 Indicateur du minuteur 22 Indicateurs de vitesse 23 Indicateur d alimentation 24 Indicateur de mode 25 Bouton de mode 26 Bouton du minuteur INSTALLATION DES PILES Ouvrez le couvercl...
Страница 30: ...lles Fixez les deux grilles en fermant les clips sur le bord ext rieur FONCTIONNEMENT Veuillez appuyer sur les boutons du panneau de contr le ou sur les boutons de la t l commande pour choisir la fonc...
Страница 31: ...gler le temps de fonctionnement souhait de 0 5h 7 5h par intervalles de 0 5h NETTOYAGE 1 teindre l appareil et d brancher le cordon d alimentation de la prise avant de proc der toute r paration du ve...
Страница 32: ...ppropri e ou si les instructions de s curit n ont pas t convenablement observ es Si les accessoires sont endommag s cela ne signifie pas que toute la machine sera remplac e gratuitement Dans de tels c...
Страница 33: ...es sec Norme de mesure de la valeur de service IEC 60879 1986 corr 1992 Coordonn es de contact pour tout compl ment d information Electroactiva Calle Huelva 6 28343 Valdemoro Madrid Espa a 0034 918 76...
Страница 34: ...equisitos de este manual 1 Este aparato podr ser utilizado por ni os mayores de 8 a os y personas con capacidades f sicas sensoriales o mentales reducidas o sin la experiencia y los conocimientos nece...
Страница 35: ...1 No toque el aparato si se cayera al agua En dicho caso retire el enchufe de la toma de corriente apague el aparato y ll velo a un servicio t cnico autorizado para su reparaci n 12 No enchufe ni dese...
Страница 36: ...u sitio De otro modo podr an producirse graves lesiones personales 24 El aparato deber estar montado completamente antes de su uso 25 Tenga cuidado con el pelo largo ste podr a quedar atrapado en el v...
Страница 37: ...ndido y velocidad 20 Bot n de apagado 21 Indicadores de tiempo 22 Indicadores de velocidad 23 Indicador de encendido 24 Indicador de modo 25 Bot n de modo 26 Bot n del temporizador INSTALACI N DE LAS...
Страница 38: ...r y empuj ndola hacia abajo Desatornille la tuerca y el tornillo peque os de la parte inferior de la rejilla frontal y atornille las dos rejillas con ellos Asegure ambas rejillas cerrando los ganchos...
Страница 39: ...establecer el tiempo de funcionamiento entre 0 5 y 7 5 horas en incrementos de 0 5 h LIMPIEZA 1 Antes de reparar el ventilador y despu s de cada uso apague el aparato y desconecte el cable de aliment...
Страница 40: ...responsabilidad por da os derivados de no seguir las instrucciones de uso correctamente Da os en el acceso teor as no significa libre de sustituci n autom tica del aparato completo En dichos consulte...
Страница 41: ...ima del aire c 3 24 metros s Medici n est ndar del valor de servicio IEC 60879 1986 corr 1992 Datos de contacto para obtener m s informaci n Electroactiva Calle Huelva 6 28343 Valdemoro Madrid Espa a...
Страница 42: ...de 8 anos e pessoas com capacidades f sicas sensoriais ou mentais reduzidas ou com falta de experi ncia e conhecimentos se forem supervisionadas e tiverem sido instru das relativamente utiliza o segur...
Страница 43: ...iente autorizado para repara o 12 N o ligue ou desligue o aparelho da tomada el trica com as m os molhadas 13 Nunca tente abrir a caixa do aparelho ou reparar o aparelho sozinho Isto pode provocar um...
Страница 44: ...tos graves 24 O aparelho deve ser montado completamente antes da utiliza o 25 Tenha cuidado com os cabelos compridos Podem ser apanhados pela ventoinha devido turbul ncia do ar 26 N o vire o fluxo de...
Страница 45: ...temporizador 22 Indicadores da velocidade 23 Indicador da energia 24 Indicador do modo 25 Bot o do modo 26 Bot o do temporizador COLOCA O DAS PILHAS Abra a tampa do compartimento das pilhas na parte t...
Страница 46: ...ertar as duas prote es Fixe as duas prote es fechando os clipes na borda exterior FUNCIONAMENTO Prima os bot es no painel de controlo ou os bot es no telecomando para escolher a fun o desejada Os LED...
Страница 47: ...definir o tempo de funcionamento desejado desde 0 5h a 7 5 incrementos de 0 5h LIMPEZA 1 Antes de fazer manuten o ventoinha e ap s cada utiliza o desligue o aparelho e retire o fio da alimenta o da to...
Страница 48: ...Nem nos podemos responsabilizar por danos materiais ou danos pessoais causados pelo uso indevido se o manual de instru es n o for correctamente seguido Danos nos acess rios n o significam a substitui...
Страница 49: ...o para o valor do servi o IEC 60879 1986 corr 1992 Dados para contacto para obten o de informa es adicionais Electroactiva Calle Huelva 6 28343 Valdemoro Madrid Espa a 0034 918 762 026 Satisfaz os req...
Страница 50: ...t fisiche sensoriali o mentali o prive di esperienza o conoscenza solo se supervisionati o istruiti sull uso sicuro dell apparecchio e se comprendono i rischi correlati 2 I bambini non devono giocare...
Страница 51: ...l apparecchio dalla presa di corrente con le mani bagnate 13 Non tentare mai di aprire l involucro dell apparecchio o di riparare l apparecchio per evitare il rischio di scossa elettrica 14 Non lascia...
Страница 52: ...eve essere assemblato completamente prima dell uso 25 Prestare attenzione ai capelli lunghi perch il flusso d aria potrebbe risucchiarli nella ventola 26 Non dirigere il flusso d aria verso persone pe...
Страница 53: ...icatori della velocit 23 Indicatore di funzionamento 24 Indicatore della modalit 25 Pulsante della modalit 26 Pulsante del timer INSTALLAZIONE DELLE BATTERIE Aprire il coperchio del vano batterie sul...
Страница 54: ...Fissare le due protezioni chiudendo i fermagli sul bordo esterno UTILIZZO Premere i pulsanti sul pannello di controllo o sul telecomando per selezionare la funzione desiderata L indicatore corrispond...
Страница 55: ...e la durata di funzionamento desiderata tra 0 5 e 7 5 ore a incrementi di 0 5 ore OPERAZIONI DI PULIZIA 1 Prima di svolgere le operazioni di pulizia sulla ventola dopo ogni utilizzo spegnere il dispos...
Страница 56: ...uenti danni non potremmo essere ritenuti responsabili Decliniamo inoltre qualsiasi responsabilit per eventuali danni o lesioni personali causati da un uso improprio o in caso di mancata aderenza al ma...
Страница 57: ...Norme di misura per il valore di esercizio IEC 60879 1986 corr 1992 Referente per ulteriori informazioni Electroactiva Calle Huelva 6 28343 Valdemoro Madrid Espa a 0034 918 762 026 conforme ai requisi...
Страница 58: ...zgodny z wymaganiami opisanymi w instrukcji 1 Pod warunkiem zapewnienia odpowiedniego nadzoru pouczenia na temat bezpiecznej obs ugi i dopilnowania zrozumienia zagro e urz dzenie mo e by u ywane przez...
Страница 59: ...z dzenie wpadnie do wody nie wolno go dotyka Nale y wyj wtyczk z kontaktu wy czy urz dzenie i wys a je do autoryzowanego punktu serwisowego w celu dokonania naprawy 12 Nie nale y mokr r k wk ada wtycz...
Страница 60: ...y nie nale y w cza urz dzenia bez za o onych os on wentylatora grozi oby to ci kimi urazami u ytkownika 24 Przed u yciem urz dzenie musi zosta w ca o ci z o one 25 Uwaga na d ugie w osy Z uwagi na tur...
Страница 61: ...lot zdalnego sterowania 19 W cznik i przycisk pr dko ci 20 Wy cznik 21 Kontrolki minutnika 22 Kontrolki pr dko ci 23 Kontrolka zasilania 24 Kontrolka trybu 25 Przycisk trybu 26 Przycisk minutnika ZAK...
Страница 62: ...e zacisk w na obr czy zewn trznej U YTKOWANIE Aby wybra odpowiedni funkcj nale y nacisn odpowiednie przyciski na panelu sterowania lub w pilocie Zapal si odpowiednie kontrolki LED 1 Funkcja w czania w...
Страница 63: ...Naci ni cie przycisku minutnika umo liwia nastawienie danego czasu pracy od 0 5 h do 7 5 h ze skokiem co 0 5 h CZYSZCZENIE 1 Przed czyszczeniem i za ka dym razem gdy zako czone jest u ywanie wy cz urz...
Страница 64: ...ateria owe ani obra enia cia a spowodowane niew a ciw obs ug urz dzenia i nieprzestrzeganiem instrukcji obs ugi Uszkodzenie akcesori w nie oznacza bezp atnej wymiany ca ego urz dzenia W takim wypadku...
Страница 65: ...ksymalna pr dko powietrza c 3 24 metry sek Standard pomiaru dla warto ci serwisowej IEC 60879 1986 corr 1992 Dane kontaktowe na potrzeby uzyskania dalszych informacji Electroactiva Calle Huelva 6 2834...