Bionic Navigator™ 3D Programming Manual
Bionic Navigator™ 3D Programming Manual
90930923-31 REV A 50 of 309
en
Using the Keyboard Shortcuts
The follow keyboard shortcuts can be used during the programming session:
Key
Function
Q
Turn stimulation off
A
Increase stimulation amplitude
Z
Decrease stimulation amplitude
/
Selected Area is copied to the first available Temporary Area
I
Steer up (for E-Troll and Navigate modes only)
M
Steer down (for E-Troll and Navigate modes only)
J
Steer left (for E-Troll and Navigate modes only)
L
Steer right (for E-Troll and Navigate modes only)
Understanding Areas Slots
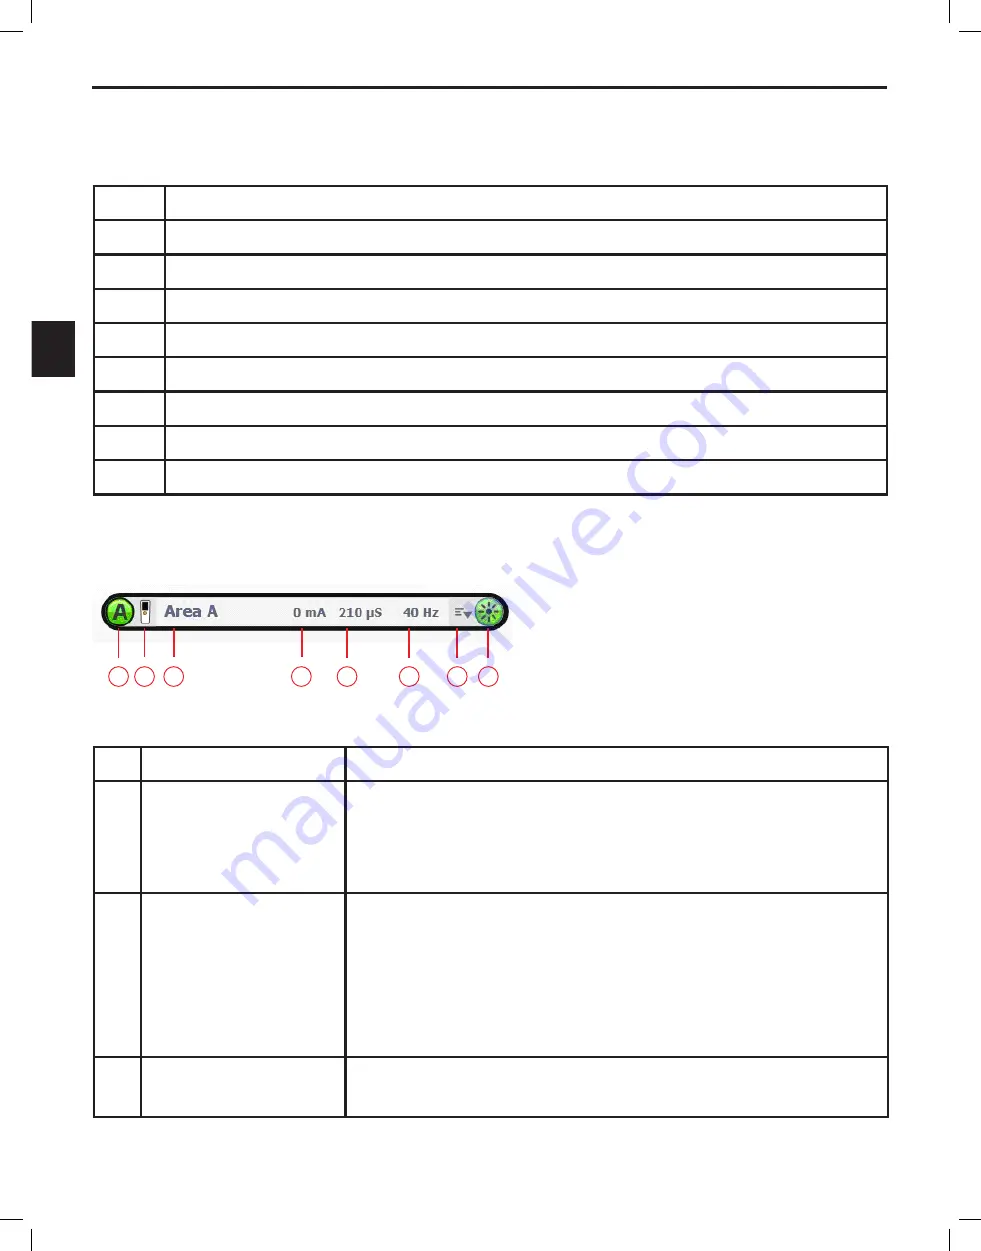
Each Area slot has the following components:
Figure 27:
1 2 3
4
5
6
7 8
Area Slot
Component
Description
1
Area Icon
The Area icon indicates whether an Area has been configured, and
whether that Area’s stimulation is ON or OFF. If an Area has been
configured, it will contain an Area icon. If the Area stimulation is ON,
it will be green. If the Area stimulation is off, it will be white.
2
Remote Icon
The Remote Control icon indicates whether the Area is active
(available on the Remote Control) or not. If the area is active, the
Remote Control icon will appear active (in color). If the area is
inactive the Remote Control icon will appear inactive (grayed out).
It is possible for the Stimulation Area to be turned off, but still be
available in the Remote.
3
Area Name
A name for each Area can be defined. Select the Area name field to
change it. After typing the name, press <enter> to save it.


