Period
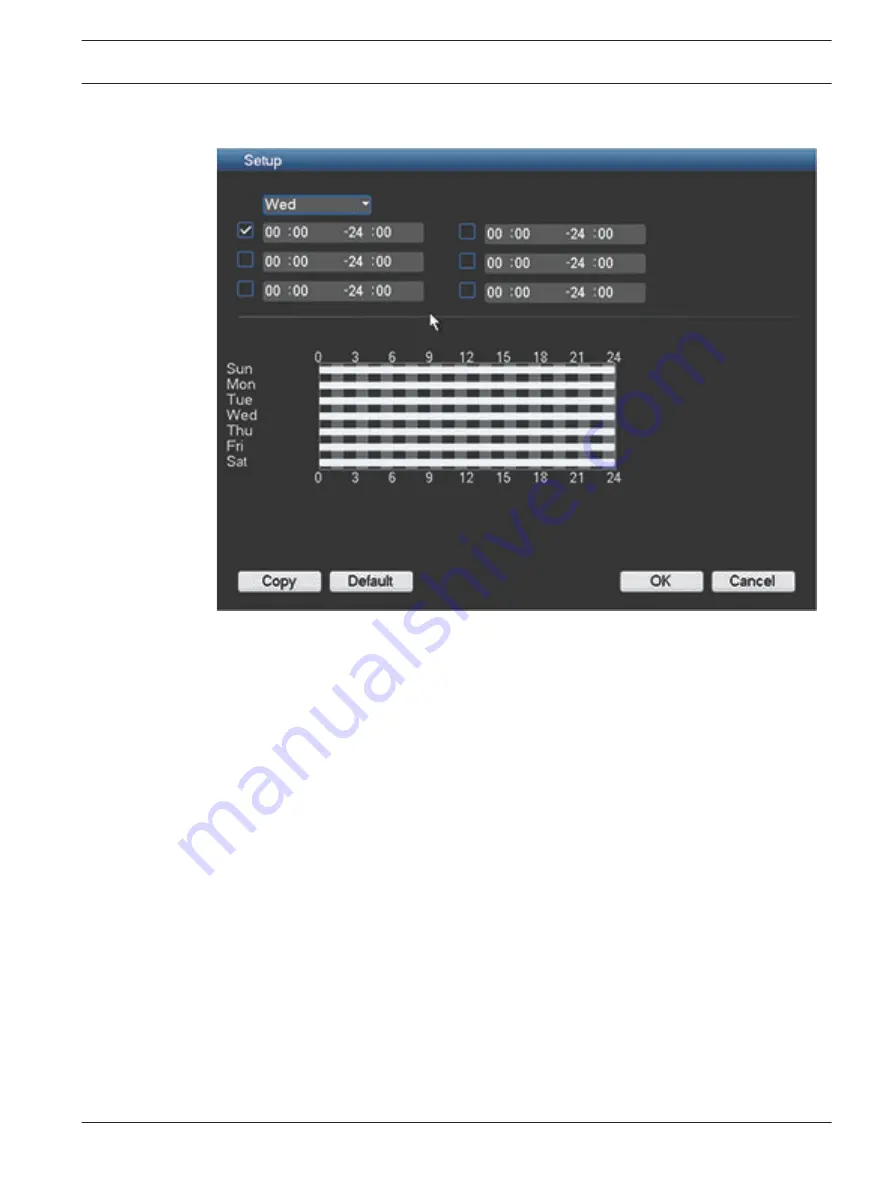
Figure 6.23: Period setup
See here the period setup screen for assigning periods for alarms and detection. Configure a
period as follows:
1.
Choose a day of the week from the drop down menu in the top field.
2.
Select the check box for one of the six time periods and use the keypad to enter a begin
time and end time for activating detect/alarm (the default is 24-hour activation).
3.
Repeat step 2 for any other required time periods; notice that the time bar for that day
(see bottom half of screen) will show a graphical representation of the active times for
each weekday.
4.
When you have correctly assigned a day, continue with the next day. If the time periods
are the same as the first day, then a quick way to do this is:
–
click <Copy> to access a Copy screen
–
here you see that the assigned day is grey
–
select each of the days that have a similar setup (checkbox is ticked) and click <OK>
–
the same time periods for the first day now apply to all selected days
5.
If you wish to assign active time(s) for a work day or a free day (holiday) that are the
same for each work day or free day, do this as follows:
–
choose either Work day or Free day from the drop down menu and press <Setup> –
the following screen appears:
6.8.2
DIVAR AN 3000 / DIVAR AN 5000
Configuration | en
65
Bosch Security Systems
Operations Manual
2015.10 | v2.3 | AM18-Q0669
Содержание DIVAR AN 5000
Страница 1: ...DIVAR AN 3000 DIVAR AN 5000 Digital Video Recorder en Operations Manual ...
Страница 2: ......
Страница 168: ......
Страница 169: ......


