P/N: 691106
USER KIT LAYOUT
Now you’re all set to enjoy your new Bodyguard
®
V6X-V9X bike.
If you have any questions, don’t hesitate to contact your nearest Bodyguard
®
dealer.
Don’t forget to fill out your Bodyguard
®
warranty card.
You can also do it online at:
www.bodyguardfitness.com
PLEASE NOTE: Be sure to read the Owner’s Manual before using your new bike.
Images are for illustrative purposes only and may change without notice.
Setup Guide
Setup Guide
V6X–V9X
bodyguard
fitness.com
9095, 25th Avenue, St-Georges
Quebec G6A 1A1 Canada
Telephone: 418-228-8934
North America: 1-800-373-2639
Fax: 418-227-8120
13mm wrench
Phillips Screwdriver
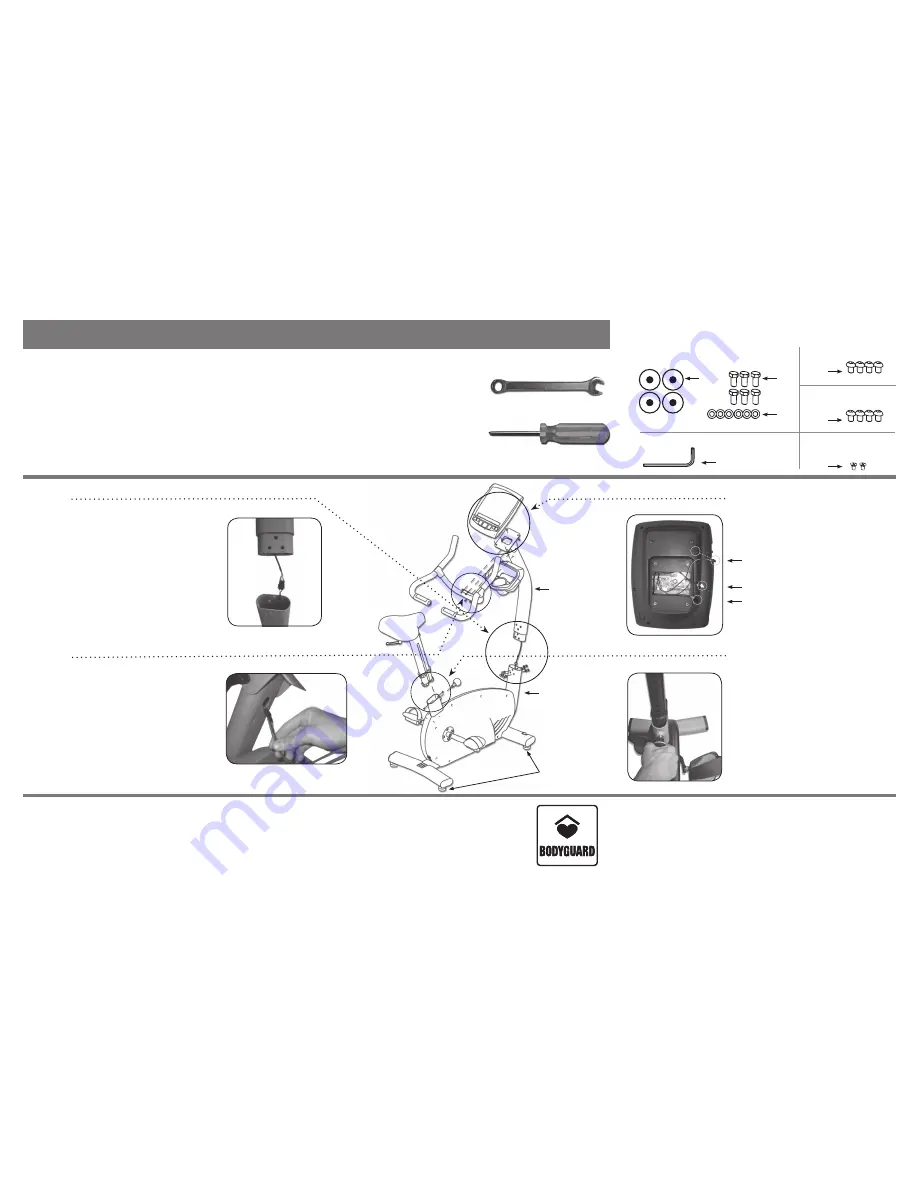
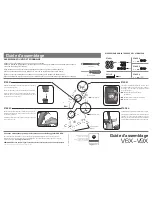
SETTING UP YOUR STATIONARY BIKE
Every bike is delivered in a protective cardboard box. Remove all the packaging and choose a location
that provides enough space around the bike for you to work comfortably.
In the box, you will find the parts you need to put the bike together.
You will also need a 13 mm flat wrench and a Phillips screwdriver, as shown.
Please note that your stationery bike has two transport wheels at the front of the machine.
Do not place or roll the machine on a rough uneven surface as this may damage the wheels.
STEP 2
Pull the two cables wound up inside the handlebar to the
upper end of the front mast to connect them to the console.
Install the handlebar on the front mast using the four
No. 7 screws and the No. 6 hex key.
STEP 4
The last step involves installing the seatpost.
Pull the adjustment handle and insert the seatpost
into the main frame. Use the two No. 9 screws and
a Phillips screwdriver to finish the installation of the
plastic ring around the seatpost.
STEP 1
Begin your setup by installing the leg levelers No. 20 under
your machine.
Connect the cables coiled up inside the front masts.
Fit the upper mast into the lower mast and secure with the
six No. 4 screws and the six No. 5 washers. You will need a
13 mm wrench.
STEP 3
You now have to install the console. You have four
cable connections to do. Then install the console on
the front frame using the four No. 8 screws and the
No. 6 hex key.
N
o.
4
N
o.
5
N
o.
6
N
o.
20
Front Upper
Mast
Contact Heart Rate
Heart Rate Radio Receiver
Communication Cable
Front Lower Mast
Leg Levelers
(Step 1)
STEP 1
TOOlS
N
o.
9
STEP 4
N
o.
7
STEP 2
N
o.
8
STEP 3


