background image

9

3.2 Camera Setup Options

To view the camera settings menu, you need to

enter the SETUP Mode, and press MENU.

Use

or

keys to select the sub-menu.

Use

keys to select the different options.

Press “OK” to save the settings.

After changing EACH setting in SETUP Mode,

you must press OK or the camera will retain

the previous setting.

Menu

Option

Description

Language

Choose desired language: English,
Spanish,French

Default:English

Camera

Mode

Choose between capturing images,
videos or both at the same time: Photo,
Video, Pic+Video.

Default: Photo

Set Clock

Two time systems:12H or 24H.
Setting the date and time of the camera.
You can change the date and time of the
device through this setting when
necessary (battery replacement, day
light savings). The date format is

month

/

day

/

year

. The time format is

hour

:

minute

:

second

.

Default:24H

Содержание BG490 Series

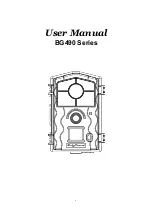
Страница 1: ...1 User Manual BG490 Series...

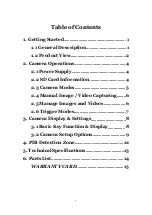
Страница 2: ...Supply 4 2 2 SD Card Information 4 2 3 Camera Modes 5 2 4 Manual Image Video Capturing 6 2 5 Manage Images and Videos 6 2 6 Trigger Modes 7 3 Camera Display Settings 8 3 1 Basic Key Function Display...

Страница 3: ...cally captures pictures or video clips This camera is powered by 4 or 8 AA batteries It can sustain in stand by mode alone for up to 6 months on 8 AA batteries is designed for outdoor use and resistan...

Страница 4: ...2 1 2 Product View Front View...

Страница 5: ...3 Inner Panel View Bottom View...

Страница 6: ...he 3 top positions along with the first bottom position the left position or the last 4 bottom positions the right 4 positions 2 2 SD Card Information To take full advantage of the latest technologies...

Страница 7: ...he different modes are according to the position of the power switch The three basic operation modes as below OFF Mode Switching the camera to the OFF position turns the camera off The camera will sti...

Страница 8: ...will automatically shut down after a few minutes of no operation 2 4 Manual Image Video Capturing Place the camera in SETUP Mode and press SHOT to manually capture photos or record video Press SHOT ag...

Страница 9: ...IR Timer trigger If you want both PIR trigger and time lapse you need to set PIR trigger to normal high or low sensitivities according to the external environments Be sure to also set the time lapse t...

Страница 10: ...ition MENU Enter the program menu in preview mode Parameter settings as described in the user s manual OK Save parameter settings and play videos I Exchange between playback and preview DEL Delete an...

Страница 11: ...evious setting Menu Option Description Language Choose desired language English Spanish French Default English Camera Mode Choose between capturing images videos or both at the same time Photo Video P...

Страница 12: ...video time by 10 seconds Default 10 seconds Time Lapse Time lapse means the camera can capture images or videos at a preset time interval regardless of whether motions are detected The default parame...

Страница 13: ...be set to off Default Normal PIR Interval This interval shows how long the PIR will be disabled after each triggering in the ON mode During this time the PIR sensor will not react to any detected mot...

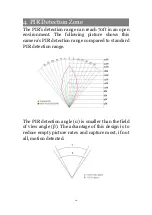
Страница 14: ...ronment The following picture shows this camera s PIR detection range compared to standard PIR detection range The PIR detection angle is smaller than the field of view angle The advantage of this des...

Страница 15: ...Screen on Remote Control 2 LCD Memory Card Up to 32 GB Image Resolution 14 20 30MP Video Resolution 1920x1080 1280x720 PIR Trigger High Normal Low Off Trigger Time 0 7 Sec PIR Interval 0Sec 60 Min Ph...

Страница 16: ...14 6 Parts List Part Name Quantity Camera 1 USB Cable 1 Belt 1 User Manual 1 Mounting Bracket 1 Version 1 0...

Страница 17: ...tion under normal use within 1 year the camera manufacturer will repair or replace the camera for free of charge Improper use of the camera resulting in damage is not covered by this warranty The came...

Отзывы: