background image

25

THE BODYCRAFT 400M WARRANTY

BODYCRAFT warrants its products to be free of defects in material and workmanship for the 

time stated below to the original purchaser.

Residential Warranty: Lifetime* Frame and Drive Motor, 5 years Parts & Electronics and 

2 years Labor.

This warranty is valid only in accordance with the following conditions:

•  The warranty begins on the original date of purchase at retail and ends when the original 

owner disposes of it, either through sale, gift, or otherwise.

•  This warranty is available only for purchases made within the USA and Canada, and cur

-

rently residing in the USA or Canada.**

•  In order for the warranty to be valid for the terms listed below, the product must be regis

-

tered with BODYCRAFT within 30 days of purchase.

•  The warranty is not transferable and does not cover normal maintenance.

•  This warranty applies to Residential use only and is void when used in a Commercial 

environment.

•  This warranty does not cover damage or equipment failure caused by electrical wiring not 

in compliance with electrical codes or owner’s manual specifications, or failure to provide 

reasonable and necessary maintenance as outlined in the owner’s manual.

•  This warranty does not cover damage resulting from shipping, accident, misuse, water, 

tampering, unreasonable use, unauthorized or improper repairs and alterations.  

•  This warranty does not cover normal wear and tear.  

•  BODYCRAFT cannot guarantee that the heart rate system on its products will work for all 

users. Heart rate measurement accuracy varies based on a number of factors, including 

the user’s physical condition, the heart rate measurement method is used, external inter

-

ference, and other factors that may influence heart rate acquisition.

•  If the item exhibits such a defect, BODYCRAFT will, at its option, repair or replace it with

-

out cost for parts. Shipping and handling charges may apply. (BODYCRAFT may request 

a return of the part(s) or photographic evidence of the damaged part(s) prior to replace

-

ment at the owner’s expense).

•  Proof of purchase must be supplied to validate warranty and the product must have been 

registered  with  BODYCRAFT  via  the  included  warranty  card  or  online  at  www.BODY

-

CRAFT.com.

•  This warranty is in lieu of all warranties, expressed or implied, and/or all other obligations 

or liabilities on our part and we neither assume nor authorize any person to assume for 

us any other obligation or liability in connection with the sale of the BODYCRAFT 400M. 

Under no circumstances shall we be liable by virtue of this warranty or otherwise for dam

-

age to any person or property whatsoever for any special, indirect, incidental, secondary 

or consequential damage of any nature whatsoever arising out of the use or inability to 

use the BODYCRAFT 400M.

* Lifetime is defined as the period the original owner owns it, or 5 years after the product has 

been discontinued. 

** If you do not reside within the USA or Canada, please contact your local BODYCRAFT dis-

tributor for details specific to you.

Содержание Blu series 800m

Страница 1: ......

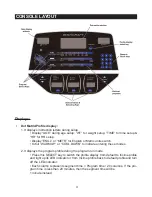
Страница 2: ...that will keep you motivated challenged and within reach of your fitness goals The BODYCRAFT 400m will provide an efficient low impact cardiovascular workout that will help improve energy levels and...

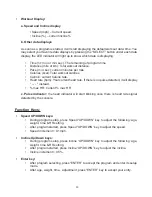
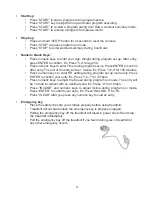
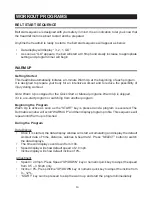
Страница 3: ...ws 6 Step 5 Handrail Cover Assembly 6 Step 6 Motor Cover Assembly 6 Step 7 Finish Up 6 HEART RATE MONITORING DEVICES 7 CONSOLE 8 CONSOLE LAYOUT 11 Displays 11 Function Keys 12 WORKOUT PROGRAMS 14 BELT...

Страница 4: ...e treadmill Always follow the console instructions for proper operation WARNING TO REDUCE THE RISK OF BURNS FIRE ELECTRIC SHOCK OR INJURY TO PERSONS Unplug from outlet before servicing or moving the u...

Страница 5: ...to reduce the risk of electric shock The treadmill is equipped with a cord having a grounding conductor and grounding plug The plug must be plugged into an appropriate outlet that is properly install...

Страница 6: ...these screws 3 Repeat procedure 2 for the Right upright post 4 Do not tighten bolts until end of assembly Step 2 Console Assembly 1 Hold the console next to the Left upright post and connect the main...

Страница 7: ...the handrail cover inserts into the inner handrail covers Step 6 Motor Cover Assembly 1 Place the Left motor cover onto the left side of frame 2 Insert and tighten the self tap M5 x 10mm screw into t...

Страница 8: ...est strap onto the transmitter 2 Adjust the band length so that the fit is snug but not too tight 3 Buckle the other end of the chest strap onto the transmitter 4 Center the transmitter on your chest...

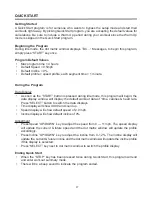
Страница 9: ...2 0mph Incline default for Warm up and Cool down is 0 Target HR default is 70 of max HR Operating Tips Power ON OFF Power ON OFF switch is located in the front of the motor cover Turn Power ON before...

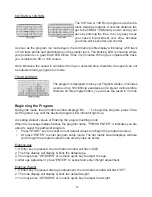
Страница 10: ...display You may continue pressing the program selecting key until your desire program LED is lit Press ENTER to accept this new program or START key to start this new program right away If ENTER key i...

Страница 11: ...Max heart rate within 60 85 for the most effec tive workout It is also unsafe to exceed 90 and above This treadmill is equipped with Heart Rate protection shut off function The pulse display will blin...

Страница 12: ...P or COOL DOWN to indicate entering these modes 2 It displays the program profile during the program run mode Press this SELECT key to switch the profile display from default to Incline profile and li...

Страница 13: ...heart rate If there is no pulse detected it will display instead max HR Current max HR c Pulse indicator the heart indicator will start blinking once there is heart rate signal detected by the consol...

Страница 14: ...te Ex Press 1 0 0 for 100 minutes Press numeric keys to enter HR setting during program set up mode only Press ENTER to confirm your entry Ex Press 1 3 7 for 137bpm Press numeric keys to adjust the Sp...

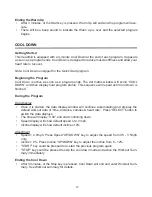
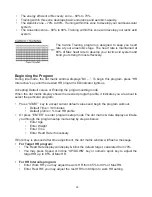
Страница 15: ...is skipped if it is a re start program or switching from another program Beginning the Program Warm Up is active as soon as the START key is pressed and a program is executed The Dot matrix window wil...

Страница 16: ...until Cool Down is finished During the Program Data Display Once it is started the data display window will continue accumulating and dis play the default workout data of time distance calories heart...

Страница 17: ...splay shows total Program time Distance display shows the total distance Calories display shows total calories accumulated for the workout The Incline Display shows the average incline The Speed Displ...

Страница 18: ...n the data display window will display the default workout data of time calories heart rate Press SELECT button to switch the data displays Time display will show 00 00 and count up Speed display will...

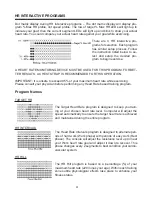
Страница 19: ...the workload from high speed to low speed incline your heart gets an effective workout HILL WALK The Hill Walk program simulates a hill climb exercise with a preset hill profile and slow speed to wal...

Страница 20: ...will see the result in no time Beginning the Program During idle mode the dot matrix window displays BC To begin this program press Clas sic Programs key until the desired program LED indicator light...

Страница 21: ...ill display time calories heart rate as defaults Press Select button to switch the data displays Time display will show the selected program time and count down Speed display will show default speed I...

Страница 22: ...exceed 95 of your maximum heart rate while exercising Please consult your physician before performing any Heart Rate based training program Program Names TARGET HR The Target Heart Rate program is de...

Страница 23: ...the program setting mode When the dot matrix display shows the desired program profile it indicates you are about to select the particular program Press START key to accept current default values and...

Страница 24: ...eric quick key can not be used to adjust the target HR setting during program run mode Press Incline UP DOWN key to adjust the incline from 0 12 The incline display will update the current future incl...

Страница 25: ...press the Custom Programs key and hold the key when the right Custom Program number LED indicator lights up for 2 seconds There will be 2 beeps to indicate that your program has been saved Following i...

Страница 26: ...RAFT cannot guarantee that the heart rate system on its products will work for all users Heart rate measurement accuracy varies based on a number of factors including the user s physical condition the...

Страница 27: ...ce Lubrication to the deck is very important to your treadmill It will reduce the wear of the deck and maintain the smooth running surface Although this treadmill has been pre lubed at the factory per...

Страница 28: ...ng stops This will insure that you do not over tight en the rollers Over tighten the rollers may cause serious damage to the treadmill Belt Alignment If the belt tracks too close to one side loosen th...

Страница 29: ...400 800m 2GD6 SAFE KEY ASS Y 200 400 800m 3JQJ RUNNING BELT 200 400m 2FPC RUNNING DECK 200 400m 3KH8 STEP RAIL ASS Y LEFT 200 400m 3KH9 STEP RIAL ASS Y RIGHT 200 400m 3KHC HAND RAIL L R 200 400 800m 2...

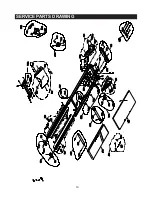
Страница 30: ...29 SERVICE PARTS DRAWING...

Страница 31: ...30 SERVICE PARTS DRAWING...

Отзывы: