INSTRUCTION MANUAL
PLEASE READ THIS MANUAL CAREFULLY BEFORE USING AND SAVE IT FOR FUTURE REFERENCE.
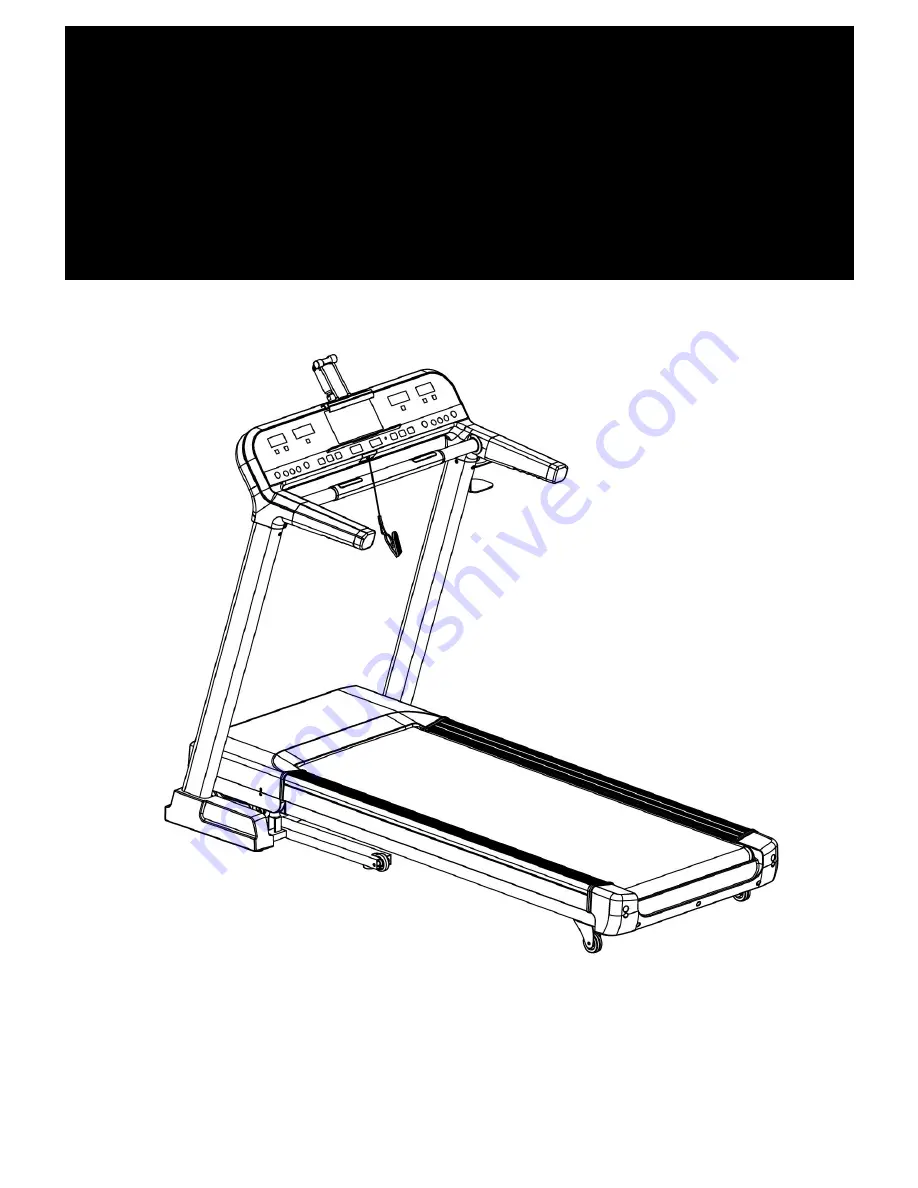
ALL PRODUCT DRAWING IS USED FOR REFERENCE ONLY, THE FINALLY CORRECT DETAILS PLEASE SEE REAL PRODUCTS.
Страница 1: ...INSTRUCTION MANUAL PLEASE READ THIS MANUAL CAREFULLY BEFORE USING AND SAVE IT FOR FUTURE REFERENCE ALL PRODUCT DRAWING IS USED FOR REFERENCE ONLY THE FINALLY CORRECT DETAILS PLEASE SEE REAL PRODUCTS ...
Страница 2: ...2 Content Safety Precautions Assembly Steps Folding Steps Operation Instruction Tips for Stretching Maintenance Explosive drawing Part list ...
Страница 3: ...ked on or pinched 4 Only the supplied power cable should be used with the treadmill General Safety Precautions 1 Use the treadmill only in the way described in this instruction book 2 Ensure that the voltage of the electrical supply is the same as that indicated on the power cable 3 It is the responsibility of the owner to ensure that all users of the treadmill are adequately informed of all warni...
Страница 4: ...h hands on the handlebars and put your feet onto the non slip surface of the main frame As you do this the safe key will disengage from the computer and the emergency dismount function will be triggered 20 All moveable accessories require weekly maintenance Check them before use every time If anything is broken or loose please fix it immediately You may continue using the treadmill after any damag...
Страница 5: ...ad holder optional 1 C14 Left bottom cover 1 B01 Bottle holder 1 C15 Right bottom cover 1 B08 Cross solid wrench 1 E13 Bolt M8 15 10 B09 5 Allen wrench 5mm 1 E22 Bolt M5 12 6 B15 Solid wrench 19mm 1 E32 Lock washer 8 10 C05 Left foam handlebar 1 E39 Big flat washer Φ5 φ13 1 0 4 Assembly tools 5 Inner hex wrench 5mm 1pc Cross solid wrench S 13 14 15 1pc Solid wrench 19mm 1pc Attention please don t ...
Страница 6: ... belt P before set up of the treadmill 1 Lift up column A06 A07 first 2 Fix the column A06 to the mainframe A with bolt E13 and lock washer E32 by 5 Allen wrench B09 3 Fix the column A07 to the mainframe according to the steps above Attention ATTENTION Support the column with hand to avoid falling down ...
Страница 7: ...9 Attention Please make sure cables are well connected before fasten Please screw the ipad holder C into the monitor B by solid wrench B15 Attention First screw the shaft B12 of the ipad holder into the monitor B by hand and then fasten the stop nut B13 by solid wrench B15 The ipad holder is an optional part you don t need to assemble it if not find it in the package ...
Страница 8: ...to the monitor B with bolt E22 and big washer E39 by cross solid wrench B08 Fix the left and right bottom cover C14 C15 to the mainframe Attention the structure of left and right bottom cover is buckle design Please make sure all the buckles are securely fastened ...
Страница 9: ...right column A07 with bolt E22 by solid cross solid wrench B08 1 Cut off belt P 2 Insert the safety key D07 into the monitor B 1 Before running please nip the safety key clip D07 with your cloth 2 For any emergency please pull the safety key rope and the machine will stop ...
Страница 10: ... steel cable E with 5 Allen wrench B09 Take apart the bolt M8 15 E13 in the top side of the steel cable E with 5 Allen wrench B09 Then take away the steel cable from the bottom frame Notice The steel cable will ensure your safety during assembly you can keep it for next use ...
Страница 11: ...unning or incline mode Folding down Hold the running deck which showed in F position and then fold it up with the arrow direction until you hear a bang voice from the air cylinder Support place F with hand kick the place E of air pressure bar then the base frame will fall down automatically ...
Страница 12: ...on D to hold the bottom end of the treadmill steady With your foot at D slowly tilt the top of the treadmill downward towards the ground Once the Main Frame F reaches a low enough point the wheels of the treadmill will become active To transport hold the treadmill from position F and tilt until the wheels are able to move on the ground ...
Страница 13: ...t from the setting data to 0 when down to 0 the machine will stop smoothly and enter into the standby mode When set inclination it shows your current inclination from 0 15 if there is not any operation it will enter into calorie window after 30s running time isplay the running distance usually it shows your current speed from 0 8 20 0km h if you hold the pulse sensor for several seconds it shows y...
Страница 14: ...at any time to start the machine 13 Safety key 14 Stop key 15 Mp3 interface You can connect external MP3 and mobile phone with MP3 wire to play music 16 Press it for several seconds to turn down the volume in both music and video mode Press it shortly and it will enter into the previous music or video 17 Press it for several seconds to turn up the volume in both music and video mode Press it short...
Страница 15: ...tional and 1 FAT test program under program function Icon description Inclination Hold the pulse sensor for several seconds it shows your current pulse from 50 200 min the date just for reference cannot be used as the medical purpose Time Distance Calorie Speed System will calculate the distance only if the user doing exercise on the machine or it won t Blue tooth Count countdown timer Distance di...
Страница 16: ...andby mode Display range 0 999 when overflow 999 it will count from 0 again In countdown mode it will decrease from default calorie 50 0 to 0 System itself will give you a score and then enter into standby mode 1 Manual mode Press the START key and then the machine will work at a speed of 0 8km h and all other windows will count from 0 Press the SPEED key to change the speed and the INCLINE key to...
Страница 17: ...test mode There are 6 distance modes They are 3 0km 5 0km contest distance and then Press the INCLINE or SPEED key to change the Display the distance percentage of the computer The default speed of the computer is 9km h you can adjust the computer speed by changing contest time Display the distance percentage of the user 17 5 0km 10 0km 5 0km SPEED key to change the contest time At Display the dis...
Страница 18: ...tomatically 4 Preset program Press PROG to enter into program mode Press PROG key to select Program1 24 U1 U2 U3 HP1 HP2 FAT in sequence There are 30 different kinds of preset program FAT is fat test program Icon description Program movement time default time is 10 minutes Press the INCLINE or SPEED key to change the time from 5 to 99 Program column each program is divided into 10 stages ...
Страница 19: ... give you a score ix Program introduction Each program is divided into 10 stages and each stage has its own speed and incline Time stage program Set time 10 time of each stage 1 2 3 4 5 6 7 8 9 10 P1 SPEED 2 4 3 4 3 5 4 2 5 3 INCLINE 1 2 3 3 1 2 2 3 2 2 P2 SPEED 2 5 4 6 4 6 4 2 4 2 INCLINE 1 2 3 3 2 2 3 4 2 2 P3 SPEED 2 5 4 5 4 5 4 2 3 2 INCLINE 1 2 2 3 1 2 2 2 2 1 P4 SPEED 3 6 7 5 8 5 9 6 4 3 INC...
Страница 20: ... 4 3 P16 SPEED 2 5 7 5 8 6 5 2 4 2 INCLINE 1 5 6 8 12 9 10 9 5 3 P17 SPEED 2 5 6 7 8 9 10 5 3 4 INCLINE 3 5 6 8 6 5 8 7 5 3 P18 SPEED 2 3 5 6 8 6 9 6 5 2 INCLINE 5 7 5 8 6 5 9 10 6 2 P19 SPEED 3 7 6 5 9 7 6 3 5 2 INCLINE 3 5 6 8 5 6 5 12 8 3 P20 SPEED 3 7 9 10 11 12 10 8 5 2 INCLINE 2 5 6 7 6 5 8 6 3 2 P21 SPEED 3 6 8 7 9 10 5 8 3 2 INCLINE 3 6 8 9 9 6 8 10 6 3 P22 SPEED 3 5 8 6 9 10 8 12 6 3 INCL...
Страница 21: ...s MODE key to set data for the next stage Repeat the above steps to set the data for the rest 8 stages When finish setting all data will be kept for you only if you reset again Ÿ After set data please press START key to begin exercise 6 Display range of each data Item Initial Original data Range Display range Time min sec 0 00 30 00 5 00 99 00 0 00 99 59 Incline step 0 0 0 15 0 15 Speed km h 0 0 0...
Страница 22: ... age is 30 years old target heart rate is 114 INCLINE or SPEED key The setting range is from 15 to 80 years old After owner finish choice of age press MODE button system will recommend a suitable target hear rate and show in screen f INCLINE or SPEED key to choose expected target heart rate according to owner s physical condition and available option range is from 84 to133 After owner finish optio...
Страница 23: ...r losing weight and burning more calories Ÿ The Aerobic Zone 70 80 of maximum heart rate It is good for your heart and lung Ÿ The Anaerobic Threshold Zone 80 90 of maximum heart rate It is a very high intensive training and suitable for advanced trainer Ÿ The Redline Zone 90 100 of maximum heart rate It is a limited training zone for users Please do not use it too long Because it may do harm for y...
Страница 24: ...0 162 102 102 73 140 90 51 161 101 101 74 139 90 52 160 101 101 75 138 90 53 159 100 100 76 137 90 54 158 100 100 77 136 90 55 157 99 99 78 135 90 56 156 98 98 79 134 90 57 155 98 98 80 133 90 ress PROG continuously to enter into FAT mode Please set your sex age height and weight first A t last the result will be showed on the right column of BMI The best body fat index is between 20 and 25 If the...
Страница 25: ...Local video Press the key to change the mode of music and video 01 male 02 female 10 99 100 200 20 150 19 Thin 20 25 Normal 26 29 A little weight 30 Too fat to change the mode of music and video The green words stand for the name of playing music and the size of the file he white words stand for the rest of the music and the size of the file Stands for the progress of the playing music he total ti...
Страница 26: ...me of playing video and the size of the file The white words stand for the rest of the video and the size of the file The data Stands for the progress of the playing video The data stands for the total time of the video The icon stands for the progress of the playing video ull off the safety key in any case and the machine will stop working immediately Meanwhile al l window data shows efore you pu...
Страница 27: ...ignal A If the motor start working for about 5 8 seconds and then the monitor displays E03 E03 stands for there is no speed signal Please check whether the speed sensor is connected well or not In addition please check whether the sensor is broken or not B The sensor wire on the PCB board is broken please replace the PCB board 5 The display shows E04 after switch on A Please check whether the sign...
Страница 28: ...eck the IGBT is ok or not by multi meter Please replace the PCB board 7 The display shows E08 Storage wrong A Storage IC is not in place reconnect it to to IC seat and pay attention to the position of PIN1 B Storage IC or the related wire is damaged change a new storage IC or driver Simple Malfunction and Solution Show in TFT screen ...
Страница 29: ...29 ...
Страница 30: ...the machine will pause and keep your running data Then press START the machine will move with the lowest speed and the system will continue to calculate your running data Press STOP button twice the system will standby mode and list your running date automatically at the same time This machine has lubrication remind function After every total running distance of 300km system will remind you to oil...
Страница 31: ...shortly and then the treadmill will enter into standby mod fter finish oil please press the START key lasts for 3 seconds and the tip will be swept off automatically will display will give you a treadmill work report ress the START key shortly and then the treadmill will enter into standby mode 31 fter finish oil please press the START key lasts for 3 seconds and the tip will be swept off automati...
Страница 32: ...the joints i e simply rotate the wrists bend the arm and roll your shoulders allow the body s natural lubrication synovial fluid to protect the surface of the bones at these joints Always warm up the body before stretching as this increases blood flow around the body which in turn makes the muscles Each stretch should be held for at least 10 seconds working up to 20 to 30 seconds and usually repea...
Страница 33: ...f center The Running belt may become off center after using for a period of time First allow the machine to run by it self and the belt may centralize automatically If it does not centralize automatically you can adjust the position of the belt by screwing the bolt shown in the images below If the running belt has shifted to the right you need to tighten the screw on the right of the belt or loose...
Страница 34: ...34 Explosive drawing ...
Страница 35: ...35 ...
Страница 36: ...5 30 2 B08 Cross solid wrench 1 C26 Blue cushion φ20 φ6 5 30 2 B09 Inner hex wrench 1 C27 Black cushion 2 B10 Handle pulse sheet 4 C28 cone shaped cushion 2 B11 safety key seat 1 C29 Flat foot pad 6 B12 IPAD shaft M10 149 1 C30 Transportation wheel 2 B13 Stop nut φ23 30 1 C31 Adjustable wheel 2 B14 IPAD connect pole φ6 120 2 C32 Plastic washer 4 B15 Solid wrench 19mm 1 C33 O ring 2 C01 Monitor top...
Страница 37: ...ver load protector 1 E27 Screw ST4 2 12 14 D19 Magnet ring 1 E28 Bolt M3 10 4 D20 Magnet core 1 E29 Screw ST2 9 8 4 D21 Power cable 1 E30 Screw ST2 9 6 0 29 E01 Non locked nut M6 5 E31 Lock washer 6 3 E02 Lock nut M8 6 E32 Lock washer 8 16 E03 Lock nut M10 6 E33 Lock washer 10 2 E04 Bolt M10 90 1 E34 Spring washer 8 6 E05 Bolt M10 45 1 E35 Flat washer 8 7 E06 Bolt M10 30 4 E36 Big washer φ10 φ26 2...
Страница 38: ...luetooth mould Optional 1 G02 Screw ST2 9 8 2 H02 Bluetooth connection wire Optional 1 G03 Speaker 2 H03 Screw ST2 9 6 0 Optional 4 G04 Screw 8 J01 Polar emitter Optional 1 G05 MP3 connection wire 1 J02 Heart rate receiver Optional 1 G06 USB connection wire 1 J03 HRC connect wire Optional 1 ...