


EN.
PLEASE READ THIS MANUAL. THE INFORMATION PROVIDED IS FUNDAMENTAL TO YOUR SAFETY AND THE SAFETY OF YOUR CHILD.
IT IS RECOMMENDED A PROFESSIONAL BICYCLE SHOP TO ASSEMBLE AND INSTALL YOUR CARRIER TO THE BICYCLE.
ES.
LEA ATENTAMENTE ESTE MANUAL. ESTA INFORMACIÓN ES FUNDAMENTAL PARA SU SEGURIDAD Y LA SEGURIDAD DEL NIÑO.
LE RECOMENDAMOS QUE ENCARGUE EL MONTAJE Y LA INSTALACIÓN DE LA SILLA A UN ESTABLECIMIENTO ESPECIALIZADO EN
BICICLETAS.
FR.
VEUILLEZ LIRE CE MODE D’EMPLOI. CES INFORMATIONS SONT IMPORTANTES POUR VOTRE SÉCURITÉ ET CELLE DE VOTRE ENFANT
IL EST CONSEILLÉ DE DEMANDER À UN MAGASIN SPÉCIALISÉ EN VÉLOS DE FAIRE LE MONTAGE ET D’INSTALLER LE SIÈGE SUR VOTRE
VÉLO.
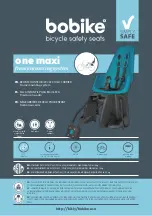
one maxi
frame mounting system
EN. REAR-MOUNTED BICYCLE CHILD CARRIER
Frame mounting system
ES. SILLA INFANTIL PARA BICICLETA
Fijación al cuadro
FR. SIÈGE ARRIÈRE DE VÉLO POUR ENFANT
Fixation au cadre
maximum child
weight 40 lbs
(18 kg)
1 to 5 years
3-point
seatbelt
26”- 28”
e-bike fitting
required tools
included
EN.
COMPLIES WITH ASTM F1625 | CPSIA 2008 | MAXIMUM CHILD WEIGHT 40lbs-18kg
ES.
EN CUMPLIMIENTO DE ASTM F1625 | CPSIA 2008 | PESO MÁXIMO DEL NIÑO 40lbs-18kg
FR.
CONFORME AUX NORMES ASTM F1625 | CPSIA 2008 | POIDS MAXIMAL DE L’ENFANT 40 lb -18 kg
http://bit.ly/bobike-usa
3,15”
80 mm
for round and oval tubes
1,1 to 1,57” | Ø 28 to 40 mm


