Capture and Playback
107
Final Cut Pro X
Apple Final Cut Pro X
If you want to use Final Cut Pro X to play back video on an external video monitor or TV, you can use the
broadcast monitoring feature of Final Cut Pro X 10.0.4 and newer to output your video through Teranex
Processor hardware. You can also use as many as two computer monitors for the Final Cut Pro X interface.
Setting up Final Cut Pro X
Step 1.
Ensure you are running Final Cut Pro X 10.0.4 or newer with the latest version of Mac OS X Lion or
Mountain Lion.
Step 2.
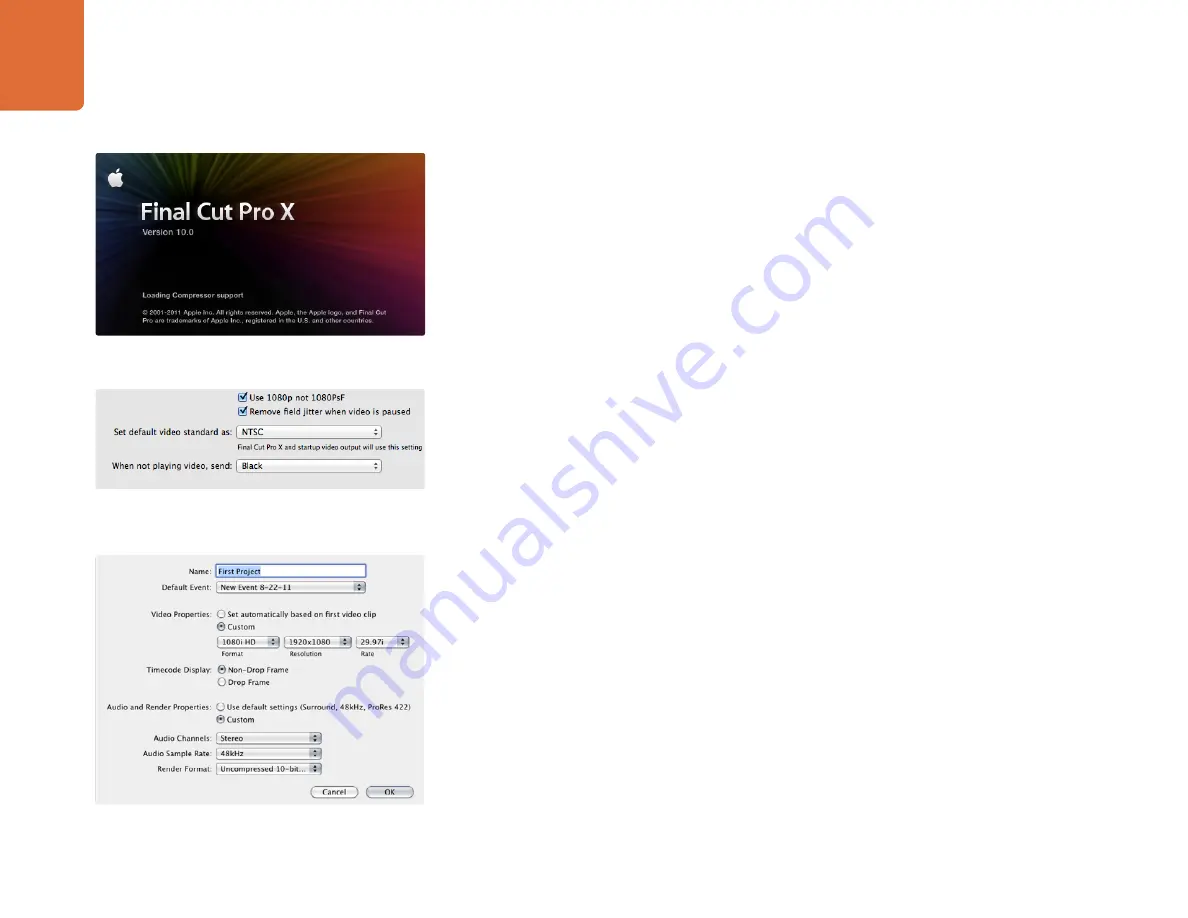
Open the System Preferences and click on Blackmagic Design. Go to the setting, "Set default
video standard as" and then set the same standard that you will use in your Final Cut Pro X
project, e.g. HD 1080i59.94. The standard should be the same as the video format of your clips.
Step 3.
Launch Final Cut Pro X and create a new project.
Step 4.
Type a name and choose a location for the new project.
Step 5.
Set the Video Properties to Custom and then set the format, resolution and frame rate to match
the default video standard set in the Blackmagic Design Desktop Video system preferences.
Step 6.
Set the Audio and Render Properties to Custom. Set the audio channels to Stereo or else you can
choose Surround for 6 audio channels. Set the audio sample rate to the television rate of 48kHz.
Set the render format to the same format as your video clips. Final Cut Pro X defaults to using
ProRes compression but you can switch this to Uncompressed 10-bit 4:2:2 for an uncompressed
workflow. Click OK to complete the creation of your new project.
Step 7.
Go to the Final Cut Pro menu, choose Preferences and then click the Playback tab. Ensure the A/V
Output menu has selected "Blackmagic" and the same video standard as your project and then
close the Preferences.
Step 8.
Go to the Window menu and select A/V Output to enable video output via your Teranex Processor
hardware.
If you also wish to monitor audio via your Teranex Processor, open the System Preferences, click the Sound
icon, click the Output tab and then select "Blackmagic Audio" for the sound output.
Step 6. Set the Audio and Render Properties to Custom.
Step2. Set the default video standard in the System Preferences
to match your Final Cut Pro X project.


