background image

5

ENGLISH

3.  Drill appropriate sized holes.

4.  Insert ¼” (6mm) Hex head bolts through washers and 

the holes. You may want to use washers on the 

underside of the bench as well.

5.  Tighten the nuts. Do not overtighten. Allow the rubber 

feet to absorb the vibration when the grinder is running.

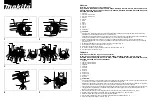
Installing Eye Shields (Fig.1)

Turn off tool and disconnect from power supply. Adjust the 

eye shields so they are between the wheels and your eyes.

Note:

 Eye shields are not designed to replace safety 

glasses.

Installing Tool Rests

Turn off power and disconnect from power supply. Use the 

bolts, washers, spacers and lock nuts from the plastic bag to 

secure the brackets and tool rests in place.

Caution:

 Use the washers and screws supplied. 

Longer screws may interfere with the movement 

of the grinding wheel.

Operation

Never use a bench grinder if it is not firmly fastened to a 

work bench or rigid frame. Before turning the grinder on, put 

on safety glasses. Turn on the grinder and allow it to reach 

full speed ( 2950 rpm ) . Hold the workpiece firmly and 

against the tool rest. Hold very small pieces with pliers or 

other suitable clamps. Feed the work smoothly and evenly 

into the grinding wheel. Move the work slowly and avoid 

jamming the work against the wheel. As the wheel tends to 

slow down you should occasionally release the pressure to 

let the wheel return to full speed.

Grind only on the face of the grinding wheel and never on 

the side. (Some wheels are designed for side grinding and 

will say so on their instruction sheets).

Caution

: Prolonged grinding will cause most 

materials to become hot. Handle them with 

pliers.

Switch

The switch is located on the front of the grinder, on the base. 

To turn the tool on depress the side of the rocker switch on 

the right side, marked “1”. To turn off the grinder, depress the 

left side of the rocker switch, marked “ O ”.

Changing Accessories (Fig. 2)

Turn off the tool and disconnect from power supply. Use only 

wheels that measure in diameter. This tool has arbors on 

both sides. Follow the steps below to remove and replace an 

accessory.

1.  Loosen and pull the tool rest out as far as possible. Do 

not remove it.

2.  Remove the three screws from the side of the wheel 

cover and remove the cover.

3.  Insert a flat bladed screwdriver into the slot in the left end 

of the grinder’s rotor shaft. Hold the screwdriver firmly to 

keep the shaft from turning as you loosen and remove the 

hex nut in the center of the grinding wheel or other 

accessory.

4.  Remove the wheel washer and the wheel.

5.  Inspect the wheel for cracks, chips or any other visible 

damage (other than normal wear) and discard if such 

damage is found. Inspect the blotters for damage. If the 

blotters are missing or severely damaged, replace them 

with pieces of thin cardboard or blotter paper cut in the 

same shape. NEVER USE A GRINDING WHEEL 

WITHOUT A BLOTTER ON EACH SIDE OF THE 

WHEEL.

6.  Install the new wheel or other accessory. Be sure that 

both wheel washers are in place (concave sides toward 

wheel). Use only flanges furnished with the grinder.

7.  Hold as before and tighten the nut firmly but do not 

overtighten. OVERTIGHTENING CAN CRACK A 

GRINDING WHEEL.

8.  Replace the wheel cover and its screws.

9.  Adjust the tool rest to at least 1/16" (1,5mm) from the 

accessory and tighten securely.

Caution

: To reduce the risk of fire, use 10 watt 

max. appliance bulb.

Maintenance

Your tool has been designed to operate over a long period of 

time with a minimum of maintenance. Continuous satisfactory 

operation depends upon proper tool care and regular 

cleaning.

Содержание BPGB3150

Страница 1: ...BPGB3150 www blackanddecker ae ...

Страница 2: ...ENGLISH 2 FIG 1 FIG 2 ...

Страница 3: ...rt watch what you are doing and use common sense when operating a power tool Do not use a power tool while you are tired or under the influence of drugs alcohol or medication A moment of inattention while operating power tools may result in serious personal injury b Use safety equipment Always wear eye protection Safety equipment such as dust mask non skid safety shoes hard hat or hearing protectio...

Страница 4: ...mp nut This may crack the grinding wheel Clean the cavity around the grinding wheel periodically Warning Some dust created by power sanding sawing grinding drilling and other construction activities contains chemicals known to cause cancer birth defects or other reproductive harm Some examples of these chemicals are lead from lead based paints crystalline silica from bricks and cement and other ma...

Страница 5: ...inder on the base To turn the tool on depress the side of the rocker switch on the right side marked 1 To turn off the grinder depress the left side of the rocker switch marked O Changing Accessories Fig 2 Turn off the tool and disconnect from power supply Use only wheels that measure in diameter This tool has arbors on both sides Follow the steps below to remove and replace an accessory 1 Loosen ...

Страница 6: ...ed Black Decker and Piranha accessories are engineered to high quality standards and designed to enhance the performance of your tool By using these accessories you will get the very best from your tool Grinding wheels must fit within the confines of the guard and must be rated higher than the recommended speed as marked on the nameplate 2950rpm Caution Strands of wire brushes may break and fly off w...

Страница 7: ...l household waste Should you find one day that your Black Decker product needs replacement or if it is of no further use to you do not dispose of it with household waste Make this product available for separate collection Separate collection of used products and packaging allows materials to be recycled and used again Reuse of recycled materials helps prevent environmental pollution and reduces the...

Страница 8: ...8 FRANÇAIS FIG 1 FIG 2 ...

Страница 9: ...ualifié mais non agréé par Black Decker la garantie ne sera pas valable 3 Sécurité personnelle a Restez vigilant surveillez ce que vous faites Faites preuve de bon sens quand vous utilisez un outil électroportatif N utilisez pas l outil lorsque vous êtes fatigué ou après avoir consommé de l alcool ainsi que des médicaments Un moment d inattention lors de l utilisation de l outil peut entraîner de g...

Страница 10: ... à côté de l opérateur Ne meulez pas avec les côtés de la meule à moins qu ils ne soient conçus pour le faire Ne serrez pas les écrous de serrage de la meule trop fort car cela pourrait la fêler Nettoyez fréquemment la cavité autour de la meule Attention La poussière dégagée lors du ponçage sciage meulage perçage de certains matériaux et lors d autres opérations de construction contient des produi...

Страница 11: ...nterrupteur L interrupteur est situé à l avant de la meuleuse sur le socle Pour mettre l outil en marche appuyez sur le côté droit de l interrupteur à bascule marqué 1 Pour éteindre la meuleuse appuyez sur le côté gauche de l interrupteur à bascule marqué O Changement des accessoires Fig 2 Eteignez l outil et débranchez le du secteur Utilisez uniquement des meules mesurées en diamètre Cet outil po...

Страница 12: ...a sont conçus selon des normes de qualité supérieure pour améliorer les performances de votre outil En utilisant ces accessoires vous obtiendrez le meilleur de votre outil Les meules doivent tenir dans les limites de l écran protecteur et doivent être prévues pour une vitesse supérieure à celle recommandée indiquée sur la plaque signalétique 2950 tr mn Avertissement Les brins des brosses métalliqu...

Страница 13: ...it être remplacé ou si vous n en avez plus l usage ne le jetez pas avec les ordures ménagères Songez à la protection de l environnement et recyclez les La collecte séparée des produits et des emballages usagés permet de recycler et de réutiliser des matériaux La réutilisation de matériaux recyclés évite la pollution de l environnement et réduit la demande de matières premières Des réglementations ...

Страница 14: ...É L πjóÑJ Öéj fCÉH ΩÉjC G óMCG d ÚÑJ GPEG ºbh á dõæŸG äÉØ îŸG e æe ü îàJ eGóîà S áLÉëH ó J hCG π üØæŸG ªéà d èàæŸG Gòg ÒaƒàH øe áeóîà ùŸG äGƒÑ dGh äÉéàæª d π üØæŸG ªéàdG øµÁ IOÉYEG óYÉ ùj PEG iôNCG Iôe É eGóîà SGh OGƒŸG ôjhóJ IOÉYEG Y Ö dG ØNh Ä ÑdG çƒ àdG æe Y ÉgôjhóJ OÉ ŸG OGƒŸG ΩGóîà SG ΩÉÿG OGƒŸG øY á FÉHô µdG äÉéàæª d π üØæe ªŒ Y á ëŸG äÉ jöûàdG üæJ ób AGöT óæY áFõéàdG ôLÉJ hCG ájó ÑdG äÉØ fl...

Страница 15: ... º ª üJ h áeóîà ùŸG äÉ ë ŸG Y RÉ L AGOCG óªà j Ú ù Vô H á dÉY IOƒéH ÉfGÒHh ôµjO ófCG ÓH äÉ ë e ƒ ü G øe øµªàà S äÉ ë ŸG J ΩGóîà SÉHh RÉ L AGOCG RÉ é d πãeC G AGOC G Y Y É Ñ Vh bGƒdG GƒM ï éàdG äÓéY Ö côJ Öéj áMƒd Y IOóëŸG É H UƒŸG áYöùdG øe YCG áYöS á bódG IQhO 2950 º S G á µ ùdG IÉ TôØdG Ó SCG àJ ób ôjò Y Öéj Gòdh ΩGóîà S G AÉæKCG ôjÉ àJh øjóLGƒàŸG øjôNB G OGôaC Gh Úeóîà ùŸG Ωóîà SG ó ù Gh LƒdGh ...

Страница 16: ...π ûàdG ìÉàØe óLƒj íLÎdG ìÉàØe ÖfÉL Y VG RÉ G π ûàd IóYÉ dG π ûJ É jE h 1 áeÓ dÉH Oófi øÁC G ÖfÉ G Y Oófi íLÎdG ìÉàØe øe öùjC G ÖfÉ G Y VG RÉ G 0 áeÓ dÉH 2 πµ ûdG äÉ ë ŸG Ò J ábÉ dG π UƒJ πHÉc øe üah RÉ G π ûJ É jEÉH ºb Gòg πªà ûj a ô dÉH SÉ dG IOófi äÓé dG Ωóîà SG äGƒ ÿG ÑJG ÚÑfÉ G Óc Y äÓéY QhÉfi Y RÉ G dGóÑà SGh ë e CG ádGRE á dÉàdG h øµ Qób ÈcCÉH êQÉî d Ñë Sh RÉ G óæ ùe ØH ºb 1 àdGREÉH º J RCGh...

Страница 17: ... GPEG EG ï éàdG äÓéY ÖfGƒL ΩGóîà SÉH ï éàdÉH º J Vô dG Gò d ᪪ üe âfÉc dP ODƒj ó a á é dG Ωõ e ádƒeÉ U HQ ôØJ ï éàdG á éY ó üJ EG ájQhO áØ üH ï éàdG á éY ƒM jƒéàdG æàH ºb øY áŒÉædG áHôJC G H ƒà ôjò hCG ôØ G hCG ï éàdG hCG öûædG hCG á eôdG IôØæ ùdG ájhɪ c OGƒe Y iôNC G á FÉ ûfE G á ûfC G QGöVC G hCG áæLC G ƒ ûJ hCG ÉWöùdG ÖÑ ùJ É fCÉH hô e OGƒŸG òg Y á ãeC G H j ɪ ah iôNC G á SÉæàdG ájhɪ µdG UÉ...

Страница 18: ...ÉM áHÉ UE G hCG Qö dG Óàd kÉeÉ óªà e ÒZ æµdh πgDƒe üî T á SGƒH ábÉ dG πHÉc GóÑà SG RÉ G ɪ V ùj ôµjO ófBG ÓH øe á üî ûdG áeÓ ùdG 3 RÉ G π ûJ óæY kGQòM øch ØJ ÉŸ ÑàfGh kÉ j øc CG Qƒ T óæY FÉHô µdG RÉ G Ωóîà ùJ h FÉHô µdG ƒëµdG hCG äGQóîŸG ÒKCÉJ â ƒµJ ÉeóæY hCG Ö àdÉH óæY IóMGh á ë d ÉÑàf G ΩóY ODƒj ób PEG ájhOC G hCG IÒ N áHÉ UE Vô àdG EG FÉHô µdG RÉ G ΩGóîà SG á üî ûdG ájɪ G äGó eh ájÉbƒdG äGQÉ f...

Страница 19: ...19 Arabic FIG 1 FIG 2 ...

Страница 20: ......

Страница 21: ...WARRANTY REGISTRATION CARD YOUR NAME YOUR ADDRESS POSTCODE DATE OF PURCHASE DEALER S NAME ADDRESS PRODUCT MODEL NO BPGB3150 ù ß r F M u Ê d e d b Í U a A d ß r Ë M u Ê U z l ...

Страница 22: ...74 44601338 Al Muftah Service Centre Al Wakrah Road P O Box 875 Doha Qatar Tel 974 44650880 44650110 44446868 Fax 974 44441415 44662599 SAUDI ARABIA Al Bahr Mohamed Ahmed Bin Afif Est P O Box 530 Yanbu Al Bahr Tel 966 4 3222626 3228867 Fax 966 4 3222210 Al Khobar Fawaz Ebrahim Al Zayani Trading Est P O Box 76026 Al Khobar 31952 Tel 966 3 8140914 Fax 966 3 8140824 MSS Al Mojil Supply Services P O Bo...
Отзывы: