ONCORE PRO, Operating Manual, Rev. K
19
4.2.
Preparing and Printing Labels
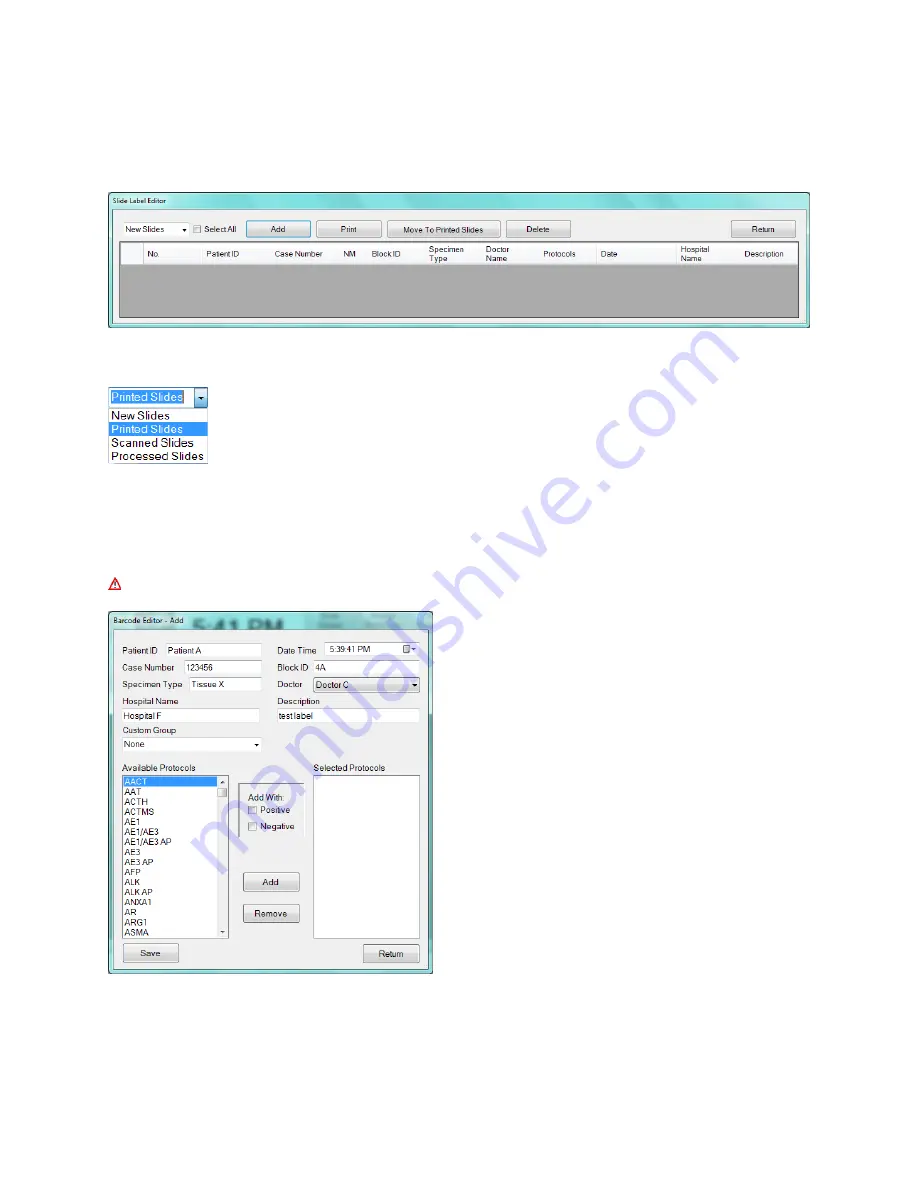
From the Main screen, click “
Prepare Labels
” to open the
Slide Label Editor
:
Figure 11
Labels available for printing are listed on the screen under New Slides.
A.
Select
New Slides
to create or view new labels.
B.
Select
Printed Slides
to review or reprint a label.
C.
Select
Scanned Slides
to review labels that have already been scanned.
D.
Select
Processed Slides
to review labels that have already been processed.
Add New Labels in the Barcode Editor
Labels must be prepared in the Barcode Editor and added to the Slide Label Editor before they can be printed.
To add new labels, click “Add” to open the Barcode Editor.
Enter the
Patient ID, Case Number,
and other required label information* into the designated fields
.
Note: caret
^
and tilde
~
characters are not permitted in the entry fields.
(Optional) Select the
Date Time
of the label.
(Optional) Select the name of the
Doctor
from the
dropdown list
. To add new names to the list, refer to
2D Barcode Format
(Optional)* To print the “Block ID” field to the slide
label, the user must change the default label format.
Select “Container Identifier” from the drop-down list
in the desired field of the Label Formatter.
Note: The information entered may not be printable
due to the size constraints of the label. Use
abbreviations as needed or select a different label
format. Protocol Name, Patient ID, Date, Case
Number, Hospital Name and Description are printed
on the label by default.
To change this setting, refer
to
2D Barcode Format
Figure 12
Next, add protocols to the list of
Selected Protocols
:


