BIANCA/BRICK-XM
6
Note that the BRICK-XMdoes not have a power switch.
The system will power up as soon as it is connected to
your power source. You may decide to wait until you’re
ready to access the BRICK before connecting the power
source.
LED Indicators
Each time you power up the system, the BRICK switches
into Power Up Mode and performs a self-test to verify the
integrity of the system. The LEDs on the front panel cor-
respond to various stages of the test.
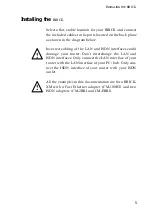
Step 2
Connect your BRICK to your
ethernet’s cabling using
either the UTP or BNC port.
Step 1
Connect the included laplink
cable to your terminal or
computer and the 9 pin serial
port.
Step 3
Connect the included ISDN
cable (RJ-45) to your BRICK’s
ISDN port(s) and your ISDN out-
let.
Step 4
Connect the included power
cord to the BRICK-XM and
your local power supply.
P
T
U
BNC
U T P B N C
ISDN
!
Содержание BIANCA/BRICK-XM
Страница 1: ...BIANCA BRICK XM Getting Started Version 1 6 July 1999 Document 71020E...
Страница 2: ......
Страница 36: ...BIANCA BRICK XM 30...


