background image


Canton Media Console     

MODEL # BHS0025004002 


ADULT ASSEMBLY REQUIRED 


If you have any questions regarding assembly or if parts are missing, DO NOT return this item to the 
store  where  it  was  purchased.  Please call  our  customer  service  number  and  have  your  instructions 
and parts list ready to provide the model name, part name or factory number: 

866-942-5362 

Pacific Standard Time: 8:30 a.m. - 4:30 p.m., Monday - Friday 

Or visit our web site 24 hours a day, 7 days a week for product assistance at  

www.whalenstyle.com 

Or e-mail your request to 

[email protected]


LOT NUMBER:       


DATE PURCHASED:      /     /     

THIS INSTRUCTION BOOKLET CONTAINS 

IMPORTANT

 SAFETY INFORMATION. 

PLEASE READ AND KEEP FOR FUTURE REFERENCE. 

Date 2020-08-25       Rev. 0001-

B


Содержание Canton BHS0025004002

Страница 1: ...ctions and parts list ready to provide the model name part name or factory number 866 942 5362 Pacific Standard Time 8 30 a m 4 30 p m Monday Friday Or visit our web site 24 hours a day 7 days a week for product assistance at www whalenstyle com Or e mail your request to parts whalenfurniture com LOT NUMBER DATE PURCHASED THIS INSTRUCTION BOOKLET CONTAINS IMPORTANT SAFETY INFORMATION PLEASE READ A...

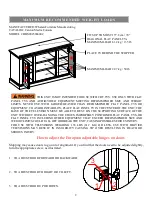
Страница 2: ...WITH FLAT PANEL TVS AND AUDIO VIDEO EQUIPMENT MEETING RECOMMENDED SIZE AND WEIGHT LIMITS NEVER USE WITH LARGER HEAVIER THAN RECOMMENDED FLAT PANEL TVS OR EQUIPMENT TO AVOID INSTABILITY PLACE FLAT PANEL TV IN THE CENTER OF THE UNIT THE BASE OF THE TELEVISION MUST BE ABLE TO REST ON THE SUPPORTING SURFACE OF THE UNIT WITHOUT OVER HANGING THE EDGES IMPROPERLY POSITIONED FLAT PANEL TVS OR FLAT PANEL T...

Страница 3: ...PERATION HOW THE KNOCK DOWN KD ASSEMBLY SYSTEM WORKS 1 Screw the Cam Bolt into the threaded inserts on the panel Connect both panels together making sure Cam Bolt goes into the pre drilled hole on the end of panel for Cam Lock 2 Insert the Cam Lock into the pre drilled large hole on the panel Make sure the arrow on the face of Cam Lock faces out and points towards Cam Bolt 3 Take a Phillips screwd...

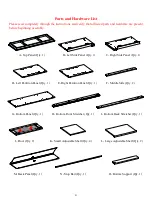
Страница 4: ...Top Panel Qty 1 B Left Side Panel Qty 1 C Right Side Panel Qty 1 D Left Partition Panel Qty 1 E Right Partition Panel Qty 1 F Middle Stile Qty 2 G Bottom Panel Qty 1 H Bottom Front Stretcher Qty 1 I Bottom Back Stretcher Qty 1 J Door Qty 2 K Small Adjustable Shelf Qty 4 L Large Adjustable Shelf Qty 2 M Back Panel Qty 1 N Stop Rail Qty 1 O Bottom Support Qty 1 ...

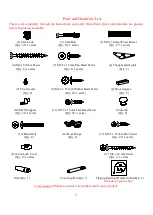
Страница 5: ...Qty 4 1 extra Qty 8 1 extra Qty 2 7 Floor leveler 8 M3 5 x 15 mm Washer Head Screw 9 Door stopper Qty 2 Qty 24 1 extra Qty 2 10 Shelf Support 11 M3 5 x 15 mm Flat Head Screw 12 Knob Qty 24 1 extra Qty 28 1 extra Qty 2 13 Knob Bolt 14 Door Hinge 15 M3 5 x 15 mm Zinc Screw Qty 2 Qty 4 Qty 24 1 extra 16 Cam Lock Cover 17 M4 x 38 mm Screw Qty 8 1 extra Qty 2 1 extra Glue Qty 1 Touch up Pen Qty 1 Tippi...

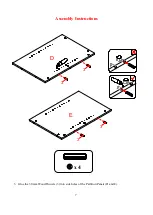
Страница 6: ...the unit on a carpeted floor or the empty carton to avoid any scratch 2 Securely screw the Cam Bolts 2 into the designated small holes on the Side Panels B and C the Bottom Panel G the Bottom Front Stretcher H and the Middle Stiles F using a Phillips screwdriver DO NOT over tighten the cam bolts x 20 B C G F F H 2 ...

Страница 7: ...7 Assembly Instructions 3 Glue the 30 mm Wood Dowels 3 into side holes of the Partition Panels D and E x 4 D E 3 3 3 3 ...

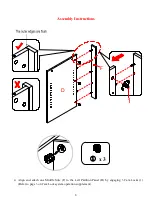
Страница 8: ...8 D F 1 Assembly Instructions 4 Align and attach one Middle Stile F to the Left Partition Panel D by engaging 3 Cam Locks 1 Refer to page 3 on Cam Lock system operation supplement x 3 ...

Страница 9: ...9 E F 1 Assembly Instructions 5 Repeat the same procedure to combine the other Middle Stile F to the Right Partition Panel E x 3 ...

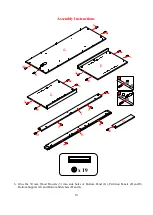
Страница 10: ...mbly Instructions 6 Glue the 30 mm Wood Dowels 3 into side holes of Bottom Panel G Partition Panels D and E Bottom Support O and Bottom Stretchers H and I x 19 3 O G D E H I 3 3 3 3 3 3 3 3 3 3 3 3 3 3 3 3 3 3 ...

Страница 11: ...11 Assembly Instructions 7 Align and attach the Bottom Front Stretcher H to the Bottom Panel G by engaging 4 Cam Locks 1 G H 1 G x 4 ...

Страница 12: ...12 Assembly Instructions 8 Align and attach the Bottom Support O to the Bottom Front Stretcher H by engaging one Cam Lock 1 G H O 1 x 1 ...

Страница 13: ...13 Assembly Instructions 9 Align and attach the Bottom Back Stretcher I to the Bottom Panel G by engaging 3 Cam Locks 1 G H I I 1 G x 3 ...

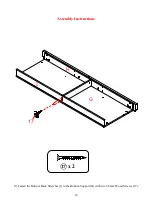
Страница 14: ...14 Assembly Instructions 10 Fasten the Bottom Back Stretcher I to the Bottom Support O with two 38 mm Wood Screws 17 x 2 G I H 17 ...

Страница 15: ...15 Assembly Instructions 11 Attach the Partition Panels D and E to the Bottom Panel G with four 50 mm Wood Screws 4 x 4 G D E 4 4 4 4 I H ...

Страница 16: ...16 Assembly Instructions 12 Glue the 30 mm Wood Dowels 3 into side holes of the Side Panels B and C x 4 B C 3 3 3 3 ...

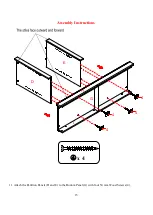
Страница 17: ...es on Left Side Panel B with the inserted Wood Dowels 3 on the assembled base Firmly press them together and fasten it in place by engaging 3 Cam Locks 1 14 Repeat the previous step to attach Right Side Panel C at the other end x 6 B C G D E 1 G B C ...

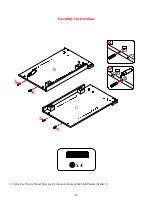
Страница 18: ...18 Assembly Instructions 15 Securely screw the Cam Bolts 2 into the designated small holes on the Top Panel A using a Phillips screwdriver A 2 x 8 ...

Страница 19: ...19 Assembly Instructions 16 Using the pilot holes as a guide fasten 2 door stoppers 9 to the Top Panel A with four 15 mm Flat Head Screws 11 A A 11 9 11 x 2 x 4 ...

Страница 20: ...20 Assembly Instructions 17 Ask for assistance to position the Top Panel A onto the inserted Wood Dowels 3 Attach the Top Panel A in place by engaging 8 Cam Locks 1 x 8 A B G C D E 1 ...

Страница 21: ...bly Instructions 18 With the pilot holes as a guide align and attach two Triangle Metal Plates 6 to the front corners of the assembled base using four 15 mm Pan Head Screws 5 per bracket x 8 x 2 B G C D E A 6 5 ...

Страница 22: ...22 Assembly Instructions 19 Screw two Floor Levelers 7 into the threaded sockets on the Triangle Metal Plates 6 and set to the correct height x 2 B G C D E A 7 ...

Страница 23: ...p the unit square 21 Flip the assembled unit around at its front edges Unfold the Back Panel M and position it onto the back edges of the assembly Make sure that the overlaps on the panels are even all the way around Secure the Back Panel M in place with the 15 mm Washer Head Screws 8 NOTE We recommend attaching back panel with the screws at the corners first C G M 8 8 x 24 ...

Страница 24: ...ly Instructions 22 Extend the Hinges Arms 14 and rest the Hinge Cups onto the cutouts of the Door Panels J Secure the Hinge Arms in place by using two 15 mm Zinc Screws 15 in each x 2 J 15 15 15 15 14 14 x 4 x 8 ...

Страница 25: ...Panel B with four 15 mm Zinc Screws 15 in each DO NOT fully tighten the screws 25 Repeat the procedure to attach the other Door J to the Right Side Panel C 26 Open and close the doors to make sure they are aligned and shut correctly If necessary adjust the screws for a good fit Refer to the hinge sticker on door for adjustment A B C 15 B C 14 J J x 16 ...

Страница 26: ...26 Assembly Instructions 27 Attach one Knob 12 to the front side of each Door J with the provided Knob Bolts 13 13 13 A B 12 12 C J J x 2 x 2 ...

Страница 27: ...e each side compartment Make sure you place the four Shelf Supports 10 in the same level so the shelf is not tilted Tilt and rest the Adjustable Shelves K and L onto the Shelf Supports 10 Secure the shelf in place with the 15 mm Flat Head Screw 11 for extra support A B C K K L L K K L K 10 11 x 24 x 24 ...

Страница 28: ...28 Assembly Instructions 29 Plug the Cam Lock Covers 16 onto the visible Cams Locks to conceal the Cams A B 16 ...

Страница 29: ...ith the top edge of the stopper template on Top Panel A Press down on the Stop Rail to help adhesion 31 Carefully remove the stopper template from the Top Panel A N A A B B NOTE To prevent your TV from tipping you must follow these instructions if you place a TV on top of your console Otherwise skip to Step 30 ...

Страница 30: ...ng furniture You must install the Tipping Restraint Hardware with the unit to prevent the unit from tipping causing any accidents or damage The tipping restraints are intended only as a deterrent they are not a substitute for proper adult supervision The tipping restraints are not earthquake restraints If you wish to add the extra security of earthquake restraints they must be purchased and instal...

Страница 31: ...umidity changes can cause fading warping shrinking and splitting of wood It is advised to keep furniture away from direct sunlight as sun may damage the finish Proper care and cleaning at home will extend the life of your purchase Follow these important and helpful tips that will enhance your furniture as it ages A touch up pen has been provided to minimize the small nicks or scratches that may oc...

Страница 32: ......

Страница 33: ... Por favor llame a nuestro número de servicio al cliente y tienen sus instrucciones y lista de piezas listo para proporcionar el nombre del modelo el nombre o el número de parte de la fábrica 866 942 5362 Hora estándar del Pacífico 8 30 am 4 30 pm de Lunes Viernes O visite nuestro sitio web las 24 horas del día 7 días a la semana para recibir asistencia del producto en www whalenstyle com O por co...

Страница 34: ...ES DE PANTALLA PLANA Y EQUIPO DE AUDIO VIDEO QUE TENGA LA MEDIDA PESO RECOMENDADO NUNCA UTILIZAR CON TELEVISIONES MÁS GRANDES PESADAS DE LAS RECOMENDADAS PARA EVITAR INESTABILIDAD COLÓQUELA EN EL CENTRO DE LA UNIDAD LA BASE DE LA TELEVISIÓN DEBE DE REPOSAR SOBRE LA SUPERFICIE DE SOPORTE DE LA UNIDAD SIN REBASAR LAS ORILLAS LAS TELEVISIONES DE PANTALLA PLANA COLOCADAS INAPROPIADAMENTE O LAS TELEVIS...

Страница 35: ...ÓN CÓMO FUNCIONA LA INSTALACIÓN DE MONTAJE KD 1 Fijar los tornillos de fijación en los orificios pequeños Conectar ambos paneles cerciorandose que los tornillos de fijación entren bien y que estos queden en los orificios al final del panel con tuercas de fijación 2 Inserte las tuercas de fijación en los orificios grandes del panel Hacer que la flecha en la tuerca este apuntando hacia la entrada de...

Страница 36: ...e A Panel superior Cant 1 B Panel izquierdo Cant 1 C Panel derecho Cant 1 D Panel divisor izquierdo Cant 1 E Panel divisor derecho Cant 1 F Soporte medio Cant 2 G Panel inferior Cant 1 H Soporte inferior frontal Cant 1 I Soporte inferior posterior Cant 1 J Puerta Cant 2 K Repisa ajustable pequeña Cant 4 L Repisa ajustable grande Cant 2 M Panel posterior Cant 1 N Riel tope Cant 1 O Soporte inferior...

Страница 37: ...r Cant 4 1 extra Cant 8 1 extra Cant 2 7 Nivelador de piso 8 Perno cabeza de arandela de M3 5 x 15 mm 9 Tope de puerta Cant 2 Cant 24 1 extra Cant 2 10 Soporte de repisa 11 Perno de cabeza plana de M3 5 x 15 mm 12 Jaladera Cant 24 1 extra Cant 28 1 extra Cant 2 13 Perno de jaladera 14 Bisagra de puerta 15 Perno de zinc de M3 5 x 15 mm Cant 2 Cant 4 Cant 24 1 extra 16 Tapa de la tuerca de fijación ...

Страница 38: ...idad en un piso alfombrado o en el cartón vacío para evitar rasguños 2 Atornillar los pernos de fijación 2 en los agujeros chicos designados en los paneles laterales B y C en el panel inferior G los soporte inferior frontal H y en los soportes medios F usando el desarmador estrella NO sobre apretar los pernos de fijación x 20 B C G F F H 2 ...

Страница 39: ...7 Instructivo de ensamble 3 Pegar las clavijas de madera de 30 mm 3 en los agujeros internos de los paneles divisores D y E x 4 D E 3 3 3 3 ...

Страница 40: ...8 D F 1 Instructivo de ensamble 4 Alinear y adjuntar un soporte medio F al panel divisor izquierdo D empleando 3 tuercas de fijación 1 Consulte la página 3 del sistema de tuerca de fijación x 3 ...

Страница 41: ...9 E F 1 Instructivo de ensamble 5 Repetir el mismo procedimiento para combinar el otro soporte medio F al panel divisor derecho E x 3 ...

Страница 42: ... 6 Pegar las clavijas de madera de 30 mm 3 en los agujeros interiores del panel inferior G de los paneles divisores D y E soporte inferior O y los soportes inferiores H y I x 19 3 O G D E H I 3 3 3 3 3 3 3 3 3 3 3 3 3 3 3 3 3 3 ...

Страница 43: ...11 Instructivo de ensamble 7 Alinear y adjuntar el soporte inferior frontal H al panel inferior G empleando 4 tuercas de fijación 1 x 4 G H 1 G ...

Страница 44: ...12 Instructivo de ensamble 8 Alinear y adjuntar el soporte inferior O al soporte inferior frontal H con las tuercas de fijación 1 G H O 1 x 1 ...

Страница 45: ...13 Instructivo de ensamble 9 Alinear y adjuntar el soporte inferior posterior I al panel inferior G empleando 3 tuercas de fijación 1 G H I I 1 G x 3 ...

Страница 46: ...14 Instructivo de ensamble 10 Adjuntar el soporte posterior inferior I con el soporte inferior O con 2 pernos de 38 mm 17 x 2 G I H 17 ...

Страница 47: ...15 Instructivo de ensamble 11 Adjuntar los paneles divisores D y E al panel inferior G con 4 pernos para madera de 50 mm 4 x 4 G D E 4 4 4 4 I H ...

Страница 48: ...16 Instructivo de ensamble 12 Pegar las clavijas de madera de 30 mm 3 en los agujeros laterales de los paneles laterales B y C x 4 B C 3 3 3 3 ...

Страница 49: ...s en el panel izquierdo B con las clavijas de madera insertadas 3 en la base ensamblada Presionar para juntar y sujetar en su lugar empleando 3 tuercas de fijación 1 14 Repetir el paso previo para adjuntar el panel derecho C al otro lado x 6 B C G D E 1 G B C ...

Страница 50: ...18 Instructivo de ensamble 15 Atornillar los pernos de fijación 2 en los agujeros chicos designados en el panel superior A usando el desarmador estrella A 2 x 8 ...

Страница 51: ...19 Instructivo de ensamble 16 Usando los agujeros pilotos como guía sujetar 2 topes de puertas 9 al panel superior A con 4 pernos de cabeza plana de 15 mm 11 A A 11 9 11 x 2 x 4 ...

Страница 52: ...tructivo de ensamble 17 Pedir asistencia para posicionar el panel superior A en las clavijas de madera insertadas 3 Adjuntar el panel superior A en su lugar empleando 8 tuercas de fijación 1 x 8 A B G C D E 1 ...

Страница 53: ...ble 18 Con los agujeros pilotos como guía alinear y adjuntar 2 placas de metal triangulares 6 a las esquinas frontales de la base ensamblada usando 4 pernos de cabeza de arandela de 15 mm 5 por placas x 8 x 2 B G C D E A 6 5 ...

Страница 54: ...22 Instructivo de ensamble 19 Atornillar 2 niveladores de piso 7 en los espacios roscados en las placas de metal triangulares 6 y ajustar a la altura correcta x 2 B G C D E A 7 ...

Страница 55: ...drada 21 Voltear la unidad ensamblada en sus bordes frontales Desdoblar el panel posterior M y posicionar en los bordes posteriores del ensamble Asegurar que la parte donde estan superpuestos los paneles esten nivelados todo el camino Asegurar el panel posterior M en su lugar con los pernos de cabeza de arandela de 15 mm 8 NOTA Recomendamos adjuntar el panel posterior con pernos en las esquinas pr...

Страница 56: ...nder los brazos de bisagras 14 y descansar las tapas de bisagra en los recortes de los paneles de las puertas J Asegurar los brazos de bisagras en su lugar usando 2 pernos de zinc de 15 mm 15 en cada uno x 2 J 15 15 15 15 14 14 x 4 x 8 ...

Страница 57: ...zinc de 15 mm 15 en cada uno NO apretar completamente los pernos 25 Repetir el mismo procedimiento para adjuntar la otra puerta J al panel derecho C 26 Abrir y cerrar las puertas para asegurar de que estén alineadas y se cierren correctamente Si fuera necesario ajustar los pernos para un buen ajuste Referirse a la etiqueta de la bisagra en el marco de la puerta para ajustar A B C 15 B C 14 J J x 1...

Страница 58: ...26 Instructivo de ensamble 27 Adjuntar una jaladera 12 al lado frontal de cada puerta J con los pernos de jaladera provistos 13 13 13 A B 12 12 C J J x 2 x 2 ...

Страница 59: ...nto lateral Asegurar de poner los 4 soportes de repisa 10 en el mismo nivel para que la repisa no esté inclinada Inclinar y descansar las repisas ajustables K y L en los soportes de repisa 10 Asegurar la repisa en su lugar con el perno de cabeza plana de 15 mm 11 Para soporte extra A B C K K L L K K L K 10 11 x 24 x 24 ...

Страница 60: ...28 Instructivo de ensamble 29 Enchufar la tapa de las tuercas de fijación 16 sobre las tuercas de fijación visibles para esconder A B 16 ...

Страница 61: ...uperior del templete del tope en el panel superior A Presionar el riel tope para ayudar a la adhesión 31 Retirar el templete del tope del panel superior A N A A B B NOTA Para evitar que su televisor su vuelque se debe seguir estas instrucciones cuando se ubique su televisor en el mueble Delo contrario vaya al paso 30 ...

Страница 62: ...timados por muebles inclinados Debe instalar el juego de restricción de movimiento con la unidad en función para prevenir la inclinación de la unidad causando cualquier accidente o daño El tope de movimiento es solo un impedimento no hay substituto para la supervisión adulta El tope de movimiento no es contra terremoto Si deseara añadir la seguridad extra contra terremotos deben ser comprados e in...

Страница 63: ... raje Es recommendable mantener la unidad lejos del sol directo ya que puede dañar el acabado Cuidados adecuados y limpieza pueden extender la vida útil de su unidad Siga estas recomendaciones y mantendra su mueble en buenas condiciones de uso por muchos años Un plumón de retoque es proveído en caso de pequeñas raspaduras o golpes que sucedan durante el ensamble o envío Esperamos que disfrute su m...

Отзывы: