


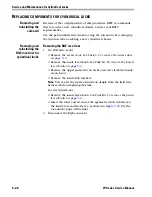

Service and Maintenance for Cylindrical Locks
5–16
W Series Service Manual
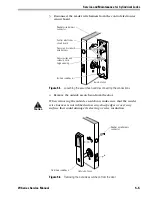
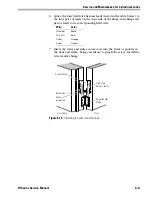
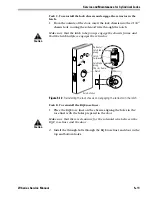
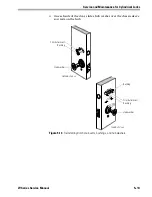
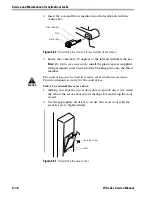
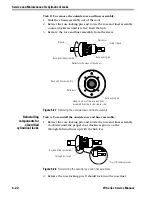
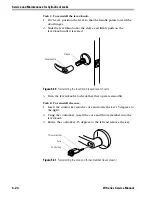
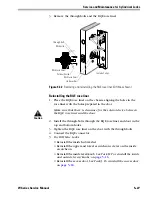
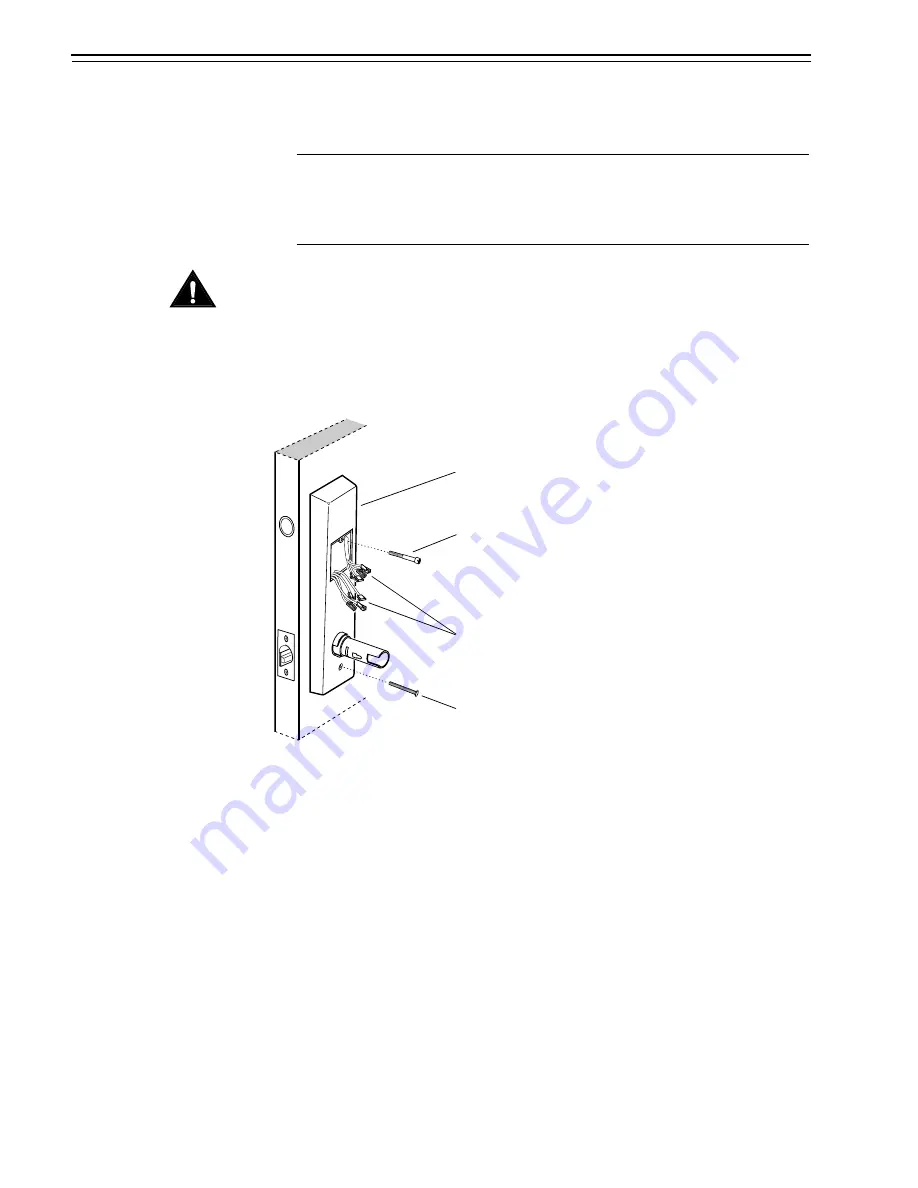
3. Make the solenoid connection and three sensor connections, and
place the wires into the inside escutcheon.
Caution
When making the sensor connections and solenoid connection, make
sure:
■
there are no loose wire connections where the wires are inserted
into the connectors
■
the connectors are firmly mated.
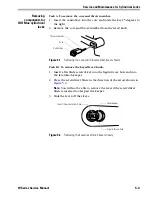
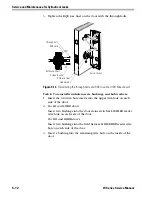
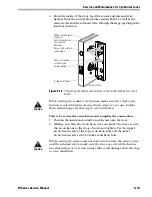
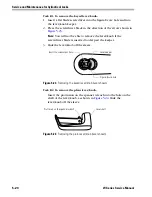
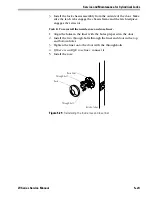
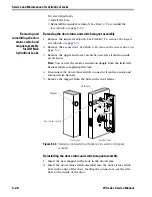
Task H. To reinstall the inside and outside levers/knobs:
Note:
To use a core and throw member from a manufacturer other than
BEST with a 9KW Lock, see the
Installation Instructions for
9K Non-interchangeable Cores & Throw Members (T56093).
Skip
Step 4 and Step 5 of those instructions.
1.
For the inside and outside knobs
Push firmly on the knob until it is seated.
For the inside and outside levers
With the handle pointing toward the door hinges, push firmly on
the lever until it is seated.
2. Tighten the upper and lower escutcheon screws.
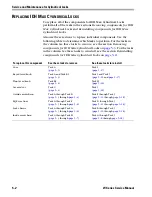
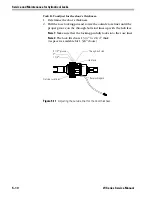
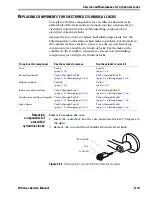
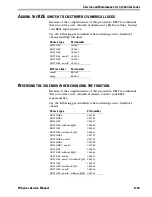
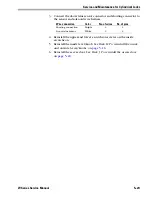
Wire connection
Color
No. of wires
No. of pins
Solenoid
Yellow
2
3
RQE
Brn/Org
2
3
Shorting connection
Purple
2
2
Door status sensor
White
2
2
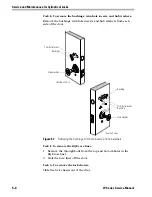
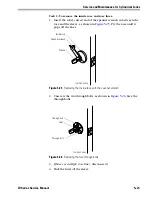
Figure 5.17
Securing the through-bolt escutcheon and completing connections
Upper escutcheon screw
Lower escutcheon screw
Make these
connections.
Inside of door
Inside escutcheon
Содержание 34HW
Страница 1: ......
Страница 6: ...Contents vi W Series Service Manual...
Страница 38: ...IDH Max Locks Functions and Parts 2 24 W Series Service Manual...
Страница 54: ...Electrified Locks Functions and Parts 3 16 W Series Service Manual...
Страница 140: ...Service and Maintenance for Cylindrical Locks 5 30 W Series Service Manual...
Страница 158: ...Additional Service and Maintenance for IDH Max Locks 6 18 W Series Service Manual...
Страница 162: ...Glossary A 4 W Series Service Manual...
Страница 164: ...Installation Instructions B 2 W Series Service Manual...