Bernina Bernette 10 Скачать руководство пользователя страница 1

my

world

my
bernette


502020.75.24_021V4D0101_1010_IM_bernette 10 12 15_EN_DE_NL_FR

Содержание Bernette 10

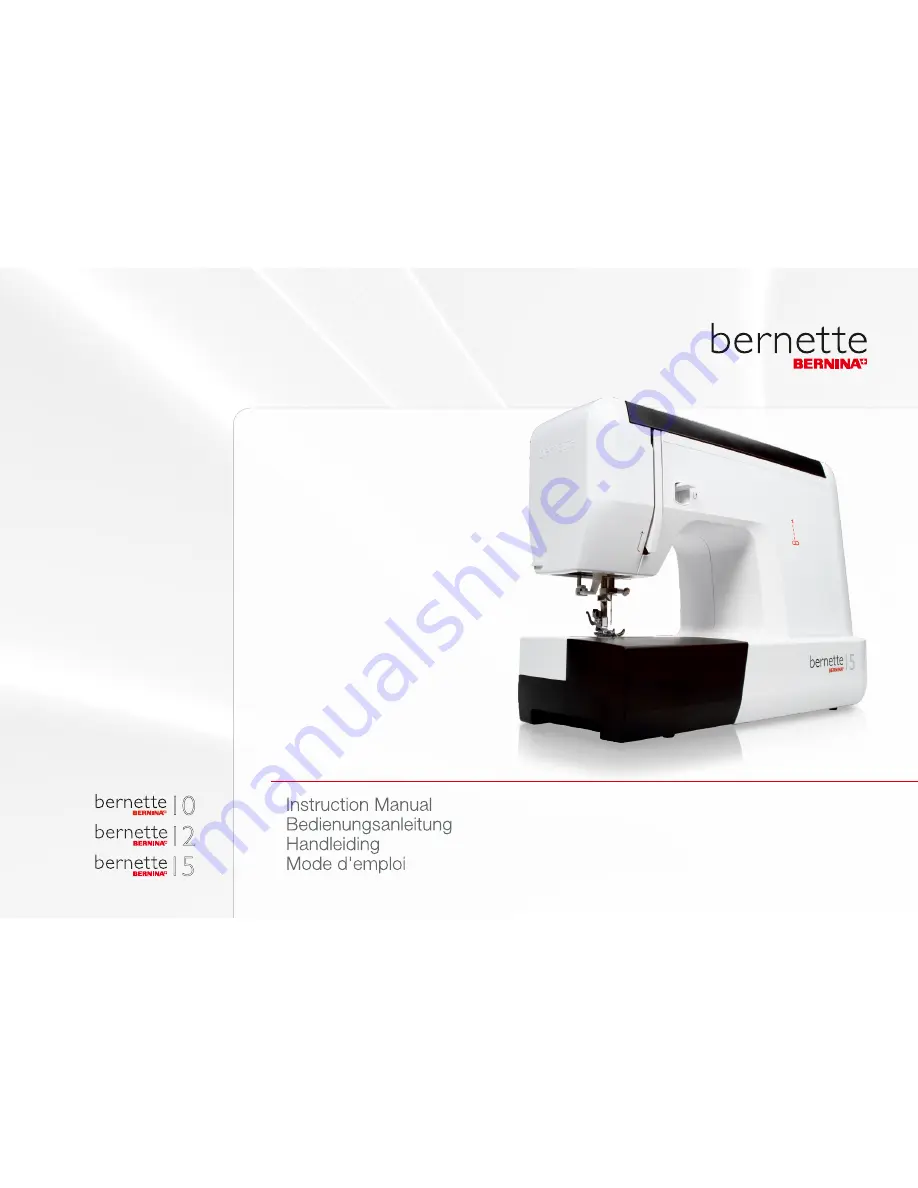
Страница 1: ...my world my bernette 502020 75 24_021V4D0101_1010_IM_bernette 10 12 15_EN_DE_NL_FR...

Страница 2: ...such cases rests with the local authorised servicing staff Hinweis Diese Anleitung beschreibt drei verschiedene bernette Modelle Oben links auf den Seiten sind jeweils die Modelle aufgef hrt f r die...

Страница 3: ...garantie nog niet is verlopen niet automatisch in de garantieregeling ingesloten Dit beslist per geval een geautoriseerde BERNINA dealer Remarque Ces directives englobent un descriptif des trois mod...

Страница 4: ...502020 75 24_021V4D0101_1010_IM_bernette 10 12 15_EN_DE_NL_FR...

Страница 5: ...Children should be supervised to ensure that they do not play with the appliance 5 Never operate this appliance if it has a damaged cord or plug if it is not working properly if it has been dropped o...

Страница 6: ...ice personnel Replacement parts for a double insulated product must be identical to those parts in the product A double insulated product is marked with the words DOUBLE INSULATION or DOUBLE INSULATED...

Страница 7: ...erden um sicherzustellen dass sie nicht mit dem Ger t spielen 4 Diese N hmaschine darf nur zu dem in dieser Anleitung be schriebenen Zweck benutzt werden Es ist nur das vom Her steller empfohlene in d...

Страница 8: ...nd sollte daher nur von qualifiziertem Personal vorgenommen werden Verwenden Sie f r Service und Reparatur nur Original Ersatzteile Ein doppeltisoliertes Produkt ist folgendermassen gekennzeichnet Dop...

Страница 9: ...eer de naaimachine door of in de nabijheid van kinderen wordt gebruikt 3 Gebruik de naaimachine alleen voor de in de handleiding beschreven doeleinden Gebruik alleen toebehoren dat doorde producent wo...

Страница 10: ...worden gebruikt Een dubbel ge soleerd product is op de volgende wijze gekenmerkt dubbele isolatie of dubbel ge soleerd Het symbool kan eveneens aangeven dat een product dubbel ge soleerd is BEWAAR DE...

Страница 11: ...s enfants 4 N utilisez cette machine que dans le but d accomplir les travaux d crits dans ce mode d emploi N employez que les accessoires originaux recommand s par le fabricant 5 N employez pas cette...

Страница 12: ...n produit double isolation est d sign de la mani re suivante isolation double ou A double isolement Le symbole peut galement caract riser un tel produit CONSERVEZ SOIGNEUSEMENT CES PRESCRIPTIONS DE SE...

Страница 13: ...erspezifisch ver ndert sein Sous r serve l gale Afin de servir notre client le au mieux de nos comp tences nous nous r servons le droit d apporter des am liorations au produit son quipement et ses acc...

Страница 14: ...anced sewing functions 80 118 Maintenance 120 122 Troubleshooting 124 Index 128 Wichtige Sicherheitshinweise 3 4 Inhaltsverzeichnis 10 bersicht bernette 10 12 15 15 Zubeh r bernette 10 12 16 Zubeh r b...

Страница 15: ...ktionen 81 119 Unterhalt 121 123 Behebung von St rungen 126 Stichwortverzeichnis 130 Prescriptions de s curit 5 6 Table des mati res 11 Aper u bernette 10 12 15 15 Accessoires bernette 10 12 16 Access...

Страница 16: ...ne sitzen Precisie en een uitstekende kwaliteit zijn de kenmerken van uw nieuwe naaimachine Het verwerken van verschillende lagen denim of kostbare zijde zal een puur genoegen zijn Uw naaimachine is e...

Страница 17: ...13 502020 75 24_021V4D0101_1010_IM_bernette 10 12 15_EN_DE_NL_FR...

Страница 18: ...ssory box 11 Spool pin 12 Hole for second spool pin 13 Bobbin winder 14 Bobbin stopper 15 Stitch length dial 16 Stitch width dial model 15 only 17 Stitch display 18 Needle threader 19 Handwheel 20 Pat...

Страница 19: ...Steekbreedteknop model 15 17 Motiefdisplay 18 Naaldinrijger 19 Handwiel 20 Steekkeuzeknop 21 Steekbalans model 15 22 Hoofdschakelaar 23 Stopcontact voor netkabel 24 Handvat 25 Naaivoethendel FR Overz...

Страница 20: ...felt 14 Darning plate Optional accessories 15 Satin stitch foot 16 Overcasting foot G 17 Hemmer foot 18 Blind hem foot L 19 Cording foot 20 Invisible Zipperfoot 21 Quilting foot 1 4 22 Darning Embroi...

Страница 21: ...oderie 16 Pied pour surjet G 17 Pied ourleur 18 Pied pour points invisibles L 19 Pied pour cordon 20 Pied pour fermeture glissi re cach e 21 Pied pour quilt 22 Pied pour reprisage broderie 23 Pied de...

Страница 22: ...11 Bobbin 3x 12 Seam guide 13 Second spool pin 14 Spool holder 15 Spool pin felt Optional accessories 16 Hemmer foot 17 Blind hem foot L 18 Cording foot 19 Invisible Zipperfoot 20 Quilting foot 1 4 21...

Страница 23: ...15 Deuxi me tige support de bobine Accessoires sp ciaux 16 Pied ourleur 17 Pied pour points invisibles L 18 Pied pour cordon 19 Pied pour fermeture glissi re cach e 20 Pied pour quilt 21 Pied pour Fro...

Страница 24: ...wing table horizontal and push it in the direction of the arrow 1 The inside of the snap in sewing table can be utilized as an accessory box 10 12 15 Sewing table 502020 75 24_021V4D0101_1010_IM_berne...

Страница 25: ...de la fl che 1 L int rieur de la table sert de coffret d accessoires DE N htisch NL Houd het aanschuifwerkblad voor het bevestigen horizontaal en druk het in de richting van de pijl vast 1 Het binneng...

Страница 26: ...e must be used with the foot controller KD 1902 110 120V area KD 2902 220 240V area manufactured by ZHEJIANG FOUNDER MOTOR CORPORATION Ltd China IMPORTANT NOTICE If the appliance has a polarized plug...

Страница 27: ...u raccordement de la machine au secteur D branchez la machine quand vous ne l utilisez pas Votre machine doit tre accompagn e de la p dale KD 1902 pour 100 120 volts KD 2902 pour 220 240volts fabriqu...

Страница 28: ...sewing However it can be adj according your needs For sewing very thin fabric loosen the pressure by turning the screw counter clockwise and for heavy fabric tighten by turning it clockwise Note The...

Страница 29: ...sus fins tournez la vis de r glage dans le sens contraire des aiguilles d une montre et pour les tissus pais dansle sens des aiguilles d une montre Remarque La pression du pied de biche est normale qu...

Страница 30: ...foot holder b until the cut out c is directly above the pin d 2 Lower the presser foot holder b and the presser foot f will engage automatically Removing the presser foot Raise the presser foot Releas...

Страница 31: ...sus de la tige d 2 Abaisser le support du pied b le pied de biche s encliquette automatiquement Retirer le pied de biche Relever le pied de biche Relever le levier e et retirer le pied en le faisant g...

Страница 32: ...wards the bobbin winding position Press the foot control gently The bobbin will stop winding when it is full Push the bobbin to the left to sewing position and remove it Before threading the machine c...

Страница 33: ...d embobinage Appuyer l g rement sur la p dale Le processus s arr te d s que la canette est pleine Repousser la canette vers lagauche et retirer Coupez le fil restant au trou de la canette avant de la...

Страница 34: ...rt the bobbin so that the thread runs in a clockwise direction arrow 2 Pull the thread through the slit and under the finger spring 3 Hold the bobbin case by the hinged latch 4 Insert it into the hook...

Страница 35: ...irer le fil dans la rainure et le faire glisser sous le ressort 3 Tenir le bo tier de canette par sa languette Placer dans le crochet 5 La tige du bo tier de canette doit tre dirig e vers le haut et t...

Страница 36: ...e as illustrated A Loosen the needle clamp screw and tighten again after inserting the new needle 1 B The flat side of the shaft should be towards the back C D Insert the needle as far up as it will g...

Страница 37: ...ser d s que l aiguille est en place 1 B Le c t plat doit toujours tre dirig vers l arri re C D Repousser l aiguille vers le haut jusqu la but e L aiguille doit tre neuve et ne pr senter aucun d faut 2...

Страница 38: ...e thread through rear guide A and then into slit of upper thread tension 2 Pull thread down to the right of the cover around point B 3 Take thread up to the left of the cover placing it in the take up...

Страница 39: ...ers de la fente dans la tension du fil sup rieur 2 Guider le fil vers le bas le long et la droite du recouvrement du levier de fil autour du point B 3 Guider le fil vers le haut le long et la gauche d...

Страница 40: ...hreading position B Take the thread round the hook C Take the thread in front of the needle so that the thread will insert into the hook D from bottom to top Release lever A Pull the thread through th...

Страница 41: ...cer le fil autour du crochet C Guider le fil devant l aiguille il doit reposer sur le levier D de bas en haut Rel cher le levier A Tirer le fil au travers du chas Attention Mettre toujours le commutat...

Страница 42: ...is too loose increase setting C1 C The upper thread tension is too tight decrease setting B1 Note The tension is factory set for best possible sewing results using a thread Metrosene 100 2 The optimu...

Страница 43: ...aleur B1 Remarque La tension a t parfaitement r gl e en fabrique avec des fils Metrosene 100 2 dans la canette et pour le fil sup rieur Pour obtenir un bon r sultat avec d autres fils il est ventuelle...

Страница 44: ...up through the stitch plate hole Lay both threads to the back under the presser foot 2 Note When the excess thread was cut the thread can be brought up however does not have to Caution When starting t...

Страница 45: ...te au travers du trou Glisser les deux fils vers l arri re sous le pied 2 Remarque D s que le fil qui d passe a t coup on peut seulement si souhait faire remonter le fil de canette Attention Ne pas ti...

Страница 46: ...of seam press down the reverse sewing lever A Sew a few reverse stitches Release the lever and the machine will sew forwards again Removing the work 2 Turn the handwheel towards to bring the thread t...

Страница 47: ...i re Rel cher la touche et continuer la couture en avant Retirer l ouvrage 2 Tourner le volant vers l avant pour amener le levier de fil dans sa position la plus haute Relever le pied de biche et reti...

Страница 48: ...work e g darning or free hand embroidery the darning plate must be used Install the darning plate as illustrated For normal sewing remove the darning plate Darning Plate 502020 75 24_021V4D0101_1010_...

Страница 49: ...mains libres ou de reprisage Placer la plaque de reprisage comme illustr Retirer la plaque de reprisage pour les travaux de couture courants DE Stopfplatte NL Bij borduren uit de vrije hand of stoppe...

Страница 50: ...ary sewing keep the feed dog up for freehand embroidery sewing on buttons and darning drop the feed dog To raise a and lower b feed dog How to drop feed dog 502020 75 24_021V4D0101_1010_IM_bernette 10...

Страница 51: ...aiss e pour la broderie mains libres la couture de boutons et les travaux de reprisage Relever la griffe d entra nement a et l abaisser b DE Transporteur versenken NL Transporteur omlaagzetten Bij nor...

Страница 52: ...itch patterns If the patterns are too open turn the dial counterclockwise 2 If the patterns are too close turn the dial clockwise 2 Adjusting the stitch density of buttonhole If the stitches on the ri...

Страница 53: ...raire 2 Si le motif est trop troit tourner la vers dans le sens horaire 2 Adapter la densit des points des boutonni res Si les points sont trop larges sur le c t droit de la boutonni re tourner la vis...

Страница 54: ...for best results Always use the same thread on top and bottom Heavy duty thread carpet thread Use heavy foot pressure large numbers DE EN Needle fabric thread selection NEEDLE FABRIC SELECTION Medium...

Страница 55: ...cht f r doppelteStrickstoffe Gewobene Natur und Synthetikstoffe Polyestermischgewebe Polyesterstrickstoffe Interlocks Tricot einfache und doppelte Strickstoffe Pulloverstrickstoffe Lycra Badeanzugstof...

Страница 56: ...jersey cr pe geweven polyester Middelzware stoffen katoen satijn zeildoek dubbelgebreide stoffen fijne wollen stoffen Middelzware stoffen zeildoek van katoen grof gebreide wollen stoffen badstof denim...

Страница 57: ...5 18 110 Pointe arrondie de 9 65 18 110 Aiguille pour cuir de 12 80 18 110 TISSUS Tissus naturels laine coton soie qiana etc Ne convient pas aux lainages doubles Tissus naturels et synth tiques polyes...

Страница 58: ...itch length with the control dials according to the result desired To obtain any of the patterns on the second row turn the stitch length dial to S select the pattern desired with pattern selector dia...

Страница 59: ...nner les motifs de points de la deuxi me rang e en tournant le bouton der glage de la longueur de point sur S choisir ensuite le motif avec le bouton s lecteur et la largeur avec le bouton de r glage...

Страница 60: ...ch Zigzag Overlock Blindhem Scalop 3 Step Zigzag Stretch Blindstich Universal Bridging Stitch Single Overlock Tripple Zigzag Honeycomb Double Overlock Feather Fagothing Decorative Stitch Universal Dec...

Страница 61: ...verlock Stretchoverlock Doppeloverlock Federstich Dekorstich 4 Stufen Knopfloch Stichmuster 1 Stufen Knopfloch Geradstich Zickzack Overlock Blindstich Raupennaht 3 Stufen Zickzack Stretch Blindstich U...

Страница 62: ...lock Stretchoverlock Dubbele overlock Decoratieve steek 1 fase knoopsgat Eenvoudige overlock Veersteek Fagotsteek Decoratieve steek Decoratieve steek Trapeziumsteek Vierkanten Festonsteek Applikacatie...

Страница 63: ...atif Point d coratif Trap ze Carr s Point parisien point d appliqu Point stretch Point de croix Point droit triple Point zigzag triple Point nid d abeille Superstretch point parisien Point de surjet s...

Страница 64: ...lly speaking the finer the fabric the finer the thread and shorter the stitch length the heavier the fabric the thicker the thread and longer the stitch length At stitch length 0 the fabric will not m...

Страница 65: ...lus le tissu est pais plus le fil doit tre pais et la longueur de point augment e Si la longueur de point se trouve sur 0 le tissu n avance pas et l aiguille pique toujours au m me endroit Attention D...

Страница 66: ...the finer the fabric the finer the thread and shorter the stitch length the heavier the fabric the thicker the thread and longer the stitch length At stitch length 0 the fabric will not move and the n...

Страница 67: ...ngueur de point r duite plus le tissu est pais plus le fil doit tre pais et la longueur de point augment e Si la longueur de point se trouve sur 0 le tissu n avance pas et l aiguille pique toujours au...

Страница 68: ...eat zigzag stitches are usually achieved at 2 5 or below Satin stitch When the stitch length is set between 0 1 the stitches are very close together producing the satin stitch which is used for making...

Страница 69: ...n 0 kommt Saubere Zickzackstiche werden in der Regel bei 2 5 oder tiefer erreicht Raupennaht Wenn die Stichl nge zwischen 0 1 eingestellt ist liegen die Stiche sehr nahe aneinander und bilden so die R...

Страница 70: ...5 Function of stitch length dial while zigzaging The density of zigzag stitches increase as the setting of stitch length dial approaches 0 Neat zigzag stitches are usually achieved at 2 5 or below Sat...

Страница 71: ...zigzag Plus le bouton se rapproche du 0 plus la densit du point zigzag augmente En r gle g n rale le point zigzag sera r gl sur 2 5 ou moins Couture chenille point satin Quand la longueur de point es...

Страница 72: ...fabric under the foot Turn the handwheel forward by hand until the needle swings fully to the left It should just pierce the fold of the fabric If it does not adjust the stitch width accordingly 2 Ad...

Страница 73: ...e que l aiguille setrouve tout gauche Elle ne doit piquer que la pointe du tissu pli Si n cessaire r gler et adapter la largeur de point R gler le guide 2 en tournant le bouton 4 jusqu ce qu il repose...

Страница 74: ...overlock For fine knits jerseys neck edges ribbing 1 Double overlock stitch For fine knits handknits seams 2 All overlock stitches are suitable for sewing and neatening edges and visible seams in one...

Страница 75: ...Surjet double Pour les lainages fins tricots fait main coutures 2 Tous les points surjet peuvent tre utilis s pour la couture et le surfilage de rebords et la couture d ourlets en une seule tape de t...

Страница 76: ...the needle goes into the right and the left hole of the button without any obstruction adjust the stitch width according to the button Slowly sew on the button with about 10 stithces Select pattern a...

Страница 77: ...ille pique exactement dans les trous du bouton Coudre lentement le bouton avec 10 points R gler le bouton s lecteur de point sur et coudre quelques points d arr t Glisser une aiguille repriser sur le...

Страница 78: ...into the left and right holes of the button Set the pattern selector knob on straight stitch and sew a few securing stitches Set the pattern selector knob on zigzag stitch and slowly sew on the button...

Страница 79: ...r de point sur point droit et coudre quelques points d arr t R gler le bouton s lecteur de point sur zigzag et coudre lentement le bouton env 10 points R gler le bouton s lecteur de point sur point dr...

Страница 80: ...y Note Density varies according to the fabric Always test sew a buttonhole Follow the 4 step sequence changing from one step to another with the stitch pattern selector dial Take care not to sew too m...

Страница 81: ...les quatre tapes de couture et passer d une l autre avec le bouton s lecteur de point Ne pas trop coudre de points durant les tapes 1et 3 Ouvrir la boutonni re avec le d coud vite en partant des extr...

Страница 82: ...8 Stop the machine when the buttonhole is sewn Making a Buttonhole on Stretch Fabrics fig E When sewing buttonholes on stretch fabric place a gimp thread under the buttonhole foot 1 Mark the position...

Страница 83: ...nni re est cousue Couture d une boutonni re sur un tissu stretch E Glisser une ganse sous le pied pour la couture de boutonni res sur des tissus lastiques 1 Placer un rep re avec la craie de couturi r...

Страница 84: ...ich side of the foot you are going to sew 1 To sew past the zip pull lower the needle into the fabric raise the presser foot and push the zip pull behind the presser foot Lower the foot and continue t...

Страница 85: ...le tissu relever le pied et faire glisser la coulisse derri re le pied Abaisser le pied et continuer la couture Il est galement possible de glisser un fil dans un biais pour former une nervure 2 Atte...

Страница 86: ...ce by about 3 mm 1 8 and sew 4 5 stitches to secure Pull the thread slightly towards the back Insert the needle into the fabric raise the presser foot and guide the fold into the scroll on the foot 1...

Страница 87: ...d deux fois 3 mm et arr ter avec 4 5points Tirer l g rement le fil vers l arri re Piquer l aiguille dans le tissu relever le piedet glisser la pliure dans l ergot du pied 1 Tirer l g rement le rebord...

Страница 88: ...ortened to produce very close stitches 1 When mending tears it is advisable to use a piece of backing fabric to reinforce The stitch density can be varied by adjusting the stitch length First sew over...

Страница 89: ...a r paration de d chirures de glisser une garniture de renforcement sous le tissu ab m La densit des points peut tre modifi e en changeant la longueur de point Coudre tout d abord en partant du milieu...

Страница 90: ...rds and one stitch backwards This gives triple reinforcement Triple zigzag 2 Pattern selector on For hardwearing seams hems and decorative seams Turn the stitch length dial to S and adjust the stitch...

Страница 91: ...enforc trois fois Point zigzag triple 2 R gler le bouton s lecteur de point sur Pour les coutures fortement sollicit es les ourlets et les ourlets d coratifs R gler le bouton de r glage de la longueur...

Страница 92: ...n the stitch length dial to S Set stitch width control between 4 5 model 15 This stitch can be used for all types of jersey as well as for woven fabrics 1 Sew at 1 cm 1 4 from the fabric edge and trim...

Страница 93: ...de r glage de la longueurde point sur S R gler la largeur de point entre 4 et 5 mod le 15 Ce point sera utilis sur les tissus en jersey ainsi que ceux tiss s 1 Coudre 1 cm du rebord du tissu et d cou...

Страница 94: ...th control between 1 4 Set stitch width control between 3 5 model 15 Insert the cord between the spring covering the cord groove and the foot The cord should run in the groove One two or three cords c...

Страница 95: ...r glage de la longueur de point entre 1 et 4 R gler la largeur de point entre 3 et 5 mod le 15 Guider le fil sous la tige du pied pour cordon Le fil doit tre gliss dans la rainure Coudre un deux ou t...

Страница 96: ...eedle clamp screw B Press the darning foot firmly from behind with your index finger and tighten the screw C 3 First sew round the edge of the hole to secure the threads 4 First row Always work from l...

Страница 97: ...e tour du trou pour arr ter les fils 4 Premi re ligne travailler toujours de gauche droite Tourner l ouvrage d un quart et coudre par dessus Il est recommand d utiliser un cadre pour reprisage qui per...

Страница 98: ...should be behind the needle clamp screw B Press the darning foot firmly from behind with your index finger and tighten the screw C 3 First sew round the edge of the hole to secure the threads 4 First...

Страница 99: ...depuis l arri re le pied avec l index et visser C 3 Coudre tout d abord le tour du trou pour arr ter les fils 4 Premi re ligne travailler toujours de gauche droite Tourner l ouvrage d un quart et coud...

Страница 100: ...fabric to create the shell effect Rampart 2 Pattern selector on For flat joining seams sewing on elastic visible hems This stitch can be used for firm thicker fabrics Bridging 3 Pattern selector on Fo...

Страница 101: ...fronce 2 R gler le bouton s lecteur de point sur Pour des coutures de rapport plates la couture de rubans lastiques les ourlets Ce point peut tre utilis sur les tissus pais et rigides Point universel...

Страница 102: ...r edges tablecloths bed linen cuffs embroidery For an attractive decorative effect adjust the stitch width to maximum Embroidery thread adds to effect Square stitch 1 Pattern selector on For all fabri...

Страница 103: ...kbreedte wordt ingesteld krijgt u een mooi decoratief resultaat Borduurgaren geeft het geheel ook een bijzonder decoratief effect Bloksteek 1 Zet de steekkeuzeknop op Voor alle stoffen en werkzaamhede...

Страница 104: ...ying fabric to be used Lower the presser foot and alternately sew forward or reverse using the reverse sewing lever Repeat this motion until the area to be darned is filled with rows of stitching For...

Страница 105: ...Zet de naaivoet omlaag en naai afwisselend vooruit en achteruit gebruik hierbij de achteruitnaaitoets Herhaal deze bewegingen tot het gedeelte dat gestopt moet worden met rijen van steken is bedekt Ac...

Страница 106: ...under the folded edge of the fabric allowing it to underlap the fabric slightly as required by the pattern of the lace Sew on the edge of the fabric fold You can add a decorative touch by using the sa...

Страница 107: ...e Stoffkantelegen dass sie ein wenig unter den Stoff zu liegen kommt je nach Bedarf des Spitzenmusters Auf der Stoffkante n hen Als zus tzlicher Ziereffekt kann eine Raupennaht zum Einn hen der Spitze...

Страница 108: ...round the edge of the design Trim excess material outside the stitching Make sure not to cut any stitches Remove the basting thread Tie top and bottom thread under the applique to avoid unraveling Ple...

Страница 109: ...s bern hen bersch ssigen Stoff ausserhalb der Stiche abschneiden Darauf achten dass in keine Stiche geschnitten wird Heftfaden entfernen Ober und Unterfaden unter der Applikation verknoten um das Auft...

Страница 110: ...ading Thread each needle separately Please note When sewing with twin needle always proceed slowly and make sure to maintain low speed to insure quality stitching When using twin needle on zigzag make...

Страница 111: ...e Naai bij het gebruik van een tweelingnaald altijd langzaam en let erop dat deze snelheid onveranderd blijft zodat de steekkwaliteit optimaal is Let er bij het gebruik van een tweelingnaald voor de z...

Страница 112: ...sired lettering or design on the right side of the fabric Stretch the fabric between embroidery hoop as firmly as possible Place the fabric under the needle Make sure the presser foot bar is down in i...

Страница 113: ...ef op de bovenkant van de stof Span de stof zo strak mogelijk in het borduurraam Leg de stof onder de naald Let erop dat de naaivoetstang in de laagste stand staat Draai het handwiel naar voren om de...

Страница 114: ...rn selector on For all fabrics and all types of work Quilt 2 Pattern selector on For all fabrics and all types of work The bobbin thread must come through the right side Depending on the fabric used i...

Страница 115: ...de point sur Pour tous les tissus et travaux Point quilt 2 R gler le bouton s lecteur de point sur Pour tous les tissus et travaux Le fil de canette doit tre ramen sur l endroit du tissu Selon le tiss...

Страница 116: ...sition the fabric under the foot raw edges aligned with the outer edge of the right toe see arrow Stitch perfect 1 8 inch seams The notches on the left edge of the foot are 1 4 inch in front and behin...

Страница 117: ...1 8 inch breed De inkepingen aan de rand van de naaivoet zijn op een afstand van 1 4 inch voor en achter de naald aangebracht De middelste inkeping bevindt zich daar waar de naald in de stof steekt D...

Страница 118: ...stitch zipper until the foot hits the slider Remove the garment from the machine To attach the other half of the zipper place the fabric edge on the 5 8 inch marking line on the needle plate as shown...

Страница 119: ...itssluiting op de stof zodat de tandjes onder de rechter inkeping van de ritsvoet liggen en deritssluiting 1 4 inch van de bovenkant vande stof af ligt Naai de rits tot waar het lipje wordt vastgezet...

Страница 120: ...a single row or multiple rows of straight stitches If more gathering is required loosen the upper thread to about 2 so that the lower thread lies on the under side of the material Pull the lower threa...

Страница 121: ...eken Als de stof sterker moet worden gerimpeld moet de bovendraadspanning worden verminderd op ca 2 zodat de onderdraad aan de onderkant van de stof ligt Trek aan de onderdraad om de stof te rimpelen...

Страница 122: ...older see page 26 3 Attach the walking foot to the machine in the following way i The fork arm should fit into the needle screw and clamp 2 ii Slide the plastic attaching head from your left to right...

Страница 123: ...etstang omhoog 2 Verwijder de naaivoethouder door de schroef 3 los te draaien zie blz 27 3 Bevestig de boventransportvoet als volgt op de naaimachine i De naaldbevestigingsschroef moet onder de vork z...

Страница 124: ...ms a outwards Remove the hook race cover b and the hook c Clean first the feed dogs with the brush 2 Then clean with a soft cloth hook c hook race d and hook race cover b Lubricate at the point d 1 to...

Страница 125: ...oyer tout d abord la griffe d entra nement avec le pinceau 2 ensuite la coursi re avec un chiffon doux c le crochet d et l anneau b Lubrifier les points d avec de l huile sp ciale pour machine 1 2 gou...

Страница 126: ...hing it Loosen the screw a on the left side of the sewing head and remove the face plate b 1 Pull light bulb downward to remove Replace the bulb with same type rated 5w 12V Set the face plate and tigh...

Страница 127: ...e gloeilamp eerst afkoelen vervang daarna pas de gloeilamp Om de gloeilamp te verwijderen moet deze naar beneden worden getrokken 2 Gebruik alleen gloeilampen van 12V 5W Gloeilampen zijn bij de vakhan...

Страница 128: ...he needle is damaged 1 Thread is caught in the hook 1 Mahine sews in reverse Correction 1 Rethread the machine 2 Reduce the thread tension lower number 3 Select a larger needle 4 Remove and reinsert t...

Страница 129: ...eifer eingeh ngt 1 Maschine n ht r ckw rts Fehlerbehebung 1 Die Maschine neu einf deln 2 Die Fadenspannung reduzieren kleinere Zahl 3 Eine st rkereNadel w hlen 4 Nadel entfernen und wieder einsetzen F...

Страница 130: ...Oplossing 1 Rijg de naaimachine opnieuw in 2 Verminder de draadspanning kleiner getal 3 Gebruik een dikkere naald 4 Verwijder de naald en zet hem opnieuw in platte kant naar achteren 5 Verwijder het g...

Страница 131: ...r la machine 2 R duire la tension du fil chiffre inf rieur 3 Choisir un num ro sup rieur d aiguille 4 Retirer l aiguille et replacer dans la bonne position le c t plat doit se trouver vers l arri re 5...

Страница 132: ...stitch 88 Stitch selection 54 86 Stitches overview 56 Straight stitching and needle position 60 62 T Threading the upper thread 34 Trouble shooting guide 124 Twin needle 106 Two step presser foot lev...

Страница 133: ...nsetzen 33 Nadel Stoff und Fadentabelle 51 N hfussdruck einstellen 25 N hte fixieren 43 N htisch 21 Nahtverdeckter Reissver schluss 115 Nutzstiche 97 O Oberfaden einf deln 38 Oberfadenspannung 39 Ober...

Страница 134: ...teekbalans instellen 49 Steekkeuze 55 87 Stoppen 101 A Aanschuifwerkblad 21 Accessoires 17 19 Appliqueren 105 Automatische naaldinrijger 37 B Belangrijke veiligheidsvoorschriften 5 6 Blindzoom Lingeri...

Страница 135: ...si re et de nervures 81 E Enfilage automatique 37 Enfilage du fil sup rieur 35 F F licitations 12 Fronces 117 L Levier de pied de biche 2 niveaux 25 M Maintenance 121 123 Ma trisede pannes 126 Mise en...

Страница 136: ...For more information visit www mybernette com 502020 75 24_021V4D0101_1010_IM_bernette 10 12 15_EN_DE_NL_FR...

Отзывы: