15
Installation
6005736_0 – 25.03.2021
EN
☞
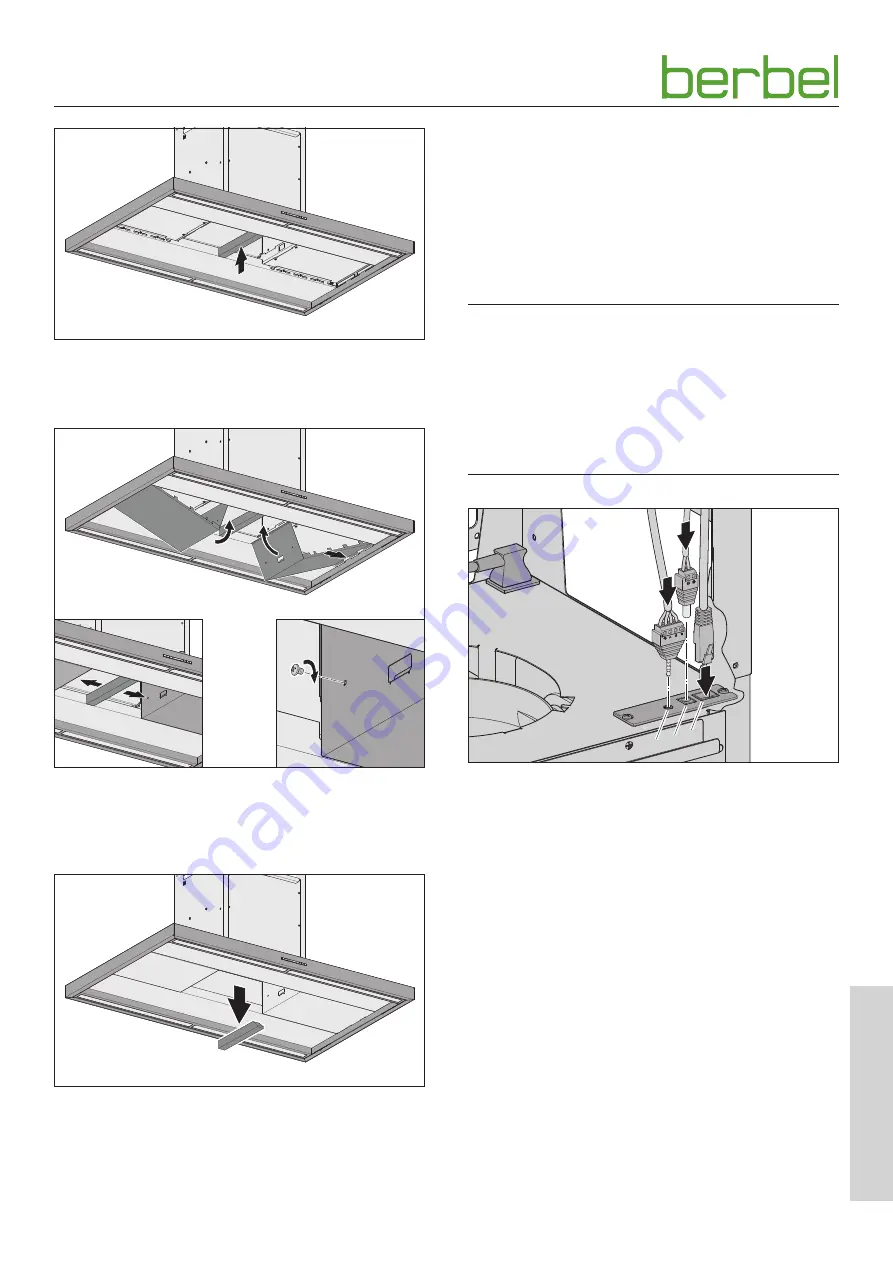
Insert the mounting aid centrally in the flue.
☞
Align the mounting aid flush with the underside of the
hood body.
☞
Push the holding clips of the cladding panels into the side
slots on the hood body.
☞
Fold the cladding panels up.
☞
Secure the cladding panels to the flue with a screw.
☞
Remove the mounting aid.
3.5.6
Connecting accessories
Depending on the installation situation, available accessories
may be connected to the hood, e.g.:
y
Wall box
y
Window contact switch
y
Control flap
y
Recirculated air filter permalyt
Observe the instructions for the accessories.
D
ATTENTION!
Danger of damage due to improper connection!
Applied voltage or defective connections can result in
damage to the electronics.
☞
Ensure that the power supply is switched off and remains
so.
☞
Ensure correct assignment of the connections.
☞
Make sure that the accessories plugs are fully inserted.
A B C
A Jack socket - for connection of wall box, control flap or
recirculated air filter permalyt.
B DC power socket - for connecting a window contact
switch.
C Connection socket (RJ45) – BUS interface for connection
with special accessories of the manufacturer.
Connection with a PC or other devices is not permitted.
Wall box
y
The wall box is closed when the control contacts are open.
y
The wall box is open when the control contacts are closed.
Window contact switch
y
The hood‘s fan is only operational when the window is
open.
Safety device
y
The hood‘s fan is only operational when no critical under-
pressure is determined in the room.
☞
Connect any available accessories.
☞
Route the cable such that it is not kinked, crushed or
damaged and so that it will not get in the way when
replacing the filter filling.
Содержание Smartline BIH 100 ST
Страница 34: ...34 6005736_0 25 03 2021 ...
Страница 35: ...35 6005736_0 25 03 2021 ...
Страница 36: ...6005736_0 25 03 2021 ...


