background image

System interface

44

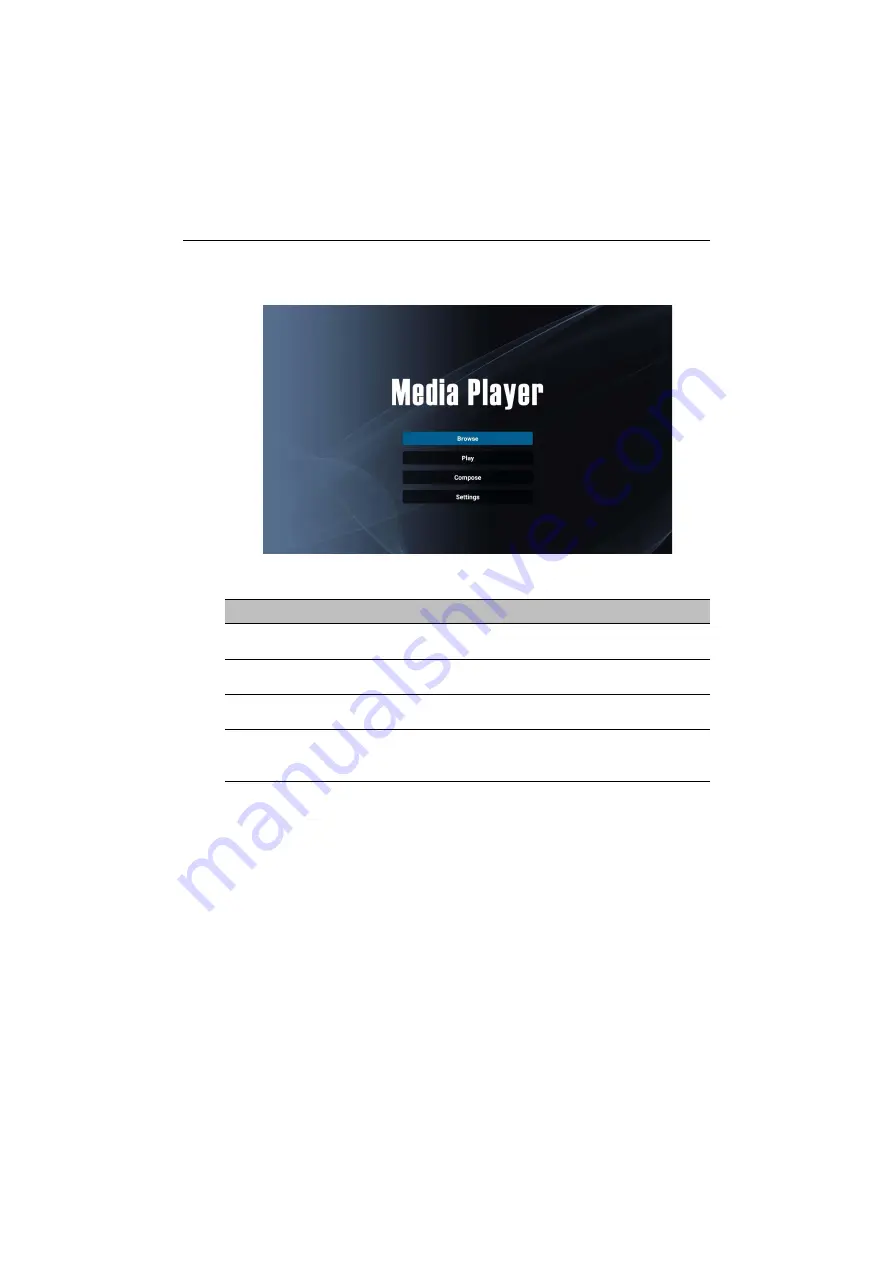
Media Player

Media Player


allows you to view your photos or play audio or video files. 

Media 

Player

 also allows you to create and play playlists of your media files.

After 

Media Player

 is launched, you will see the main 

Media Player

 screen with the 

following options:

Menu

Description

Browse

Allows you to search for and play individual media files. 
Refer to 

Browse

 on page 45

 for more information.

Play

Allows you to play your playlists. Refer to 

Play

 on page 46


for more information.


Compose

Allows you to create or edit playlists for your media files. 
Refer to 

Compose

 on page 47

 for more information.


Settings

Allows you to set the audio or video effects for your 
media files. Refer to 

Settings

 on page 50

 for more 

information.

Содержание ST4302S

Страница 1: ...ST4302S ST5502S ST6502S ST7502S ST8602S Digital Signage User Manual ...

Страница 2: ...contents thereof without obligation to notify any person of such revision or changes Copyright Copyright 2022 BenQ Corporation All rights reserved No part of this publication may be reproduced transmitted transcribed stored in a retrieval system or translated into any language or computer language in any form or by any means electronic mechanical magnetic optical chemical manual or otherwise witho...

Страница 3: ...ORT Downloads model name User Manual EU only Dismantled information Available on the user manual download page This document is provided based on Regulation EU 2019 2021 to repair or recycle your product Always contact the local customer service for servicing within the warranty period If you wish to repair an out of warranty product you are recommended to go to a qualified service personnel and o...

Страница 4: ...y 6 Mounting the display 6 Parts of the display and their functions 9 Power status indicator 10 Control panel 10 Input output terminals 11 Remote control 13 Using the remote control 14 Connection 15 Connecting audio video signals 15 Connecting power 19 Basic operations 20 Turning the display on or off 20 Switching input source 20 Operations in the OSD menu 21 Initial setup 22 Settings 22 Setting u...

Страница 5: ...8 Audio 29 Configuration 1 30 Configuration 2 31 Advanced option 32 System interface 35 Main screen 35 APPS 37 Product information 52 Specifications 52 Dimensions 55 Supported input signal resolution 60 Troubleshooting 62 3 25 22 ...

Страница 6: ...y Using wrong or unsuitable accessories may cause the display to fall and result in serious personal injuries Make sure that the surface and fixing points are strong enough to sustain the weight of the display To reduce the risk of electric shock do not remove covers No user serviceable parts inside Refer servicing to qualified service personnel To prevent personal injuries mounting the display or...

Страница 7: ...ion to avoid injury from tip over 13 Unplug this apparatus during lightning storms or when unused for long periods of time 14 Refer all servicing to qualified service personnel Servicing is required when the apparatus has been damaged in any way such as power supply cord or plug is damaged liquid has been spilled or objects have fallen into the apparatus the apparatus has been exposed to rain or m...

Страница 8: ...e control in the direct heat humidity and avoid fire Do not drop the remote control Do not expose the remote control to water or moisture Failure to do so could result in malfunction Confirm there is no object between the remote control and the remote sensor of the product When the remote control will not be used for an extended period remove the batteries Battery safety notice The use of the wron...

Страница 9: ...ment and standards pertaining to environmental management BenQ has spared no efforts in pushing our initiatives further to incorporate life cycle design in the aspects of material selection manufacturing packaging transportation using and disposal of the products BenQ ecoFACTS label lists key eco friendly design highlights of each product hoping to ensure that consumers make informed green choices...

Страница 10: ...2 cable x 1 Quick start guide The type of power cord supplied may differ from that illustrated depending on your region of purchase Before discarding the package check that you haven t left any accessories inside the box Dispose of packaging materials wisely You can recycle the cardboard carton Consider storing the package if possible for future transport of the display Do not leave plastic bags w...

Страница 11: ...T6502S 400 x 400 4 M6 x 15L ST7502S 600 x 400 4 M6 x 15L ST8602S 600 x 400 4 M6 x 15L 1 Place a clean dry and lint free cloth on a flat horizontal and object free surface Make sure that the size of the cloth is larger than the display 2 Gently lay the display on the cloth with the LCD screen facing down 3 Remove the desktop stands from the display if installed 4 Identify the wall mounting screw ho...

Страница 12: ...d torque 16 2 2 kgf cm The mounting means should be strong enough to bear the weight of the display To maintain proper ventilation keep at least 10 mm of clear space from the back cover of the display to the wall Please consult a professional technician for wall mount installations The manufacturer accepts no liability for installations not performed by a professional technician 02817 6 5 7 5 0 PP...

Страница 13: ...display can be installed in both landscape and portrait orientation When mounting the display in portrait orientation rotate the display 90 degrees counter clockwise as illustrated ensuring that the IR sensor of the display is orientated toward the top of the display 90 IR Sensor IR Sensor ...

Страница 14: ...nctions A Remote Control Sensor Power Status Indicator B Control panel C Input output terminals Bottom side D Input output terminals Left side 0 1 0 1 8 2 287 9 1 5 3 1 1 9 1 4 0 1 86 86 0 52 6 56 287 56 1 5 1 5 287 4 9 4 ST4302S ST5502S ST6502S ST7502S ST8602S A B B A C D D C ...

Страница 15: ...as been enabled Refer to Advanced option on page 32 for more information Green Blink Off Off Power switch is turned off 1 2 3 4 5 6 7 8 No Name Description Turns the display on off MUTE Disables the audio INPUT Opens the input source menu Increases the volume Opens the selected item or confirms a selection in the OSD or input source menu Decreases the volume Returns to the previous page in the OSD...

Страница 16: ...wer supplied from the AC IN port RJ45 Connects with a local network using a standard Ethernet cable PC LINE IN Connects with the VGA video source via a 3 5mm cable to receive audio from the device DVI DVI D IN Connects with devices transmitting video using the DVI D interface VGA IN Connects with devices transmitting video using the VGA interface AUDIO OUT Connects with an external audio device su...

Страница 17: ...a device to transfer data RS232 IN Connects with the serial I O output connector of a device to receive data USB2 0 Connects with a USB 2 0 flash drive to play media files stored on the drive USB2 0 MICRO SD Accepts microSD cards to play media files stored on the card IR OUT Connects with an external A V device through an IR extension cable to transfer signals from the IR sensor IR IN Connects wit...

Страница 18: ...ave no function The blue button turns on off the backlight of the display NORMAL Returns to normal operation after setting display ID ID Sets display ID if you need to control several displays in a daisy chain FORMAT Adjusts the zoom level Returns to the previous page in the OSD menu or apps INFO Indicates through which interface your media content is being played and displays the resolution Displ...

Страница 19: ...remote control sensor window is exposed to direct sunlight or strong light the remote control may not operate properly In this situation change the light source readjust the angle of the display or operate the remote control from a location closer to the display s remote control sensor window 1 Press and flip open the battery compartment cover 2 Insert two AAA batteries into the battery compartmen...

Страница 20: ...inserted and firmly seated Connecting the digital inputs To use the DVI interface 1 Connect the DVI DVI D IN jack on the display to the DVI output jack on a com puter using a DVI D cable 2 Connect the computer s audio output jack to the PC LINE IN jack on the display using a suitable audio cable 3 Press INPUT and then select DVI D from the input source menu To use the HDMI interface 1 Connect the ...

Страница 21: ...Connection 16 0 1 0 1 8 2 287 9 1 5 3 1 1 9 1 4 0 1 86 86 0 52 6 56 287 56 1 5 1 5 287 4 9 4 HDMI cable Audio cable DVI D cable Computer ST6502S ST7502S ST8602S ...

Страница 22: ...play to the VGA output jack on a computer using a D Sub 15 pin cable 2 Connect the computer s audio output jack to the PC LINE IN jack on the display using a suitable audio cable 3 Press INPUT and then select VGA from the input source menu Audio cable Computer D Sub 15 pin cable ...

Страница 23: ...Connecting the multimedia inputs To play multimedia files stored on the USB flash drive insert the USB flash drive into the USB2 0 port USB flash drive USB 2 0 standard spec is 0 5A and USB 3 0 standard spec is 0 9A ...

Страница 24: ...cord and outlet illustrated may differ from the ones used in your region Only use an appropriate power cord for your region Never use a power cord which appears damaged or frayed or change the plug type on the power cord Be aware of the power loading when you use extension cords or multiple outlet power boards There are no user serviceable parts in this display Never unscrew or remove any covers T...

Страница 25: ...t an input source The display s standby mode still consumes power To completely cut off power supply set the Power switch to OFF and then disconnect the power cord from the power outlet Only when the power switch is set to on the power button on the rear panel and the power button on the remote control will work To turn on or off the display press the power button on the rear panel or power button...

Страница 26: ... press or to scroll up or down 2 Press or to scroll up or down 3 Press to confirm selections 3 Press OK to confirm selections 4 Press or to adjust settings and press to confirm changes Press to return to the previous page 4 Press and to adjust settings and press OK to confirm changes Press to return to the previous page 5 Press MENU to close the OSD menu 5 Press to close the OSD menu ...

Страница 27: ...main screen will appear on the display To configure the display press on the remote control or MENU on the rear panel of the display to open the OSD menu Refer to OSD menu operations on page 26 for more information If it is the first time to power on the display the main screen will appear after the boot on process is finished If Boot on source is set to any video input sources via the DVI DVI D I...

Страница 28: ... display to a local network via an RJ45 cable 2 On the main screen select Settings 3 Go to Network Internet Ethernet If you are in a DHCP environment enable Ethernet and the display will be connected to the Internet automatically If you are in a non DHCP environment enable Static IP and then manually set the IP Address Gateway Netmask DNS 1 and DNS 2 To find the MAC address in operating system of ...

Страница 29: ...ore information about the wireless adapter 1 Install a wireless adapter to the display 2 On the main screen select Settings 3 Go to Network Internet Wi Fi 4 Enable Wi Fi The available networks will appear on the screen 5 Select the wireless network you want to connect to 6 Follow the on screen instructions to input the password and connect the display to the wireless network ...

Страница 30: ...g to the Internet USB update Copy the update file to the root of a FAT32 format USB drive Make sure the file name is update_signed zip Insert the USB to the display and the system will prompt a message for confirmation If the message does not show up select USB Update to start update detection Select Start Update to initiate update process Software update process may take some time to complete Dur...

Страница 31: ... the DVI IN and VGA IN port Noise reduction Reduces electrical image noise caused by different media players Off Low Medium High This option is not available for the input via the DVI IN and VGA IN port Gamma selection Adjusts the mid tone contrast of the display Native 2 2 2 4 s gamma D image Color temperature Adjusts the color temperature of the display 3000K 4000K 5000K 6500K 7500K 9300K 10000K...

Страница 32: ...5 Smart power Adjusts the power consumption based on the brightness of the display automatically Off No adjustment Medium 80 of power consumption relative to the brightness High 65 of power consumption relative to the brightness Overscan Enlarges the image displayed on the screen Off On Picture reset Resets all settings in Picture menu to factory settings CANCEL Reset Menu Description ...

Страница 33: ...ource 0 to 100 Clock phase Adjusts the clarity of the video from the VGA IN input source 0 to 100 Zoom mode Sets the zoom level Full 4 3 Real Auto adjust Enables Auto adjust to optimize the video from the VGA IN input source CANCEL OK Screen reset Resets all settings in the Screen menu to factory settings CANCEL Reset Picture Screen Audio Configuration 1 Configuration 2 Advanced option H position ...

Страница 34: ...l type Analog Select Analog if your computer or external A V device is connected to the VGA IN port of the display Digital Select Digital if your computer or external A V device is connected to the DVI DVI D IN HDMI1 IN HDMI2 IN or HDMI3 IN port of the display Audio reset Resets all settings in Audio menu to factory settings CANCEL Reset Audio Out Sync Synchronizes the volume of the internal speak...

Страница 35: ...enu RS232 routing Sets the RS232 routing path RS232 RS232 commands are transmitted via the RS232 IN and RS232 OUT port LAN RS232 RS232 commands are transmitted via the RJ45 port Boot on source Sets the input source that the display automatically opens to when powered on Input Sets the input source when booting up Playlist Selects playlist when booting up WOL Allows the display to be turned on by a...

Страница 36: ...nds Logo Turns on off the boot on logo of the display Off On User Monitor ID Gives a unique ID to a display or creates a group of displays so that you can control the display via the RS232 connection Monitor ID 1 to 255 Monitor group 1 to 254 Heat status Indicates the temperature inside the display Monitor information Lists the display s model name serial number operating hours and the current sof...

Страница 37: ...f the displays Primary Designates a display as the primary display Only the primary display will receive the commands from the remote control Secondary Designates a display as the secondary display The secondary display will not accept any commands from the remote control but the RS232 commands from the primary display To unlock press and hold INFO on the remote control for 6 seconds Power LED Lig...

Страница 38: ...ACS H monitors Sets how many columns of display there are for the video wall 1 to 15 V monitors Sets how many rows of display there are for the video wall 1 to 10 Position Sets the display position in the video wall Frame comp Removes a small amount of graphical data for each display so that all displays can operate as one large canvas to display video content Off On Enable Check to enable the til...

Страница 39: ...ects the input source automatically Off All Failover If several input sources are connected simultaneously the detection priority is HDMI1 IN HDMI2 IN HDMI3 IN and DVI DVI D IN Language Sets the language of the OSD menu OSD transparency Adjusts OSD transparency Off 1 to 100 Power Save Sets the display to enter the power saving mode when there is no signal detected Advanced option reset Resets all ...

Страница 40: ...I1 IN HDMI2 IN or HDMI3 IN port the main screen may not appear after the display is turned on You can press on the remote control and then select Android to open the main screen Application Name Description X Sign Serves as a digital signage content management system that provides multiple templates and remote scheduling through the Internet Refer to X Sign on page 37 for more information File Man...

Страница 41: ...eeting Gives you access to instant or scheduled group meetings with any other TeamViewer Meeting users Firefox Allows you to view websites WPS Office Allows you to read PDF files or edit files created in Microsoft Office PowerPoint or Excel Refer to WPS Office on page 41 for more information TeamViewer QuickSupport Allows technicians to provide remote technical assistance Settings Allows you to ma...

Страница 42: ...te content with X Sign Designer on their PCs or laptops and then import the file to the display through the USB flash drive The content will be played automatically X Sign Designer can be downloaded from BenQ website Please refer to the postcard in the accessory pack for the download instructions ...

Страница 43: ... code 5 Enter the connect code shown on the upper right corner of the display or you can also find the connect code in Setting 6 Once the mobile device has successfully connected to the display a confirmation message will appear on the display Select Allow on the display to confirm the connection 7 Once connected you can Mirror the display s screen on your mobile device by tapping Screen Mirroring...

Страница 44: ...ystem interface 39 You can also select Setting in the lower right corner of the display to modify the settings for InstaShare such as the InstaShare ID name connect code or mirroring confirmation message ...

Страница 45: ...category on the left panel to browse the suggested apps Select an app from the selected category to view the basic description of the app Function Description Search Searches for an app Education Opens the recommended app list in the Education category Corporation Opens the recommended app list in the Corporation category Exit Closes BenQ Suggests ...

Страница 46: ...r the display s internal memory an external storage device or cloud storage 2 Select the function menu on the top panel to access the file format s various functions Function Description Open Allows you to browse and open a file Share Allows you to share your files through email or other sharing applications Manage Allows you to edit or manage the document The description is for a PowerPoint file ...

Страница 47: ...r audio Transitions Allows you to apply or adjust the timing of a transition Pen Allows you to write draw paint or sketch Play Allows you to Select to start a slideshow Save As Allows you to save the presentation file on either the display s internal memory an external storage device or cloud storage Undo Allows you to undo an action Redo Allows you to redo the last action Close Allows you to clos...

Страница 48: ...ported Office versions 97 2000 XP 2003 2007 2010 Supported Office software formats Office Software Supported File Formats Word wps wpt doc docx dot dotx txt log irc c cpp h asm s java asp bat bas prg cmd Excel et ett xls xlsx xlt xltx csv xlsm xltm PowerPoint ppt pptx ...

Страница 49: ...lowing options Menu Description Browse Allows you to search for and play individual media files Refer to Browse on page 45 for more information Play Allows you to play your playlists Refer to Play on page 46 for more information Compose Allows you to create or edit playlists for your media files Refer to Compose on page 47 for more information Settings Allows you to set the audio or video effects ...

Страница 50: ...is selected from the location it will begin playing Menu Description Internal Searches for files from the internal storage of the display USB Searches for files from a USB flash drive connected to the display through the USB2 0 port at the left side of the display SD card Searches for files from a microSD card inserted into the TF port at the left side of the display ...

Страница 51: ... to play You are allowed to create up to 7 playlists for your media files Refer to Compose on page 47 for more information The Play menu only allows you to play playlists If you want to play an individual media file only use Browse to search for the media file and then play it directly Refer to Browse on page 45 for more information ...

Страница 52: ...ia files or edit an existing playlist Creating Editing a Playlist If you select an empty field a message requesting you select where your files are located will appear Select where your files are stored and start creating the playlist If you select an existing playlist a message checking whether you want to edit or remove the playlist will appear Select Edit to edit the playlist ...

Страница 53: ... file press To see the file s information press To open the toolbar press Refer to Toolbar on page 48 for more information Toolbar Compose provides various tools to help create or edit your playlists Press on the remote control to open the toolbar Menu Description Playlist Displays the files in the playlist Source Displays the files in the internal storage Menu Description Select all Selects all f...

Страница 54: ... files in the playlist Add Remove Adds a file into the playlist or removes a file from the playlist Sort Prioritizes the play sequence of the files in the playlist Save Abort Saves or aborts the playlist Back Closes the toolbar Menu Description ...

Страница 55: ...the slideshow of your photos Right to left Fold Corner None Effect Duration Sets the duration for the selected transition effect for photo slideshows 5s 10s 15s 20s Software decode Allows the system to decode the next video file in advance so that your video content can be played seamlessly Enable Disable Autoplay Allows you to automatically play photos audio files or video files stored on a USB f...

Страница 56: ... 1080 30 fps 50 Mbps Audio Codec Sampling Rate Channel Bit Rate MPEG 1 2 2 5 Layer 3 8 KHz 48 KHz 2 8 Kbps 320 Kbps MPEG 1 2 Layer 1 16 KHz 48 KHz 2 32 Kbps 448 Kbps MPEG 1 2 Layer 2 16 KHz 48 KHz 2 8 Kbps 384 Kbps AAC HEAAC 8 KHz 48 KHz 5 1 AAC LC 12 Kbps 576 Kbps V1 6 Kbps 288 Kbps V2 3 Kbps 144 Kbps Image Photo Resolution JPEG base line 1920 x 1080 progressive 1024 x 768 PNG non interlace 1920 ...

Страница 57: ...S 0 4296 x 0 4296 ST8602S 0 4935 x 0 4935 Frame Rate 60 Hz Native resolution pixels UHD 3840 x 2160 Active Area mm ST4302S 941 2 x 529 4 ST5502S 1209 6 x 680 4 ST6502S 1428 5 X 803 5 ST7502S 1649 7 x 927 9 ST8602S 1894 0 x 1066 0 Brightness cd m2 typical 400 nits Contrast typical ST4302S 1200 1 ST5502S 1300 1 ST6502S 1200 1 ST7502S 1200 1 ST8602S 1200 1 Response time ms typical ST4302S 8 ST5502S 9...

Страница 58: ...2S ST8602S Audio Audio W Amp 10W x2 Internal speaker O Power Supply 100 240 V AC 50 60 Hz ST4302S 1 5A ST5502S 2 5A ST7502S 5 5A ST7502S 5 5A ST8602S 6 5A Consumption Max ST4302S 110W ST5502S 134W ST6502S 170 W ST7502S 200 W ST8602S 360 W Consumption Standby 0 5W Environment Operating Temperature 0oC 40oC Operating Humidity 10 80 RH Non Condensing Storage Temperature 20o C 60o C Storage Humidity 1...

Страница 59: ...ess enhancement O 10 bit color processing O Source volume control O HDMI HDCP 2 2 Internal Temperature Sensor O CEC Control O FW Update USB OTA RTC Function O Specifcations and functions are subject to change without notice Item ST4302S ST5502S ST6502S ST7502S ST8602S System System Memory 3 GB Storage 16 GB OS Android 8 0 OS This Android 8 0 operating system is not standard Android so access to Go...

Страница 60: ...Product information 55 Dimensions ST4302S Unit mm ...

Страница 61: ...Product information 56 ST5502S Unit mm 287 1 287 1 23 1 1 23 1 1 7 9 5 7 9 5 02817 6 5 7 5 37 0 PP ...

Страница 62: ...Product information 57 ST6502S Unit mm 287 1 287 1 PP PP 02817 6 5 7 5 0 PP 23 1 1 23 1 1 7 9 5 7 9 5 0 1 0 1 8 2 287 9 1 5 3 1 1 9 1 4 0 1 86 86 0 52 6 56 287 56 1 5 1 5 287 4 9 4 ...

Страница 63: ...KNESS 280 87mm 400mm 745 23mm 100mm 100mm 51 37mm 100mm 600mm 541 73mm 541 73mm 1 9 4 176 4 104 104 84 4 4 72 4 4 72 2 8 2 8 IO Side IO Bottom 95 3mm HDMI3 IN USB2 0 USB2 0 MICRO SD RS232 OUT RS232 IN IR IN IR OUT HDMI1 IN HDMI2 IN AUDIO OUT DVI D IN RJ45 PC LINE IN VGA IN Q40G1001 813 79A Q40G1001 813 80A HDMI3 IN USB2 0 USB2 0 MICRO SD RS232 IR IN IR OUT IN RS232 OUT HDMI1 IN HDMI2 IN AUDIO OUT ...

Страница 64: ...Product information 59 ST8602S Unit mm 287 1 287 1 PP 23 1 1 7 9 5 7 9 5 23 1 1 02817 6 5 7 5 0 PP 0 1 0 1 8 2 287 9 1 5 3 1 1 9 1 4 0 1 86 86 0 52 6 56 287 56 1 5 1 5 287 ...

Страница 65: ... x 1050 60Hz 1920 x 1080 60Hz 3840 x 2160 30Hz 3840 x 2160 60Hz HDMI 2 0 only Resolution Video Timing non PC device Input source HDMI 1 4 2 0 640 x 480 P 59 94 60Hz 4 3 720 x 480 P 59 94 60Hz 4 3 720 x 480 P 59 94 60Hz 16 9 720 1440 x 480 I 59 94 60Hz 4 3 720 1440 x 480 I 59 94 60Hz 16 9 720 x 576 P 50Hz 4 3 720 x 576 P 50Hz 16 9 720 1440 x 576 I 50Hz 4 3 720 1440 x 576 I 50Hz 16 9 1280 x 720 P 59...

Страница 66: ...0 x 1080 60Hz HDMI 2 0 only 3840 x 2160 P 59 94 60Hz HDMI 2 0 only 3840 x 2160 P 29 97 30Hz HDMI 2 0 only 3840 x 2160 P 23 98 24Hz HDMI 2 0 only 3840 x 2160 P 50Hz HDMI 2 0 only 3840 x 2160 P 25Hz HDMI 2 0 only 3840 x 2160 30Hz HDMI 2 0 only supported Blank not supported Resolution Video Timing non PC device Input source HDMI 1 4 2 0 ...

Страница 67: ...se the Auto adjust function to let the display automatically optimize the display of computer image or manually adjust the H Position V position Clock and Clock phase for the input image Refer to Screen on page 28 for more information The control panel buttons do not work Have you locked the control panel buttons Unlock the buttons and try again The remote control does not work Have you locked the...

Отзывы: