BENETEAU SWIFT TRAWLER 42 Скачать руководство пользователя страница 1

SWIFT TRAWLER 42

Code: 087851

Index C

Owner's Manual

Содержание SWIFT TRAWLER 42

Страница 1: ...SWIFT TRAWLER 42 Code 087851 Index C Owner s Manual ...

Страница 2: ......

Страница 3: ...plished sailor Even when your boat has been adapted for them the sea and wind conditions corresponding to the design categories A B C and D may vary ranging from severe conditions to strong storms subject to the risks of exceptional waves and gusts of wind this meaning they are dangerous conditions in which only an experienced fit and well trained crew manoeuvring a well maintained boat can sail i...

Страница 4: ......

Страница 5: ... of the sea The boat shall not be loaded more with than the maximum load recommended by the builder in particular the total weight of the food supplies of the different equipment that are not supplied by the builder and of the persons on board The weight of the boat shall be properly distributed The stability is reduced when you add weight in the upper parts In case of heavy weather the hatches lo...

Страница 6: ... designed in accordance with the ISO 10240 standard requirements it has a general purpose and it may sometimes list some equipment or accessories or deal with some points or questions that are not relevant to your own boat The different warnings used throughout this guide are broken down as follows DANGER Indicates the existence of a serious inherent danger with a high risk of death or serious inj...

Страница 7: ...3 Introduction HISTORY OF UPDATES Index A 10 2008 Index B 01 2010 Index C 09 2010 ...

Страница 8: ......

Страница 9: ...on 7 General specifications 13 Safety 31 Hull 35 Deck 45 Steering system 49 Interior 55 Water and sewage water 77 Electrical equipment 103 Engine 121 Launching 125 Winter Storage Personal notes 1 2 3 4 5 6 7 8 9 10 10 11 11 ...

Страница 10: ......

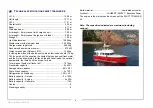
Страница 11: ...7 General specifications Technical specifications Certification Design category Your boat 1 ...

Страница 12: ...per adult the supplies the liquids that can be used fresh water and fuel in fixed completely full tanks the additional loads the optional equipments the liferaft and the scope for load Total mass of liquids all tanks full 1 975 kg Freshwater capacity 2 x 320 l Sewage water capacity 85 l 50 l Fuel oil tank capacity 2 x 750 l Refrigeration unit capacity 130 l 42 l Battery capacity Service 2 x 140A B...

Страница 13: ... 14 persons D 16 persons Design category Wind force Beaufort scale Significant height of waves to be conside red in metres H 1 3 Vessel designed for navigation A At high sea B In open sea C Near to the coast D In sheltered waters Over 8 Up to and including 8 Up to and including 6 Up to and including 4 Over 4 Up to and including 4 Up to and including 2 Up to and including 0 3 1 ...

Страница 14: ...ant wave height up to 2 m see Note 1 below You may meet with such conditions in exposed inland waters in estuaries and in coastal waters with moderate weather conditions Category D In sheltered waters This craft is designed to operate in winds up to Beaufort force 4 and the associated wave heights occasional maximum waves of 0 5 m height Such conditions may be encountered in sheltered inland water...

Страница 15: ...ANCE Tèl 33 0 2 51 60 50 10 http www beneteau com Your boat Name of the owner Address Telephone email Name of the boat Delivery date Registration number Serial number C I N Entrance door key n Telephone N Address to be contacted in case of emer gency Engine type Serial number Engine key number ...

Страница 16: ......

Страница 17: ...13 Safety Safety Equipment General information Gas system Recommendations for gas Fight against fire Bilge pump system Instructions in the event of steering gear failure 2 ...

Страница 18: ...UIPMENT REF Designation 1 Position of swimming ladder means of coming back onboard 2 Position of the liferaft not supplied Swimming ladder Reference 1 Closed position Position of the liferaft Reference 2 2 1 Safety ...

Страница 19: ...s indicated in the chapter Specifications The total weight of the persons and equipment must never exceed the maximum load recommended by the manufacturer Use the seats provided ADVICE RECOMMENDATION When sailing never padlock or lock the liferaft locker Before putting to sea carefully read the launching instructions shown on the liferaft Close the deck hatches and portholes before each trip inclu...

Страница 20: ...16 GAS SYSTEM LOCATION Note Same position for the other layouts REF Designation 1 Cooker Oven 2 Supply valve gas 3 Compartment Gas cylinder 4 Gas system 1 2 2 3 4 Safety ...

Страница 21: ...RSIONUSA 1 Cooker Oven 2 Valves 3 Compartment Gas cylinder 5 Regulator valve 6 Tap to turn off the gas 7 Gas cylinder 1 Regulator valve 12 V 2 Gas cylinder 3 Drain 4 Stuffing box 5 PVC girdled sleeve 6 Electromagnetic valve 12 V 7 Pipe propane plastic 2 6 7 4 5 3 2 1 ...

Страница 22: ...18 POSITION OF GAS BOTTLE The valve is located under the kitchen cupboard Compartment Gas cylinder 6 Open valve 7 Closed valve A pictogram helps to locate it easily Safety ...

Страница 23: ...ore you use it again The appliances use the oxygen of the cabin and release combustible gases Ventilate your boat when using appliances Don t obstruct the air vents and at least leave the door open Don t use the oven or stove as back up heaters Lock the stove oven when being not used in order to avoid damaging the tubes when sailing Never obstruct the fast access to the components of the gas syste...

Страница 24: ...doors A pictogram helps to locate it easily 1 Location of fixed extinguishers fitted 2 Extinguisher remote pull switch 3 Position of portable extinguishers not supplied Procedure to exit through the forward cabin deck hatch 1 Lift up the forward cabin mattresses and put them to the outer sides 2 Take hold of the wooden step between the lathes 3 Pull the step upwards until the locks clip into the v...

Страница 25: ...te or have been used To tell the crew where the extinguishers are and how they work the position of the remote fixed extinguisher control where the emergency exits are Make sure the extinguishers can be reached easily when people are on board Make sure that the ventilation openings in the engine and generator if installed compartment are well cleared Keep the bilge clean Regularly check that there...

Страница 26: ......

Страница 27: ...ity DANGER There may be danger of fire or explosion if direct or alternating current systems are incorrectly used Refer to chapter Electricity WARNING Do not obstruct the ways to the emergency exits Do not obstruct the safety controls fuel oil valves gas valves power switches Do not block the extinguishers placed on shelves Do not leave the vessel unattended when a cooker or heater is in use Do no...

Страница 28: ...24 POSITION OF ENGINE AND GENERATOR SUPPLY VALVES Remote valve shut off controls Reference 2 Supply valve fuel On tanks Reference 1 1 Joining generator 2 Valves supply fuel 12 13 1 1 2 2 Safety ...

Страница 29: ...FIRE IN THE ENGINE COMPARTMENT BILGE Stop the engine Switch off power and stop fuel supply Block off the air supply from the air inlets and outlets of the engine Activate the remote extinguisher pull switch Wait Open the access hatches and repair 2 ...

Страница 30: ...26 USE OF THE MANUAL BILGE PUMP Location Operation Capacity 40 5 litre minute Safety ...

Страница 31: ... the 12V service circuit To enable operation the 12V circuit must be activated by turning on the battery switches Forward electrical bilge pump Location Under the companionway Capacity 15 litre minute WARNING The bilge pump system is not designed to provide buoyancy to the boat in case of damage The bilge pump system is designed to drive out the water being either sea spray or leaks but absolutely...

Страница 32: ...mpartment and engine compartment MANUAL BILGE PUMP The manual bilge pump is in the cockpit The control arm of the pump shall be kept accessible whatever the circumstances Aft electric bilge pump Location Starboard cockpit locker Capacity 15 litre minute Safety ...

Страница 33: ...works on the difference in drive between the port and starboard engines difference in throttle and or forward aft 1 Draining pump for shower 2 Electric bilge pump 3 Filters 4 Manual bilge pump suction 5 Electric bilge pump suction 6 Electric bilge pump 7 Electric bilge pump draining 8 Draining of manual bilge pump 2 1 2 3 4 5 6 8 7 ...

Страница 34: ......

Страница 35: ...31 Hull Maintenance of the Hull Lifting 3 ...

Страница 36: ...32 LIFTING Wetted area 48 m Hull ...

Страница 37: ...done with a high pressure hose The water temperature must not exceed 15 C The water pressure must not exceed 150 bars The distance between the hose nozzle and the hull must not be less than 10 centimetres Follow the supplier s instructions very closely when applying the anti fouling paint All these hull maintenance operations can be carried out by your dealer Before applying anti fouling paint nev...

Страница 38: ......

Страница 39: ...35 Deck Navigation Deck Layout Stability Prevention of man overboard Mooring lines Towing ground tackle Maintenance of the Deck 4 ...

Страница 40: ...6 NAVIGATION DECK LAYOUT A Mooring cleats Jack lines to be fixed to the mooring cleats not supplied B Towing at the bow to be towed at the stern to tow C Swimming ladder means of coming back onboard Deck ...

Страница 41: ...g your boat Always manoeuvre your boat using the engine Make allowance for the current and wind when you handle your boat Protect your boat to the highest degree with suitably sized fenders Always keep the mooring ropes unfouled and stored away Handle your boat at a reduced speed Pass warps through the fairleads provided for this purpose AFTER MOORING Protect the mooring lines against chafing with...

Страница 42: ...siton Holding magnet with door in open position Cargo boom Flying bridge bimini top Access to fly deck by cockpit ladder Opening Deck hatches Opening Portlight Jamming the door window when sailing Gangway side door in open position when sailing it is essential to fix the hook to secure the door Deck ...

Страница 43: ...INDLASS Start the boat engines running Check that the electrical supply of the windlass is switched on battery switch circuit breaker Use the remote control to activate the windlass in lowering mode Let the chain feed out by keeping the lowering button on the remote control pressed down Let the chain out while moving backwards slowly and as straight as possible Once the anchor snags make it fast b...

Страница 44: ... 4 Mooring locker 5 Windlass control upward Companionway 6 Handle 7 Handle position 8 Smooth gypsy head 9 Chain lifter 10 diameter 10 Clinch 11 Fender storage Windlass control Inside wheelhouse Flying bridge Location Windlass circuit breaker 100A Under the companionway Battery switch panel Deck ...

Страница 45: ...anchor completely Visually check the last meters till the anchor gets into contact with the davit If you just change berth check the position of the anchor on the stem fitting For sailing store the anchor in the chain locker or fasten the anchor to its roller For electrical windlasses cut off the power supply as soon as the anchor has been lifted Secure the anchor on the bow roller STERN ANCHORING...

Страница 46: ......

Страница 47: ... scratches Consult your dealer concerning deep scratches EXTERIOR CUSHIONS Bring the removable cushions inside washed with soapy water then dried when the vessel is unoccupied STAINLESS STEEL Stainless steel is not incorruptible and requires a minimum of upkeep The use of chrome tools is preferable whenever handling stainless steel Re nourish the protective film regularly with passivation paste co...

Страница 48: ......

Страница 49: ...45 Steering system Steering Gear 5 ...

Страница 50: ...46 STEERING GEAR General layout 1 Stock 2 Steering connecting rod 3 Steering pump 4 Tiller angle indicator 5 Position for pilot option 6 Steering piston 7 Connecting rod Steering system ...

Страница 51: ... maintenance WARNING Learn how to judge the necessary distance of deceleration for the vessel to come to a complete stop Refer to chapter 2 Safety for use of the emergency tiller The reverse gear is not a brake WARNING The steering system is a feature of sailing safety and for this reason must be verified at least once a year ADVICE RECOMMENDATION The emergency tiller is designed only to be able t...

Страница 52: ...48 ACCESS TO ELEMENTS ENGINE COMPARTMENT Steering pump Steering components Steering system ...

Страница 53: ...49 Interior Introduction Interior maintenance Maintenance of fabrics 6 ...

Страница 54: ...50 INTRODUCTION Interior ...

Страница 55: ...ter mixed with a degreasing shampoo Polish the interior varnishing with a chamois leather MAINTENANCE OF FABRICS STAIN REMOVAL Dab with a clean rag Remove the stain with a solvent poured onto a clean rag Never pour the solvent directly over the stain Rub with a clean and dry rag Brush the fabric against the grain Use the vacuum cleaner when the fabric is dry PVC OR COATED FABRICS Use a sponge and ...

Страница 56: ...52 Sink Hot plate Seating removable Saloon Stowage double berth saloon Door locking from the inside Locking the washroom door Interior ...

Страница 57: ...cream for ordinary care Do not use detergent Do not use silicone based products Clean with a sponge and soapy water Remove ball point pen marks with methylated spirit Remove the grease stains with an absorbent powder e g talcum powder 6 ...

Страница 58: ......

Страница 59: ...55 Water and sewage water Water tanks Water system Distribution Water system Drainage Sewage 7 ...

Страница 60: ...56 WATER TANKS LOCATION REF Designation 20 Vent hole 21 Deck filler 22 Collector 23 Supply valve Water 24 Water unit 0566 47 A 0 56 64 7 A 20 21 20 21 22 23 24 Water and sewage water ...

Страница 61: ...der to prevent any over pressure in the systems Water tanks capacity 2 x 320 litre Location Cockpit locker Deck filler Location Gauge WARNING The tanks nominal capacity cannot be fully used due to the load and the need to maintain the correct trim A 20 reserve should be kept ADVICE RECOMMENDATION Pay attention to the quality of the water for the filling up Check if it is drinking water It is possi...

Страница 62: ...58 PLUMBING BOARD Location Under the companionway REF Designation 1 Filters 2 Supply valve Water 3 Water pump 12V 4 Accumulator tank 5 Water heater 220 V 42 l Water and sewage water ...

Страница 63: ......

Страница 64: ...asin 10 Distribution hot water cold water Galley sink 11 Distribution hot water cold water Forward washbasin 12 Collectors 13 Distribution hot water cold water Cockpit shower spray 14 Distribution hot water cold water Flying bridge 0566 47 A 05 66 47 A 9 10 11 12 13 14 Water and sewage water ...

Страница 65: ... mixer WARNING To avoid freezing during very cold spells and or winter storage bleed the cockpit shower hose and seawater deck wash pump water systems PRECAUTION Never operate the water system equipment when the valve is closed or the tank is empty the electrical equipment may be damaged Monitor the condition of the seawater filter Close the taps of empty tanks ...

Страница 66: ...62 WASHING DECK SEA WATER Location under the bed forward cabin 1 Seawater pump 2 Filter 3 Seawater inlet Water and sewage water ...

Страница 67: ......

Страница 68: ...RE FRESHWATER SUPPLY Selection valve Shore fresh water On board water circuit Location Under the companionway WARNING Before leaving the vessel you must turn off the shore water supply Water and sewage water ...

Страница 69: ......

Страница 70: ...EM DRAINAGE WASTE WATER REF Designation 15 Kitchen sink drain 16 Washbasin draining aft 17 Shower draining circa filter 18 Vent hole 19 Draining pump for shower 20 Vent hole 15 16 17 18 19 20 Water and sewage water ...

Страница 71: ...mp with a sponge The tanks nominal capacity cannot be fully used due to the load and the need to maintain the correct trim WARNING The tanks nominal capacity cannot be fully used due to the load and the need to maintain the correct trim A 20 reserve should be kept ADVICE RECOMMENDATION Regularly check the valves and thru hull seacocks for proper operation and watertightness Turn off the valves whe...

Страница 72: ...shbasin aft washroom Shower tray draining Shared drain hole 2 head compartments Washbasin draining Fore washroom Draining pump for shower Under the companionway Control shower draining Kitchen sink evacuation through hull shower Starboard cockpit locker Water and sewage water ...

Страница 73: ... the pump To avoid blocking the toilets only use absorbent paper in reasonable quantities Schedule a regular rinsing through of the heads with fresh water Close the valves after each use in particular when the boat is unattended WC evacuation to sea ADVICE RECOMMENDATION When you are in a marina use the club house sanitary facilities if there are Since it is prohibited to discharge sewage water in...

Страница 74: ...or in zones where it is forbidden Make use of the port or marina pump facilities to drain the sewage tank before leaving port Find out the international regulations against marine pollution Marpol and follow them as far as possible Electric toilet forward Seawater pump filter Control Electric toilet 1 Seawater inlet 2 WC evacuation to sea 1 Rinsing out the bowl 2 Water filling to the left and bowl...

Страница 75: ......

Страница 76: ...GRAM Deck or sea evacuation Deck only evacuation 1 Deck filler Suction and Rinsing 2 Tank vent hole 3 Thru hull seacock 1 WC 2 Seawater inlet 4 Sewage tank 5 Closing cap 6 Vent hole 7 Deck filler Intake Rinsing off Water and sewage water ...

Страница 77: ...er Capacity of sewage tank standard 85 litre additional 50 litre WC evacuation Deck Location Filler cap Passageway Port side WARNING The tanks nominal capacity cannot be fully used due to the load and the need to maintain the correct trim A 20 reserve should be kept WARNING Ask for information about the laws in force in your country or your marina about discharging your waste waters into the sea P...

Страница 78: ...basin draining forward 13 Lead lines Electronic 14 Drainage Fly 15 Manual bilge pump 16 Intake strainer Forward electrical bilge pump 17 Intake strainer Aft electric bilge pump 18 Engine exhaust 19 Aft electric bilge pump 20 Forward electrical bilge pump 21 Drainage Washer 22 Drainage Sewage tank 23 Drainage Dishwasher 24 Intake AC Saloon 25 Intake AC Cabins Forward and aft 26 Water intake for gen...

Страница 79: ...75 Water and sewage water 7 ...

Страница 80: ......

Страница 81: ...77 Electrical equipment General information 12 V DC system 110 220 V AC system Equipment Electronic 8 ...

Страница 82: ......

Страница 83: ...ify the specifications of power overload protection devices Never modify an installation Use the services of a qualified marine electricity technician Never install or replace the electric appliances or any electric equipement by components exceeding the capacity amperage of the circuit Watt for bulbs Do not leave the vessel unattended when the electrical system is switched on Certain lights repre...

Страница 84: ...80 MAIN ELEMENTS SCHEMATIC DIAGRAM ELECTRICAL CIRCUIT 12 V Electrical equipment ...

Страница 85: ...81 Electrical equipment 8 ...

Страница 86: ...ctric windlass 25 Dishwasher 7 Fridge 26 Ice maker 8 Hifi 27 Washer 9 Water heater 28 Air conditioning 10 Batteries 11 Engine compartment ventilator 30 Video Hifi forward cabin 12 Aft bilge pump 31 Electric toilet 13 Demister 14 Water unit Windlass circuit breaker 33 Cool box Flying bridge 15 Forward bilge pump 34 Deck searchlight 16 Shore power socket 220V 35 Stern thruster 17 Shore power socket ...

Страница 87: ...reen wiper 2 Switch wiper Central 3 Switch of starboard windscreen wiper 4 Switch of windscreen washer 5 Switch of demister 6 Switch of windlass electrical 7 Anchor light switch 8 Switch navigation lights 9 Switch water unit 10 Switch of forward bilge pump 11 Switch of aft bilge pump 12 Switch of horn 13 Navigation electronics switch 14 Switch Deck searchlight 15 Switch Auto pilot 8 ...

Страница 88: ...ion Engine compartment Starboard The demister works off the port engine cooling system It only heats when the port engine is warm and running Filling Windscreen washer liquid Cockpit locker Demister outlets on the windscreen Electrical equipment ...

Страница 89: ......

Страница 90: ...wheelhouse Control Wheelhouse Flying bridge Nozzle Fuse 400A Engine compartment Operation Control Wheelhouse flying bridge The thruster operates on the port engine battery set 1 Master operation relay 2 Bow thruster motor Control Inside wheelhouse Electrical equipment ...

Страница 91: ......

Страница 92: ...88 REVOLVING DECK SEARCHLIGHT Horn Location Location The green light indicates that the control is under power WARNING Refer to the apparatus instructions for use and maintenance Electrical equipment ...

Страница 93: ...nboard is 12V DC The batteries supply power to all the functions on board The engines have their own battery Provide electricity to the system by turning on the positive and negative battery switches Location Engine compartment WARNING Never work on a live electric fitting Do not touch battery terminals risk of electric shock PRECAUTION Switch off the electrical system with the battery switches wh...

Страница 94: ...e terminal Common Activate the locking switch It enables inactivation of the battery switch controls The green indicator lights up the switch and on all the battery switch control indicators This indicates that control of the battery breakers is enabled Operate the push button The battery indicator light comes on Red The battery switch is turned on To open the battery switch push once more on the ...

Страница 95: ...WITCH LOCATION ENGINE COMPARTMENT 1 Battery switch Positive Service 2 Battery switch Negative terminal Common 3 Battery switch Starboard engine 4 Battery switch Port engine WARNING Turn off the electric battery switches before leaving the vessel ...

Страница 96: ...ler control relay 10A 5 Breaker Horn 15A 6 Breaker Electric battery switch controls 10A Saloon cupboard Port aft 1 Breaker Interior lighting 15A 2 Available 10A 3 Breaker Socket 12V 10A 4 Electromagnetic valve for gas US 10A 5 Power for seawater pump sink pump 10A 6 Breaker Hifi 10A 7 Supply Fridge flying 15A 8 Breaker Fridge Wheelhouse 15A 9 Available 10A 10 Available 10A Electrical equipment ...

Страница 97: ...0A 6 Breaker Mooring light 10A 7 Breaker Navigation lights 10A 8 Breaker Water unit Pump Shower draining 10A 9 Breaker Forward bilge pump 10A 10 Breaker Aft bilge pump 10A 11 Breaker Horn Electronic power relay 10A 12 Breaker Deck searchlight 10A 13 Breaker Flaps 20A 14 Breaker Electronic 15A 15 Breaker VHF Wheelhouse Fly 10A 16 Breaker Bow thruster 10A WARNING Always replace a fuse with one of th...

Страница 98: ...94 LEAD LINES Transducer location View interior View Outside Electrical equipment ...

Страница 99: ... MAINTENANCE Clean the transducer probe during each dry dock and the log sensor regularly Read the instructions for maintenance recommendations Refer to chapter 10 Launching for the precautions to be taken concerning the sensors during hoisting ELECTRONIC Wire runs are available to complete the boat equipment Do not install electronic instruments or repeaters less than 1 50 m away from the radio l...

Страница 100: ...96 SHORE POWER SOCKET Breaker 30A 220V Cockpit locker Port side Shore power socket 30A 220V Differential Port saloon Electrical equipment ...

Страница 101: ...arine electricity technician Check the system at least twice a year Disconnect the vessel supply when the system is not being used This is to prevent the danger of fire Use double insulated or earthed appliances Note that the live wires are brown the neutral ones are blue and the earth wires are green and yellow DANGER Never let the end of the boat shore supply cable hang in the water The result m...

Страница 102: ...hore Generator 9 Master switch Air conditioning FREQ 230 ENBD AMP AC VOLTS VOLT CHARGEUR CHAUFFE EAU AUX PRISES CABINES 14 12 DC VOLTS ENTD 16 ON DC VOLTS 8 ON ON 10 BO RD ON ON ON WATER AMPERES ON ON ON ON ON ON GENERAL chargeur chauffe eau PRISES ELECTRIQUES 220V 50 HZ prise de quai générateur RESERVOIE EAU TD GENE RESERVOIE EAU BD CONTACT COUPE BATTERIE GENE NEGATIF MOTEUR TD MOTEUR BD BORD OPT...

Страница 103: ... the instructions before using any other produce The use of alcohol must be avoided ADVICE RECOMMENDATION Place the protective covers on the repeaters when unused for long periods When sailing store the protective covers inside the boat to avoid losing them The various repeater displays are back lit The onboard radio is fitted with two outside speakers When mooring be careful to adjust the sound s...

Страница 104: ...100 TELEVISION Location Port saloon Operation 1 Inverter 12 220V 2 Breaker TV 30A Electrical equipment ...

Страница 105: ...equipment WATER HEATER 220 V 42 L Location Under the companionway Operation The water heater functions On the starboard engine cooling system On the 220 V circuit House 220V socket Engine supply valves Water heater 8 ...

Страница 106: ......

Страница 107: ...103 Engine General information Engine installation 9 ...

Страница 108: ......

Страница 109: ...the fuel tank using the filler In order to protect the deck from possible fuel splash wet the area around the filler with sea water before you remove the filler cap In case of splashing rinse the deck thoroughly deck filler closed The level of fuel is transmitted to the indicator on the wheelhouse thanks to the dipstick interior Diesel oil tanks capacity 2 x 750 litre Position of tanks in front of...

Страница 110: ...106 Fuel filler Starboard gangway position Tank interconnecting valve Engine ...

Страница 111: ...107 Engine ENGINE FITTING 9 G rou nd i n g cla mp Pa tte de ma ss e Gro und ing cla mp Pa tte de ma ss e 13 14 15 16 17 18 11 10 19 20 21 7 16 ...

Страница 112: ...108 1 1 2 3 4 5 6 7 8 9 10 Engine ...

Страница 113: ... Propeller 6 Propeller shaft 7 Engine batteries 4 x 50A 8 Stern frame 9 Engine 10 Water heater 11 Fuel tank 2 x 750 l 12 Decompression 13 Outlet 14 Stern frame join 15 Ventilator 16 Extinguisher access hole 17 Diesel oil filter 18 Sea water filter 19 Earth 20 Seawater intake valve 21 Battery switch ...

Страница 114: ......

Страница 115: ...derwater exhaust 3 Ventilator 12V 4 Sea water filter 5 Diesel oil decanter valve 6 Tank interconnecting valve 7 Engine oil gauge 8 Oil filters 9 Propeller shaft 10 Sea water inlet valve for engine 11 Stern frame join 12 Stuffing box 13 Supply valve Water heater Engine 9 ...

Страница 116: ......

Страница 117: ...is essential that this valve is open before the engine is started danger of rapid wear and substantial damage to engine installation If water does not flow out Stop the engine immediately Check that the valve is open Close the water inlet valve if the boat is unattended for long Inspect and clean the water filter regularly Engine operation Before starting the engine Turn on the fuel valve Open the...

Страница 118: ...SUPPLY VALVE AND SEAWATER INTAKE Engine and generator fuel supply valve on port tank Reference 1 Engine supply valve on starboard tank Reference 2 Sea water inlet valve for engine Reference 3 12 13 1 2 3 3 Engine ...

Страница 119: ...the engine its role is to filter fuel very finely To know when you have to intervene and how frequently you have to change it please refer to the engine s manual The second filter is on the pipe that links the tank to the engine it plays the role of a water decanter and prefilter Drain by undoing the knurled screw at the base of the decantation bowl but not removing it Allow to flow into a box til...

Страница 120: ...ling control for port and starboard battery sets in the event of starting trouble Inside wheelhouse Fly REF Designation 1 Steering station selector 2 Engine control 3 Ignition key REF Designation 1 P bracket 2 Propeller 3 Propeller shaft 4 Anode Engine ...

Страница 121: ...tion may be obstructed in the following conditions Speed Position of the upper and side awnings Load and load distribution Sea conditions rain spray fog or darkness Lights on inside the boat Persons and removable equipment in the helmsman s field of visibility PRECAUTION Regularly check the anode at the end of the drive shaft for corrosion at least 2 times a year ADVICE RECOMMENDATION When the eng...

Страница 122: ......

Страница 123: ... to chafing or UV Propeller The propeller supplied as a standard with you boat is the result of tests carried out jointly with the engine manufacturer ADVICE RECOMMENDATION Have the whole driving and steering systems checked and maintained by a professional Refer to the manufacturers instructions supplied with your boat Regularly check the O ring of the filler for good condition in order to preven...

Страница 124: ......

Страница 125: ...121 Launching Launching recommendations 10 10 ...

Страница 126: ...122 POSITION OF HOISTING CRADLE AND STRAPS Note Measurements are expressed in mm Launching ...

Страница 127: ...tract the speedometer into its housing it may be damaged by the handling belts For the on line engines check the anode at the end of the shaft is in place Check the nut tightening the lock washer shall be turned over onto the nut The anode shall not be painted Turn off all the water inlet and drain valves sink washbasin heads engine HANDLING Install a fore rope a rear rope and fenders When craning...

Страница 128: ......

Страница 129: ...125 Winter Storage Laying up Protection and maintenance 11 11 ...

Страница 130: ......

Страница 131: ...osition in order to have minimum contact surfaces During long absence leave the fridge and icebox doors open to avoid mould developing EXTERIOR Thoroughly rinse the hull and deck Grease all moving and mechanical parts latches hinges locks etc Protect all ropes and mooring lines against chafing Protect the boat as well as possible with fenders Make sure the boat is properly moored Bring the removab...

Страница 132: ...we constantly desire to improve our models we reserve the right to modify them without notice Personal notes The present document is not contractual and since we constantly desire to improve our models we reserve the right to modify them without notice Code 087851 ...

Отзывы: