This appliance is for household use and may be plugged into any AC
electrical outlet (ordinary household current). Do not use any other
electrical outlet.
TO USE:
For a complete styling, hair should be clean, dry and free from dirt, hair
spray, creams, etc. (Of course, this iron can always be used for quick
touch-ups and rescues any time.)
PRE-HEAT: Rest the iron on its safety stand on a smooth, flat surface and
plug in. Set the heat switch at Hi or Low position, and allow iron to heat.
When ready dot on barrel turns dark, the iron is ready for use.
Use Hi heat for normal, easy-to-curl hair and for hard-to-curl hair, simply
holding hair wound around barrel a bit longer for hair that resists curling.
Use Low heat for hair that has been color-treated, or is fragile or
damaged.
STYLING: Start by sectioning hair into strands of not more than 1 inch
deep and 2 inches wide.
Keep the hair strand smooth by brushing or combing through the section
while holding the ends taut with the other hand.
Taking one section at a time, place the ends of hair over the barrel with
the clamp open. Then close the clamp, making sure that the ends extend
just a tiny bit beyond the clamp. Grasp the cool safety tip with the other
hand, and it will be easy to roll hair.
Keep the section of hair taut as you wind it around the hot barrel by
turning the handle with one hand and the cool safety tip with the other.
Wind the curl toward your scalp as far as you wish to go without
touching scalp with the hot barrel.
Hold the curl in place for up to 20 seconds for tight curls or if hair is hard
to curl. Hold for less time if hair is easy to curl, or if you want loose curls
or just waves. When you are ready to release curl, unwind about half a
turn (for longer hair, unwind a bit more) and push down on the clamp
release lever to open the clamp. Now, gently withdraw the barrel from
the center of curl. Allow curl to cool, and try not to disturb curls as you
proceed in the same manner around whole head.
When completely finished, and all curls have cooled thoroughly, gently
brush and comb hair into the style you wish.
STYLING TIP: For bouncy, flip-up curls, the clamp should be
under
and
the barrel
over
the section of hair at the start of curl. For curl-under,
page-boy styles, the clamp should be
over
and the barrel
under
the hair
section at the start of curl.
This appliance requires little maintenance and contains no user
serviceable parts. Do not try to fix it yourself. Refer it to qualified service
personnel if servicing is needed.
TO CLEAN:
Unplug curling iron and allow to cool. Iron must be cleaned
only when cold. Use a soft, slightly damp cloth to wipe the handle.
Do not allow water or any other liquid to go into handle of the iron.
TO STORE:
Unplug appliance and let it cool; store in its box or in a clean,
dry place. Store the cord loosely coiled.
Never wrap the cord around
unit
; this could cause the cord to wear prematurely and break. Do not
put any stress on cord where it enters the handle, as it could cause
cord to fray and possibly break. Never hang unit up by the power cord.
CARE AND CLEANING
HOW TO USE
Este artefacto es para uso doméstico y puede ser enchufado en cualquier
tomacorriente de corriente alterna (corriente ordinaria doméstica). No
use ningún otro tomacorriente eléctrico.
MODO DE USARSE
Para un mejor acabado, el cabello debe estar limpio, seco y libre de laca,
cremas, etc. (Por supuesto, su tenaza puede ser usada para retoques en
casos de emergencia.)
PRE-CALENTAMIENTO: Coloque la tenaza en su parador en una
superficie plana y enchúfela. Ponga el interruptor en la posición Alta (Hi)
o Baja (Low) y deje que se caliente. Cuando el punto indicador en la barra
se oscurezca, la tenaza estará lista para ser usada.
Use temperatura Alta (Hi), para cabellos normales, fáciles o difíciles de
rizar, simplemente sostenga el cabello enrollado en la barra y manténgalo
más tiempo en cabellos que se resisten al rizo. Use temperatura Baja
(Low) para cabellos que han sido teñidos, frágiles o dañados.
PEINADO: Comience dividiendo el pelo en mechones de no más de
1 pulgada de grueso y 2 pulgadas de ancho.
Mantenga los mechones suaves, cepillándolos o peinándolos mientras
sostiene la punta del pelo estirado con la otra mano.
Tomando una sección a la vez, coloque las puntas del cabello sobre la
barra con el clip abierto. Luego cierre el clip, asegurándose que las
puntas del cabello se extiendan sólo un poquito fuera del clip. Sostenga la
punta protectora con la otra mano, así será más fácil de enrollar el pelo.
Mantenga la sección del pelo estirado conforme vaya enrollándolo en la
barra caliente, dándole vuelta por el mango con una mano y por la punta
protectora con la otra. Enrolle el rizo lo más que desee hacia su cuero
cabelludo sin tocarlo con la barra caliente.
Sostenga el rulo en el lugar por 20 segundos para rizos bien acentuados o
si el cabello es difícil de ondular. Mantenga por menos tiempo si el
cabello es fácil de rizar o si desea rulos sueltos o solamente ondas.
Cuando ya esté listo para soltar, desenvuelva media vuelta (para cabellos
más largos desenvuelva un poco más) y empuje hacia abajo la palanca
del clip para abrirlo. Ahora suavemente suelte la barra del centro del rizo.
Deje que el rizo se enfríe y trate de no tocar los demás rizos hasta que
termine con toda la cabeza.
Cuando ya esté todo listo y los rizos estén completamente fríos,
suavemente cepille y péinelos al estilo que usted desea.
FIJANDO LAS PUNTAS DE SU CABELLO: Para rizos esponjosos o rizos
sueltos, el clip debe estar
debajo
y la barra
sobre
la sección del pelo al
comienzo del rizo. Para rizos hacia adentro o estilo paje, el clip debe ir
arriba
y la barra
debajo
de la sección del pelo al comienzo del rizo.
COMO USAR
CUIDADO Y LIMPIEZA
Este artefacto requiere poco mantenimiento y no tiene piezas que puedan
ser reparadas. No trate de repararlo usted mismo. Si necesita reparación
remítalo a personas calificadas.
PARA LIMPIAR:
Desenchufe su unidad y déjela que enfríe. La tenaza
solamente debe limpiarse cuando esté fría. Use un paño suave,
ligeramente húmedo para limpiar el mango. No deje que penetre agua u
otro líquido al mango de la tenaza.
PARA GUARDAR:
Desconecte su artefacto, déjelo enfriar y guárdelo en
su misma caja o en un lugar seco y limpio. Enrolle el cordón suavemente,
sin ajustarlo.
Nunca lo envuelva ajustado alrededor de su unidad
, esto
podría causar que se gaste prematuramente y rompa. No ponga presión
al cordón donde éste entra al mango, ya que esto podría causar el
desgaste del cordón y su posible rotura. Nunca cuelgue la unidad por el
cordón.
OPERATING INSTRUCTIONS/INSTRUCCIONES DE FUNCIONAMIENTO
PRODUCT MAY VARY SLIGHTLY FROM ILLUSTRATIONS/ESTE PRODUCTO PUEDE VARIAR LIGERAMENTE DE LAS ILUSTRACIONES
5
6
4
3
2
1
9
7
8
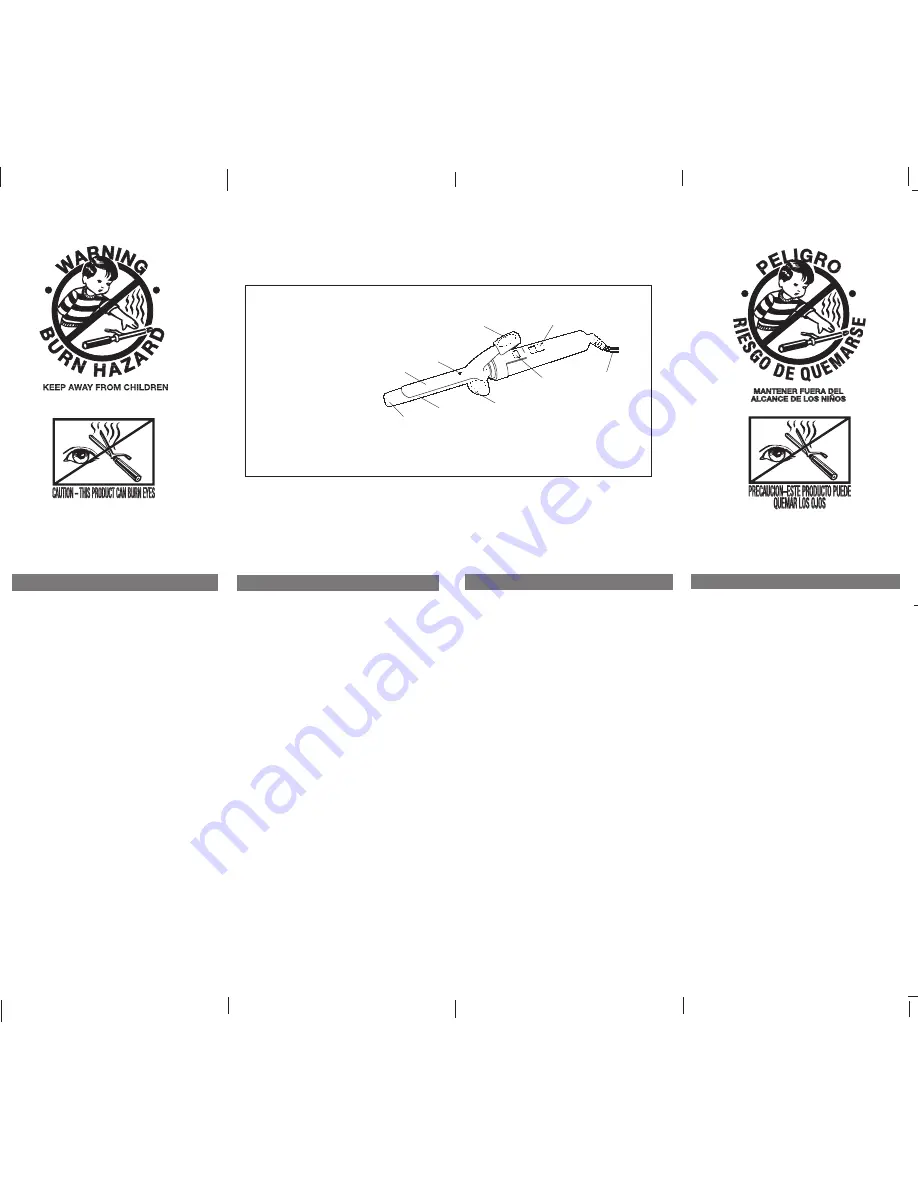
1. Clamp
Clip
2. Ready Dot
Punto que indica que está lista para usarse
3. Clamp Release Lever
Palanca del Clip
4. Hi/Off/Low Switch
Interruptor Alto/Apagado/Bajo (Hi/Off/Low)
5. Tangle-free Swivel Cord
Cordón Giratorio que evita enredarse
6. Power Indicator Light
Luz Indicadora de Encendido
7. Safety Stand
Parador de Seguridad
8. Barrel
Barra
9. Cool Safety Tip
Punta Protectora


