118
Configuring a Kaleido-X16 Cascade
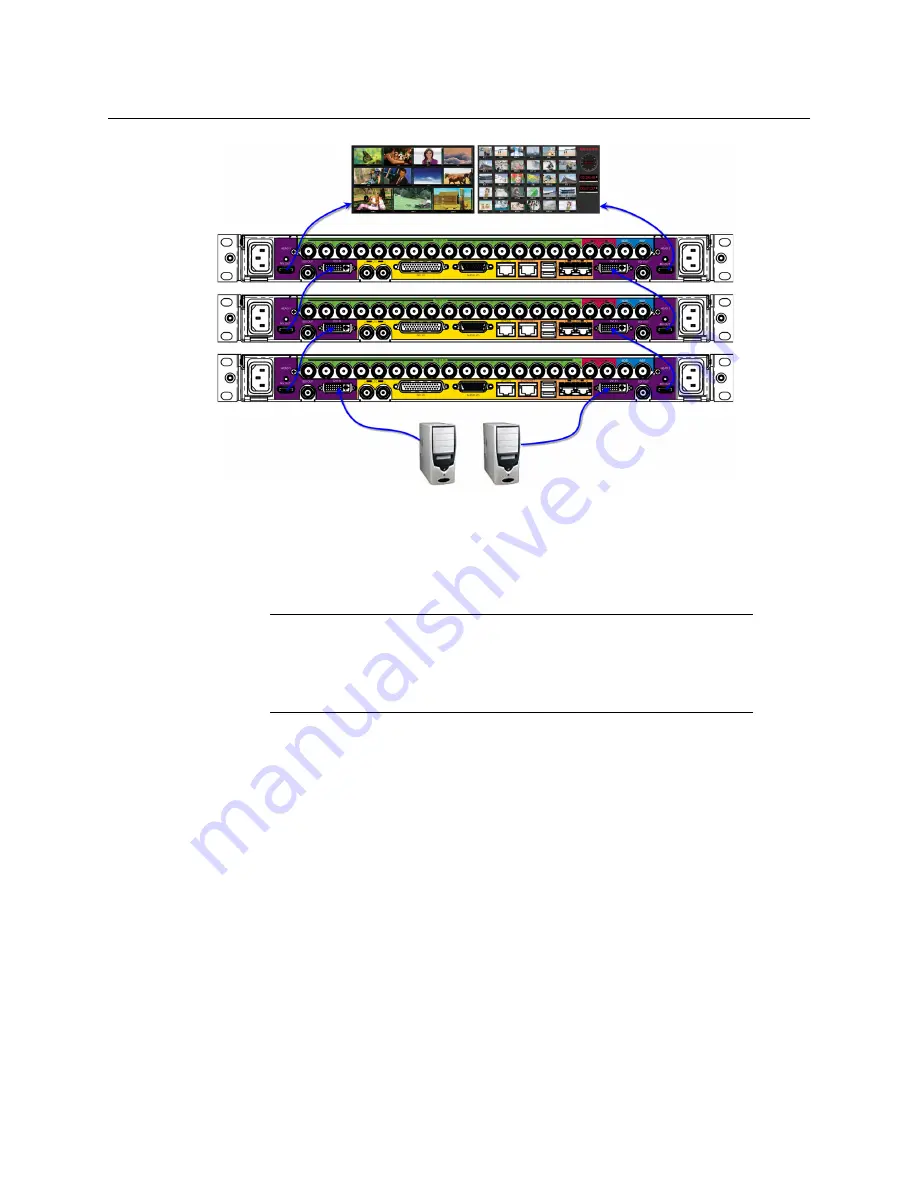
Connecting the Displays
To interconnect two Kaleido-X16 into a cascade:
1 Connect one HDMI output on the first multiviewer to a DVI input on the second
multiviewer.
2 In the case of a cascade room with two output heads, connect the second HDMI output
of the first multiviewer (if available) to the second DVI input on the second multiviewer.
3 If a third multiviewer is to be part of this Kaleido-X16 cascade, then connect one HDMI
output on the second multiviewer to a DVI input on the third multiviewer, and do the
same for the second head if available.
The HDMI outputs on the last multiviewer can now be connected to one or two
monitor-wall displays, depending on the multiviewer model (dual or single) and on
your specific purposes.
Connecting the Displays
Connect the available displays to the appropriate HDMI outputs on the
last
Kaleido-X16 in
the cascade (i.e. the one whose HDMI connectors are still available).
Connecting a PC for DVI Background Keying
If your system is to be fed DVI keying material from one PC, then connect the PC’s DVI
output to a DVI input on the
first
Kaleido-X16 in the cascade (i.e. the one whose DVI
connectors are still available). In the case of a dual-head cascade, with layouts designed for
Note:
Although nothing prevents you from connecting any HDMI output
to any DVI input, the recommended practice is to choose the most logical
signal path, by connecting MV OUT 1 to DVI IN 1, and MV OUT 2 to DVI IN 2,
in sequence, from one multiviewer to the next. Configuring your cascade
system in XEdit will then be straightforward.
Содержание Grass Valley KALEIDO-X16
Страница 20: ...20 Overview Functional block diagrams...
Страница 26: ...26 Installation CompactFlash...
Страница 42: ...42 Multiviewer Cabling Enabling EDID Auto Detection from the Monitor Wall...
Страница 126: ...126 Configuring a Kaleido X16 Cascade Limitations...
Страница 151: ...151 Kaleido X16 Hardware Description Installation Manual...


