


17
Master Control (ITX-MC)
User Guide
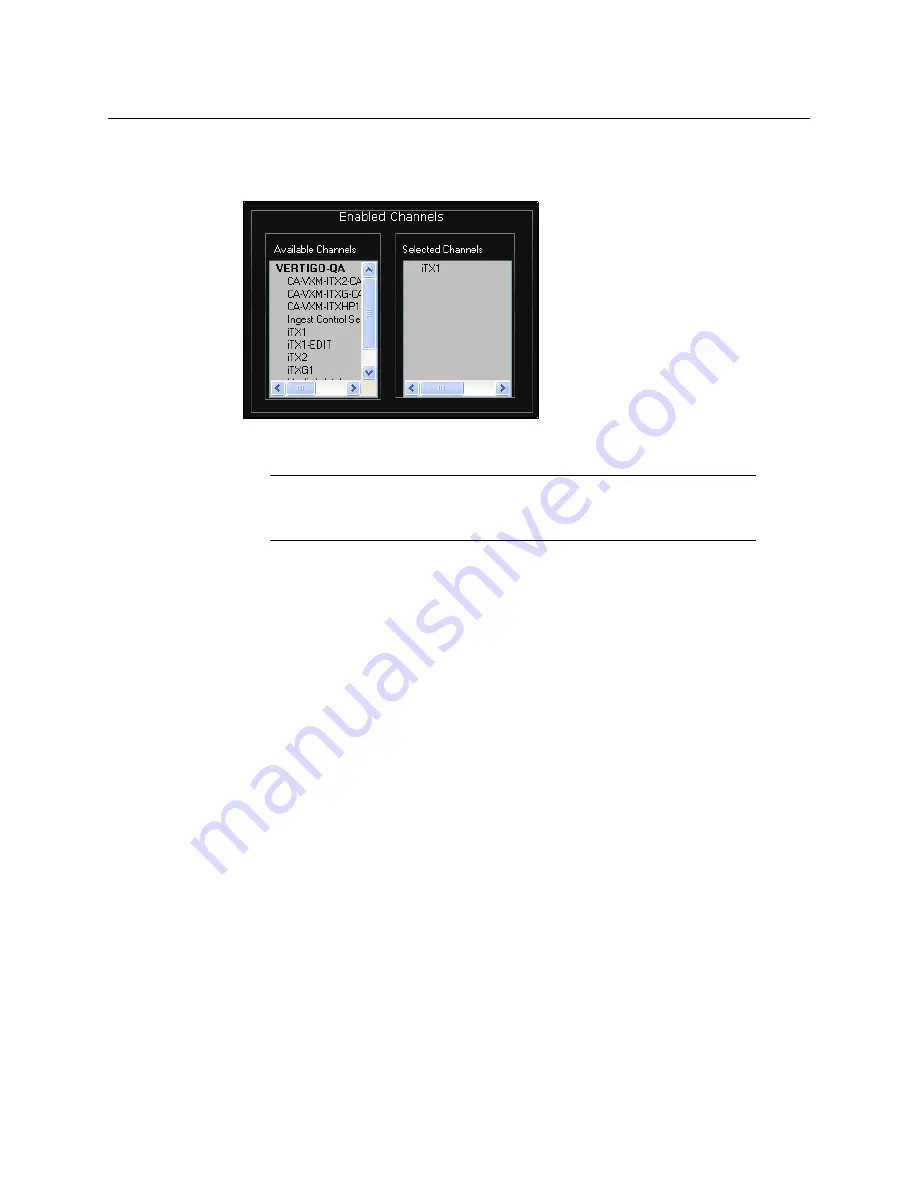
5 In the
Enabled Channels
section, identify the channel(s) that you want to be available
for panel control by dragging the channel from the
Available Channels
list and
dropping it onto the
Selected Channels
list.
When the
Channel List Display
property is set to
View Only
or
View and Edit
, the
channels listed in
Selected Channels
will be highlighted in the Mixer Mapper’s list.
6 Click
OK
.
7 Exit the iTX Desktop’s Edit Mode by right-clicking in an empty portion of the Layout
selection bar and selecting the
Edit
command.
Using the Mixer Mapper
Once the Mixer Mapper is properly configured with iTX channels that are control panel
enabled, operators simply have to click the Mixer Mapper button to activate or de-activate
panel control on selected the iTX channel.
Whether it’s configured as a single button on its own or associated with a channel list, the
functionality and appearance of the Mixer Mapper button is identical.
Figure 2-4 demonstrates that the Mixer Mapper is active (green) so that when the iTXNTSC-
1 channel is selected in the iTX Desktop’s channel selector on the iMC panel, the iTX
Desktop becomes in sync with the iMC panel and the iMC panel’s Automation Assist
buttons can be used to manually control the channel’s active schedule.
Note:
Channels can be “selected” even if they do not have an Imagestore
750 configured. However, the Mixer Mapper only highlights channels
that have an Imagestore 750 configured and are control panel enabled.


