page 49
page 49
page 49
page 49
page 49
275B SER
800-00152
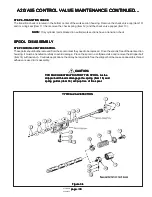
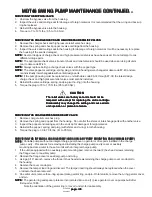
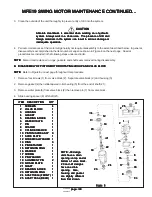
7. Remove the gerotor assembly and woodruff key.
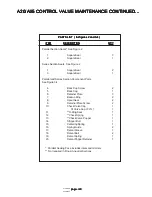
8. Each part should be inspected separately if they are to be reused. If either of the gerotor assembly parts needs to be
replaced, they must both be replaced. Always replace the o-rings.
9. Inspect the woodruff key for damage or wear and replace it if necessary.
10. Prior to assembly, lubricate the gerotor assembly with clean hydraulic oil Lubricate the o-rings with petroleum jelly.
11. Install the woodruff key into the drive shaft.
12. Slide the gerotor assembly into place in the pump housing. Be certain the gerotor engages the woodruff key
in the drive shaft.
NOTE:
NOTE:
NOTE:
NOTE:
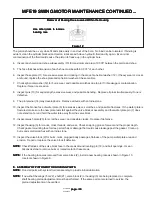
NOTE: The charge pump rotation is determined by the position of the gerotor ring (earlier units) or gerotor cover
(later units) and locating pin in the pump housing.
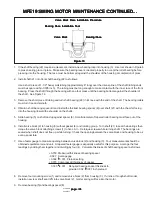
13. Install the gerotor ring and spacer plate or gerotor cover (with locating pin), over the gerotor assembly and
into the pump housing, orienting them for the proper input shaft rotation direction. The pin in the gerotor ring
or cover should be closest to the control for clockwise (CW) input rotation, and away from the control for
counterclockwise (CCW) input rotation.
14. Install a new temper load ring in the groove of the spacer plate or gerotor cover.
15. Install a new o-ring around the gerotor ring or cover.
16. Install the charge pump cover or pad adaptor onto the pump housing.
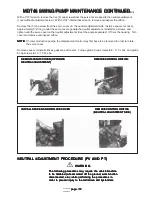
17. Reinstall the three (3) hex head screws and torque to 27 to 37 ft. lbs. (37 to 50 Nm). Check for proper internal
assembly by slowly rotating the pump shaft while tightening these screws.
18. If the unit is equipped with an auxiliary pump mounting pad, install the o-ring and flange cover or auxiliary pump
and secure with the hex head screws. Torque the screws to 20 to 25 ft. lbs. (27 to 34 Nm).
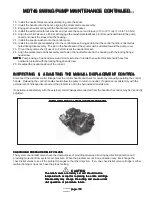
SERVICING THE MANUAL DISPLACEMENT CONTROL (MDC)
SERVICING THE MANUAL DISPLACEMENT CONTROL (MDC)
SERVICING THE MANUAL DISPLACEMENT CONTROL (MDC)
SERVICING THE MANUAL DISPLACEMENT CONTROL (MDC)
SERVICING THE MANUAL DISPLACEMENT CONTROL (MDC)
CAUTION
CAUTION
CAUTION
CAUTION
CAUTION
The removal of any portion of the control mechanism may
The removal of any portion of the control mechanism may
The removal of any portion of the control mechanism may
The removal of any portion of the control mechanism may
The removal of any portion of the control mechanism may
result in the loss of neutral, which will necessitate readjustment.
result in the loss of neutral, which will necessitate readjustment.
result in the loss of neutral, which will necessitate readjustment.
result in the loss of neutral, which will necessitate readjustment.
result in the loss of neutral, which will necessitate readjustment.
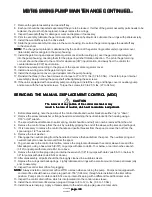
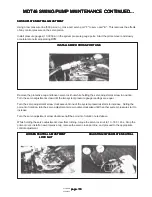
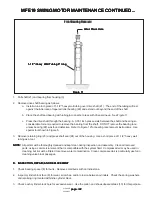
1. Before disassembly, note the position of the control handle and neutral bracket as either “up” or “down.”
2. Remove the screw and washer or flange head screw retaining the neutral bracket to the housing using a
7/16" or 3/8" wrench.
3. The spool (with neutral bracket, neutral spring, control handle, and nut) can now be removed from the unit.
4. Remove the control sleeve from the unit by carefully gripping the end of the sleeve with pliers and pulling out.
5. If it is necessary to remove the control handle and neutral bracket from the spool, remove the nut from the
spool using a 1/2" hex wrench.
6. Remove the lock washer.
7. Disengage the neutral spring from the handle and remove the handle from the spool. The neutral spring and
neutral bracket can now be removed from the spool.
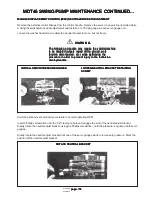
8. To gain access to the control inlet orifice, remove the plug located between the control sleeve bore and the
filter adaptor, using a hex wrench (9/16") on pumps with date code 86-13 or below, or an internal hex wrench
(3/16") on pumps with date code 86-14 or above.
9. Remove the inlet orifice plug using an internal hex wrench (1/8" for pumps with date code 86-13 or below, 5/
32" for pumps with date code 86-14 or above).
10. After disassembly, all parts should be thoroughly cleaned in a suitable solvent.
11. Replace the o-rings and backup rings. Lightly lubricate all o-rings with a small amount of clean petroleum jelly
prior to assembly.
12. Inspect the control inlet orifice for plugging.
NOTE:
NOTE:
NOTE:
NOTE:
NOTE: Always install a control inlet orifice WITH a screen when servicing the pump. Pumps not equipped with
an inlet orifice should have a screen plug with a 0.156" (3.96 mm) through-hole installed in the inlet orifice
position. Pumps prior to date code 86-14 use an inlet orifice plug with a different thread from later units.
13. Inspect the control drain orifice, which is incorporated into the control valve sleeve.
14. Install the control inlet orifice/screen plug and torque to 8 to 12 in. lbs. (0.9 to 1.3 Nm).
15. Install the external plug. Apply a thread sealant to the external pipe plug used on later units.
MDT46 SWING PUMP MAINTENANCE CONTINUED...
MDT46 SWING PUMP MAINTENANCE CONTINUED...
MDT46 SWING PUMP MAINTENANCE CONTINUED...
MDT46 SWING PUMP MAINTENANCE CONTINUED...
MDT46 SWING PUMP MAINTENANCE CONTINUED...

