8. Maintenance
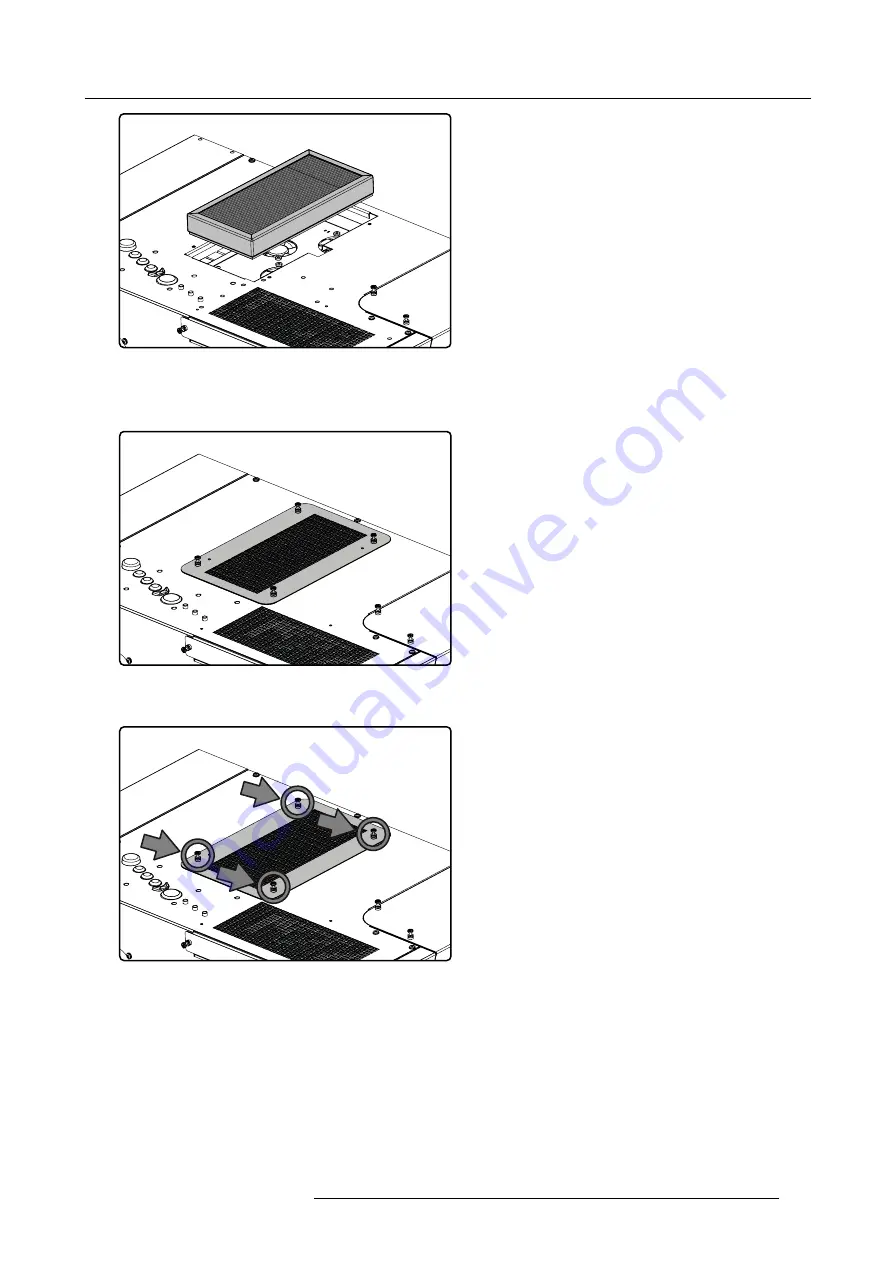
Image 8-7
X-cube
fi
lter: place it in its housing
Note:
The seal of the air
fi
lter must point down!
2. Place the x-cube
fi
lter cover in the right position
Image 8-8
X-cube
fi
lter: put the cover in the right position
3. Tighten the four screws to
fi
x the x-cube
fi
lter cover
Image 8-9
X-cube
fi
lter cover:
fi
xation screws
4. Register the air
fi
lter replacement in the
Service book
8.3.3
Removing the electronics
fi
lter
Necessary tools
Torx screwdriver T10
How to remove the electronics
fi
lter?
1. Loosen the two screws
fi
xing the
fi
lter cover
Tip:
These screws are
fi
xed to the electronics
fi
lter cover and can not drop.
R59770198 BARCO SIM 7D 13/02/2013
155
Содержание R92112071
Страница 1: ...Barco SIM 7D User Guide R92112071 R92112072 R92112073 R59770198 10 13 02 2013 ...
Страница 8: ...Table of contents 4 R59770198 BARCO SIM 7D 13 02 2013 ...
Страница 10: ...1 Introduction 6 R59770198 BARCO SIM 7D 13 02 2013 ...
Страница 14: ...2 Packaging 10 R59770198 BARCO SIM 7D 13 02 2013 ...
Страница 39: ...4 Installation Image 4 40 Location of the IR receivers R59770198 BARCO SIM 7D 13 02 2013 35 ...
Страница 40: ...4 Installation 36 R59770198 BARCO SIM 7D 13 02 2013 ...
Страница 54: ...5 Setup 50 R59770198 BARCO SIM 7D 13 02 2013 ...
Страница 80: ...7 Advanced Image 7 41 Image 7 42 Image 7 43 76 R59770198 BARCO SIM 7D 13 02 2013 ...
Страница 108: ...7 Advanced Image 7 95 Image 7 96 Image 7 97 Image 7 98 104 R59770198 BARCO SIM 7D 13 02 2013 ...
Страница 154: ...7 Advanced 150 R59770198 BARCO SIM 7D 13 02 2013 ...
Страница 174: ...B GLD alignment 170 R59770198 BARCO SIM 7D 13 02 2013 ...
Страница 176: ...Glossary 172 R59770198 BARCO SIM 7D 13 02 2013 ...
Страница 182: ...List of tables 178 R59770198 BARCO SIM 7D 13 02 2013 ...


