R5910032 /00
Freya
40
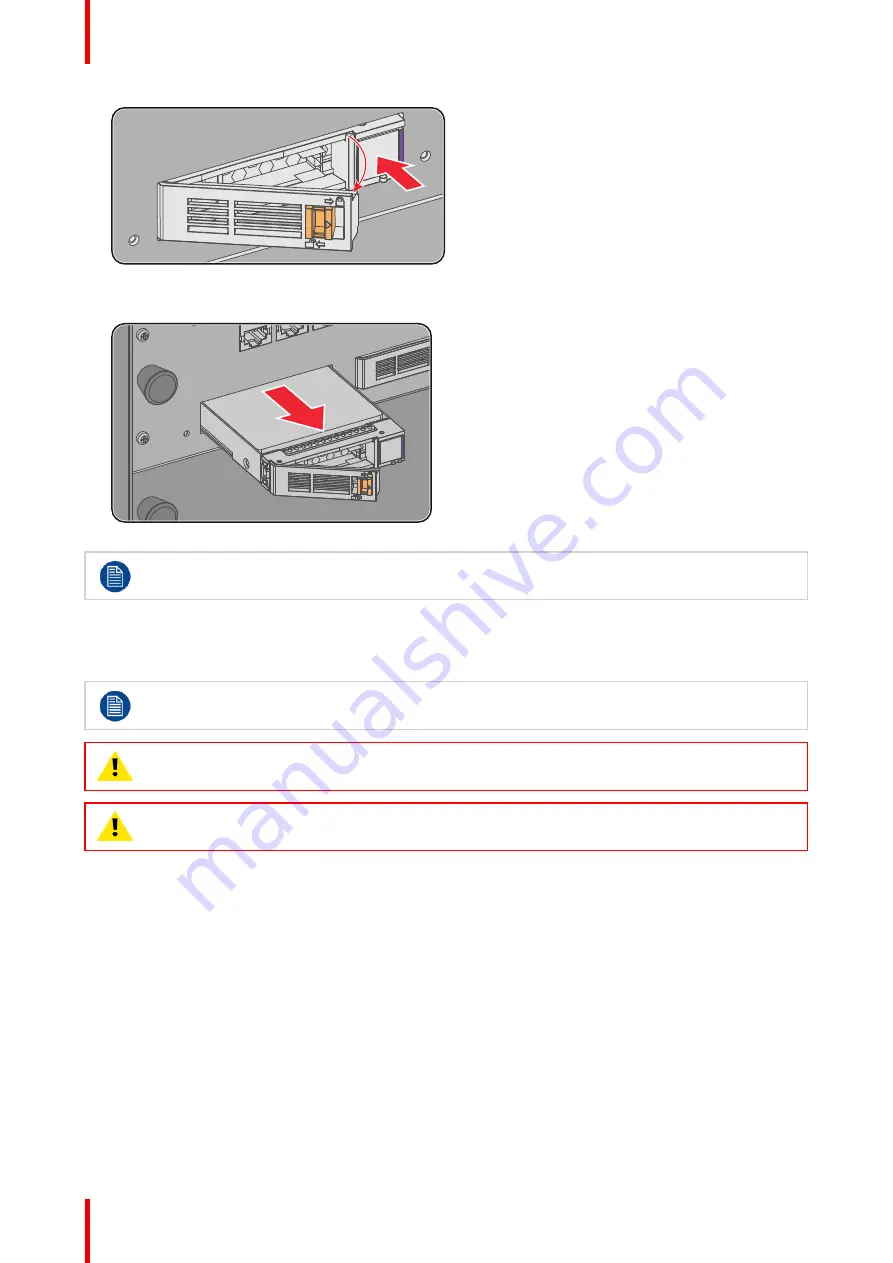
Image 3
–
5
4.
Pull the HDD out of its slot.
Image 3
–
6
To install an HDD, see the following procedure:
“
Removing a HDD from the ICMP-X
”
, page 39.
3.5 Installing a HDD into the ICMP
This procedure assumes that the HDD slot of the ICMP is empty. If not, see procedure
, page 39.
CAUTION:
Always use a new empty spare part HDD approved by Barco to replace a malfunction
HDD. Do not use a HDD from another ICMP HDD set.
CAUTION:
Always make sure that all HDDs in the ICMP HDD set have the same storage capacity.
See label on top of the HDD to know the storage capacity.
How to install a HDD ?
1.
Ensure that the projector is switched off.
2.
Prepare the HDD for insertion by moving the latch towards the left and push the unlock button to open the
handle.
Содержание Freya
Страница 1: ...ENABLING BRIGHT OUTCOMES User guide Freya...
Страница 12: ...R5910032 00 Freya 12...
Страница 26: ...R5910032 00 Freya 26 Safety...
Страница 60: ...R5910032 00 Freya 60 Projector configuration process overview...
Страница 74: ...R5910032 00 Freya 74 Control Projector...
Страница 184: ...R5910032 00 Freya 184 Configuration Light output...
Страница 208: ...R5910032 00 Freya 208 Configuration Projector automation...
Страница 234: ...R5910032 00 Freya 234 Configuration Media server automation...
Страница 240: ...R5910032 00 Freya 240 Configuration License and certificates...
Страница 254: ...R5910032 00 Freya 254 Configuration Media server...
Страница 296: ...R5910032 00 Freya 296 Diagnostics Analysis...
Страница 338: ...R5910032 00 Freya 338 Specifications...
Страница 348: ...R5910032 00 Freya 348 Pin configurations...
Страница 354: ...R5910032 00 Freya 354 Environmental information...
Страница 365: ...365 R5910032 00 Freya Z Zoom Lens 65 Index...
Страница 366: ...R5910032 00 Freya 366 Index...
Страница 368: ...R5910032 00 Freya 368 List of tools...
Страница 369: ......


