


R5906852 /09
F80
126
What should be set up for an Ethernet address?
Two ways can be used to assign an address:
•
use the
Automatic
setting so that an automatic address will be assigned.
•
Assign manually an IP address, Net-mask (subnet-mask), (default) gateway address.
-
Set the IP-Address field to the desired value. This must NOT be 0.0.0.0 for static IP-Address
assignment. The IP address identifies a projector's location on the network in the same way a street
address identifies a house on a city block. Just as a street address must identify a unique residence, an
IP address must be globally unique and have a uniform format.
-
Set the Subnet-Mask as appropriate for the local subnet.
-
Set the Default-Gateway to the IP-Address of the local router (MUST be on the local subnet!) on the
same network as this projector that is used to forward traffic to destinations beyond the local network.
This must not be 0.0.0.0. If there is no router on the projector's local subnet then just set this field to any
IP-Address on the subnet.
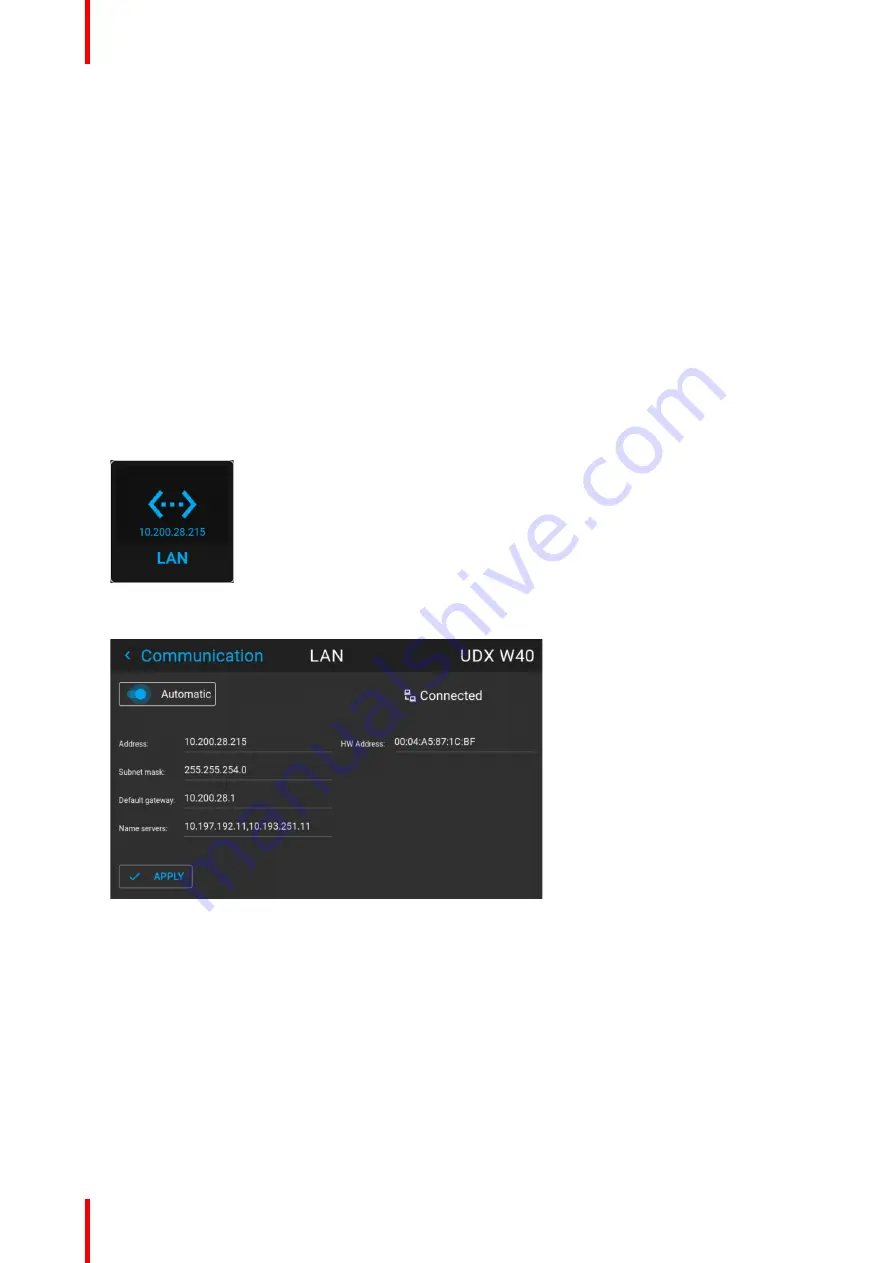
10.3.2 Wired IP address set up
How to automatically set up the IP address
1.
In the main menu, select
Settings
→
Communication
→
LAN
.
Image 10–9 Communication menu, LAN
The LAN menu is displayed.
Image 10–10 Example of the LAN menu
2.
To enable Automatic, make sure the Automatic slider is set to the right. The color of the slider will be blue.
An IP address will be automatically assigned if it can make a connection to the network..
When connected, it is indicated with the connection symbol and the indication
Connected
.
3.
Select
APPLY
and confirm.
How to manually set up the IP address
1.
In the main menu, select
Settings
→
Communication
→
LAN
.
Содержание F80-Q12
Страница 1: ...ENABLING BRIGHT OUTCOMES User Manual F80 ...
Страница 21: ...21 R5906852 09 F80 Graph shows Hazard Distance in meters versus Throw ratio of the lens Safety ...
Страница 22: ...R5906852 09 F80 22 Safety ...
Страница 34: ...R5906852 09 F80 34 Getting Started ...
Страница 44: ...R5906852 09 F80 44 Remote Control Unit ...
Страница 56: ...R5906852 09 F80 56 GUI Introduction ...
Страница 62: ...R5906852 09 F80 62 GUI Source ...
Страница 78: ...R5906852 09 F80 78 GUI Image ...
Страница 146: ...R5906852 09 F80 146 GUI System Settings ...
Страница 156: ...R5906852 09 F80 156 Advanced Settings ...
Страница 160: ...R5906852 09 F80 160 GUI Status menu ...
Страница 176: ...R5906852 09 F80 176 Specifications ...
Страница 181: ...181 R5906852 09 F80 Image B 1 HDCP revision information Connector specifications ...
Страница 182: ...R5906852 09 F80 182 Connector specifications ...
Страница 186: ...R5906852 09 F80 186 Control interface specifications ...
Страница 194: ...R5906852 09 F80 194 Regulatory information ...
Страница 205: ...205 R5906852 09 F80 DMX chart F ...
Страница 209: ......
Страница 210: ...www barco com R5906852 09 2022 11 15 ...


