2. General
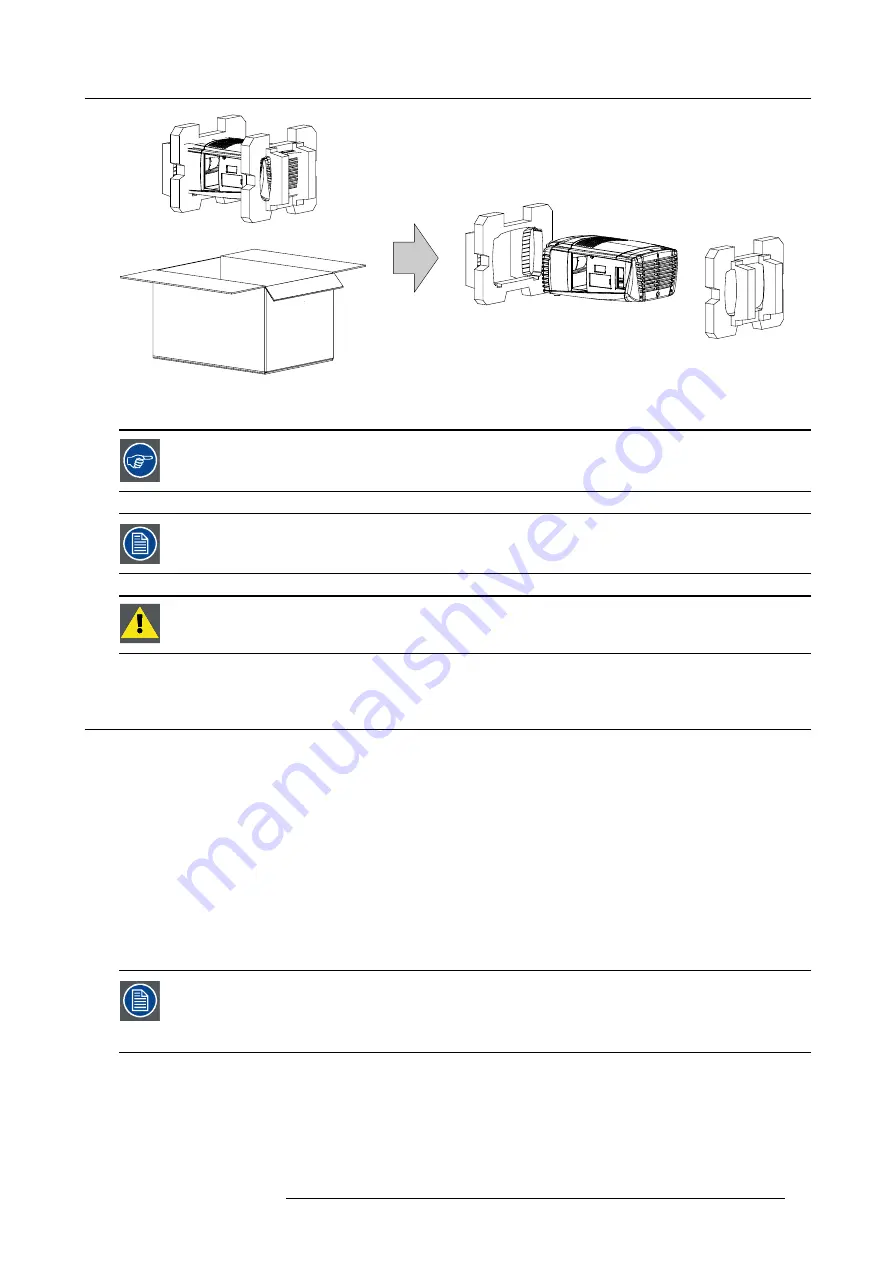
Image 2-2
5. Remove the foam rubber.
Save the original shipping carton and packing material, they will be necessary if you ever have to ship your
projector. For maximum protection, repack your projector as it was originally packed at the factory.
A rubber foam inside a plastic bag is placed into the lens opening of the projector. It’s recommended to reuse
this foam and plastic back each time you transport the projector. This to prevent intrusion of dust and foreign
particles.
C
AUTION
:
Always remove the lens before transporting the projector !
2.3
Box content
Content
•
One Barco CLM R10+, weight ±31 kg (±68 lb.).
•
One Remote Control Unit (RCU).
•
Two AA size batteries for the RCU.
•
Two power cord of 2.5 meter, one CEEC19 and one NEM6C19.
•
One user manual.
•
One safety manual.
Initial inspection
Before shipment, the projector was inspected and found to be free of mechanical and electrical defects. As soon as the projector is
unpacked, inspect for any damage that may have occurred in transit. Save all packing material until the inspection is completed. If
damaged is found,
fi
le claim with carrier immediately. The Barco sales and service of
fi
ce should be noti
fi
ed as soon as possible.
The packaging of the CLM R10+ is provided with a shock-watch label. If this shock-watch label was triggered
(red colored at arrival) during transport, that indicates the package was possibly roughly handled by the trans-
port company. In this case, the instructions mentioned on the label, should be followed, which are: adding a
note on the transportation document and informing the transport company and the Barco sales and service
of
fi
ce as soon as possible.
Mechanical check
This check should con
fi
rm that there are no broken knobs or connectors, that the cabinet and panel surfaces are free of dents and
scratches, and that the operating panel are not scratched of cracked. The Barco sales and service of
fi
ce should be noti
fi
ed as soon
as possible.
R59770021 CLM R10+ 15/03/2010
13
Содержание CLM R10+ R9050100
Страница 1: ...CLM R10 Users manual R9050100 R90501001 R59770021 10 15 03 2010 ...
Страница 14: ...1 Safety 10 R59770021 CLM R10 15 03 2010 ...
Страница 22: ...2 General 18 R59770021 CLM R10 15 03 2010 ...
Страница 35: ...3 Physical installation Skew Image 3 28 Skew adjustment R59770021 CLM R10 15 03 2010 31 ...
Страница 36: ...3 Physical installation 32 R59770021 CLM R10 15 03 2010 ...
Страница 48: ...5 Connections 44 R59770021 CLM R10 15 03 2010 ...
Страница 64: ...7 Start up of the Adjustment mode 60 R59770021 CLM R10 15 03 2010 ...
Страница 74: ...8 Input menu 70 R59770021 CLM R10 15 03 2010 ...
Страница 115: ...10 Layout menu Image 10 61 Image 10 62 Image 10 63 Image 10 64 R59770021 CLM R10 15 03 2010 111 ...
Страница 116: ...10 Layout menu 112 R59770021 CLM R10 15 03 2010 ...
Страница 158: ...13 Projector control 154 R59770021 CLM R10 15 03 2010 ...
Страница 172: ...14 Service menu 168 R59770021 CLM R10 15 03 2010 ...
Страница 186: ...16 Servicing 182 R59770021 CLM R10 15 03 2010 ...
Страница 195: ...17 Projector covers removal and installation Image 17 18 Secure the lamp door R59770021 CLM R10 15 03 2010 191 ...
Страница 196: ...17 Projector covers removal and installation 192 R59770021 CLM R10 15 03 2010 ...
Страница 204: ...C DMX Chart 200 R59770021 CLM R10 15 03 2010 ...
Страница 210: ...D Specifications 206 R59770021 CLM R10 15 03 2010 ...
Страница 216: ...E Troubleshooting 212 R59770021 CLM R10 15 03 2010 ...
Страница 222: ...F Mounting optional Carry handle 218 R59770021 CLM R10 15 03 2010 ...
Страница 224: ...G Order info 220 R59770021 CLM R10 15 03 2010 ...
Страница 232: ...Index 228 R59770021 CLM R10 15 03 2010 ...


