


2 Overview
The iVu Vision Sensor can be configured in just minutes with a few simple steps. Program through the integrated or remote
touch screen without the use of a PC. As an alternate, use Vision Manager PC software to configure and monitor devices.
Use the grayscale, color, or barcode versions to solve a wide variety of factory automation applications.
2.1 Features and Indicators
The iVu comes fully assembled with the lens and an integrated ring light (optional).
Integrated display models: The touchscreen display has a plastic cover to protect the display. Remove this cover when
configuring the device. When the display is not in use, keep the display covered to protect it.
Remote display models: The remote touchscreen display is not required for normal device operation, however, it is needed
to configure the device and to monitor inspections.
If an integrated ring light is not used, another light source is needed. Various lights are available from Banner Engineering.
Operating in external trigger mode requires a triggering source.
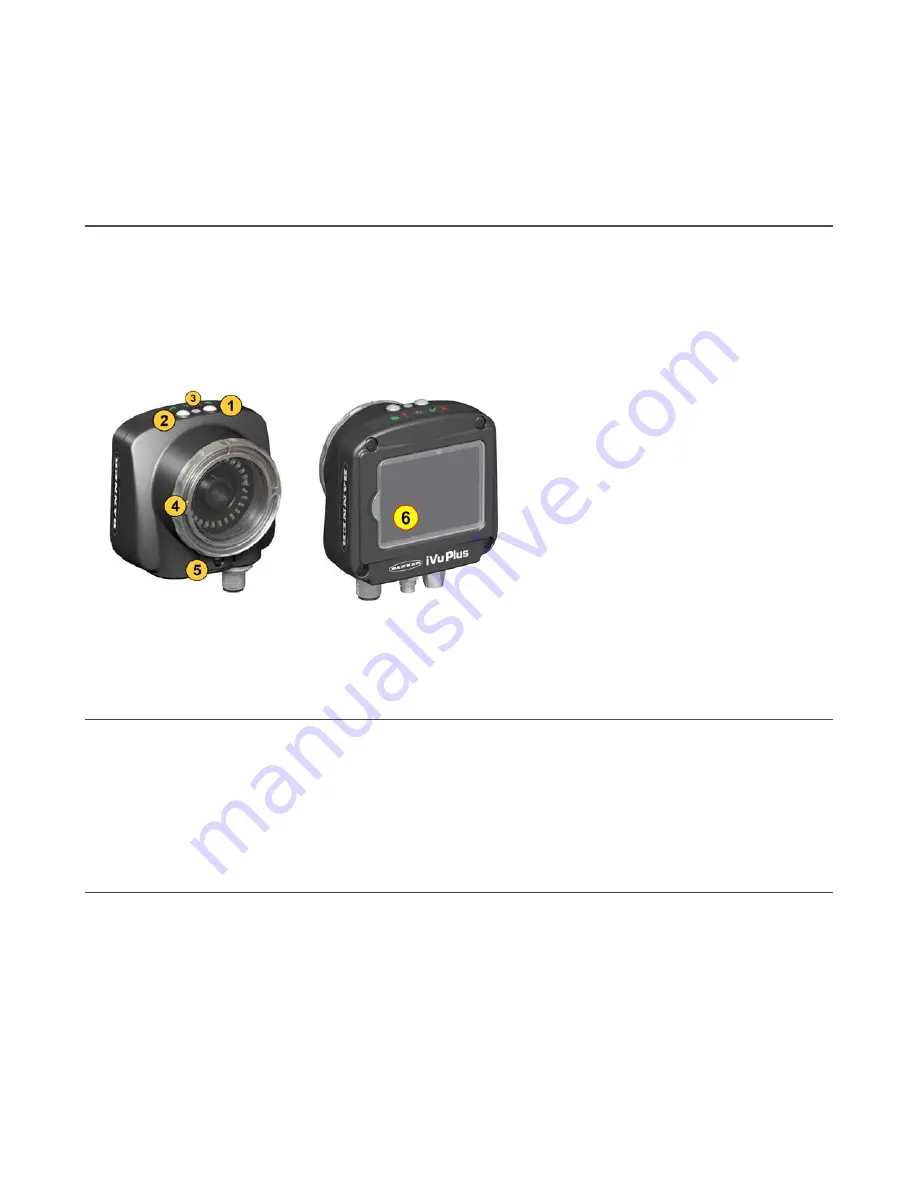
Figure 1. Features
1. Power LED
Green: Ready/Power
Red (blinking or steady): Error
2. Pass/Fail LED
Green (steady): Pass
Green (blinking): Error
Red: Fail
3. Ethernet I/O LED
Green: Connected
Off: Disconnected
4. Focusing Window
5. Focusing Window Locking Clip
6. Integrated Display (integrated display
models only)
2.2
Vision Manager
Software
Set up the iVu Plus TG and Color Gen2 Image Sensors using the free Vision Manager Software, available for download at
.
Use Vision Manager to connect to, monitor, and configure iVu devices. The simple user interface allows for quick setup of
inspections, the ability to make changes on the fly and remote monitoring of live sensors. Also included in Vision Manager
are iVu emulators, allowing users to create or troubleshoot inspections offline, without being connected to a device.
Use Vision Manager to configure Banner vision devices including iVu Vision Sensors and VE Smart Cameras.
2.3 Demo Mode
The first time the iVu is powered up, it starts in Demo Mode. You can choose whether to stay in Demo Mode or exit to Live
Mode. Demo Mode uses stored images and inspection parameters that demonstrate how the iVu is set up, without having
to worry about focus, lighting, or triggers. In this mode, practice making adjustments while working with the different sensor
types and observing how the adjustments affect the results. To exit Demo Mode, go to Main Menu > System > Mode and
select Exit Demo Mode. Upon exit, the iVu restarts in the normal operating mode with the default settings.
iVu Plus TG and Color Gen2 Image Sensors
8
www.bannerengineering.com - Tel: + 1 888 373 6767


