HANDLEIDING
MODE D’EMPLOI
MANUAL
GEBRAUCHSHANTLEITUG
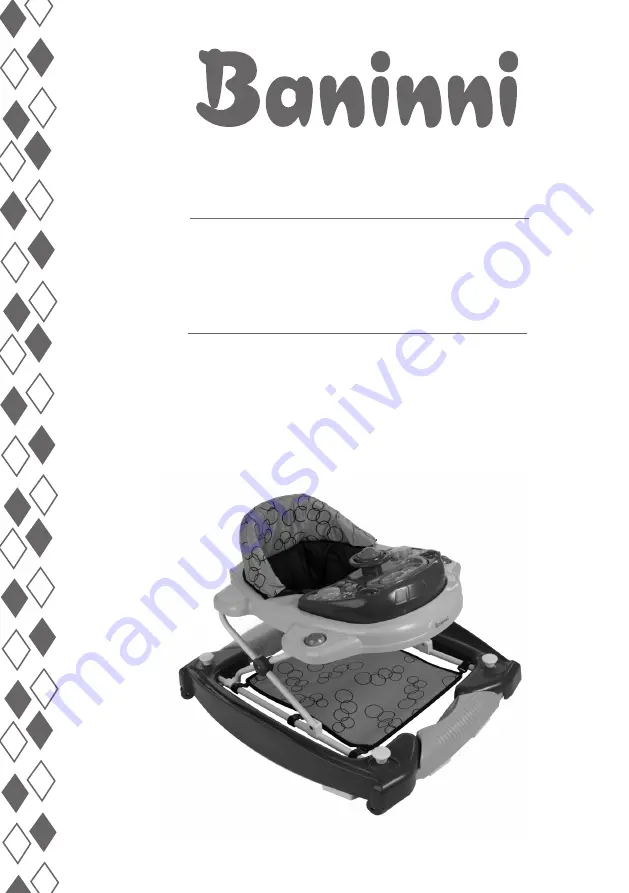
BABY WALKER
CLASSIC
LIVING
“THE FIRST STEPS TO KNOWLEDGE”
Страница 1: ...HANDLEIDING MODE D EMPLOI MANUAL GEBRAUCHSHANTLEITUG BABY WALKER CLASSIC LIVING THE FIRST STEPS TO KNOWLEDGE...
Страница 2: ...leverancier waar u het product kocht Bij uw plaatstelijke verkoper kan u het best terecht om onmiddelijk te voldoen aan alle eisen DE TEKENINGEN IN DEZE HANDLEIDING ZIJN ENKEL TER ILLUSTRATIE HET PRO...
Страница 3: ...TIEVE DELEN fig 2 kies methode A of B volgens de structuur van het product A steek de decoratieve delen in de openingen van het bovenste blad B steek de decoratieve delen in de openingen van het boven...
Страница 4: ...haakjes 90 graden zodat dit stevig vastzit op het blad MONTAGE VAN HET MULTIFUNCTIONEEL SPEELBLAD fig 4 kies methode A of B of C volgens de structuur van het product 1 Gebruik een schroevendraaier om...
Страница 5: ...p zowel de voor en achterzijde 2 Zoals de pijl aangeeft op figuur 2 past de achterzijde van de speelgoedset op het blad van de walker 3 Plaats de speelgoedset op het blad en druk dit aan zodat de snel...
Страница 6: ...standen n hand bovenop het wagentje en draai de knop van de hoogteregelaar onder het bovenste plateau 90 graden met de andere hand Druk dan de knop omhoog om de hoogtestand te regelen laat de knop los...
Страница 7: ...ij gebruik als schommelstoel de beschermhoes over de buis zoals getoond op foto 2 3 Verwijder de beschermhoes bij gebruik van de loopfunctie Met veiligheidsrubbers onder de chassi en 4 globale wielen...
Страница 8: ...pwagentje nooit met het kind erin Houd het kind en de loopwagen om brandwonden te voorkomen buiten het bereik van fornuizen radiatoren kachels open haarden enz Gebruik het loopwagentje niet in de buur...
Страница 9: ...naar behoren functioneren Montage door een volwassene Uit de buurt van vuur houden Niet oplaadbare batterijen mogen niet opgeladen worden Verschillende types batterijen of nieuwe en gebruikte batterij...
Страница 10: ...nce any difficulties please contact the retailer from which you purchased the product Your local retailer is in the best position to address any requirements DRAWINGS IN THIS MANUAL ARE FOR ILLUSTRATI...
Страница 11: ...2 Please choose method A or B according to different product structure A Insert the decorative parts into the holes of the upper tray B Insert the decorative parts into the holes on the upper tray lik...
Страница 12: ...he tray completely And turn the white plastic claspers by 90 degree to ensure it was fixed tightly on the tray ASSEMBLY OF TOY TRAY pic 4 Please choose method A or B or C according to different produc...
Страница 13: ...ees C 1 As the picture shown on Fig 1 there are 4 snap fit components a b on both front and rear toy tray 2 As the arrow shown on fig 2 fix the rear toy tray onto the upper tray and then press down th...
Страница 14: ...m beneath the top tray by 90 degrees with the other hand then push the button up it will return to original position the mechanism is locked automatically ROCKING FUNCTION pic 6 With safety rubber und...
Страница 15: ...ms by 90 degrees put the button back to the original position 2 When use it as a rocker fix the foot stepping cloth on the tube as shown in the picture 2 3 When you use it as a walker take out the foo...
Страница 16: ...e heaters fireplaces etc Do not use walker near driveways streets swimming pools or any other areas that are not safe Discontinue using the walker when it is damaged or broken This walker is recommend...
Страница 17: ...ypes of batteries are not to be mixed Only batteries of the same or equivalent type as recommended are to be used rechargeable batteries are to be removed from the toy before being charged if removabl...
Страница 18: ...trotteur contactez le fournisseur o vous avez achet le produit le fournisseur local est le mieux plac pour satisfaire imm diatement toutes les exigences LES IMAGES DU MANUAL SERVENT UNIQUEMENT D ILLU...
Страница 19: ...z la m thode A ou B en fonction de la structure du produit A Placez les pi ces d coratives dans les trous du plateau sup rieur B Placez les pi ces d coratives dans les trous du plateau sup rieur voir...
Страница 20: ...eau et tournez les crochets plastiques blancs de 90 degr s pour bien fixer le siege sur le plateau MONTAGE DU PLATEAU A JOUETS image 4 Choisissez la m thode A ou B en fonction de la structure du produ...
Страница 21: ...pouvez le voir sur la photo de la figure 1 il ya quatre composantes fast Fix a b la fois sur le devant et le dos 2 le jouet adapt sur le trotteur Figure 3 Placez le jouet sur le trotteur et s enclench...
Страница 22: ...nt en dessous du plateau sup rieur de 90 degr s avec l autre main Etirez ensuite le bouton pour r gler la hauteur L chez le bouton il retournera dans sa position initiale le m canisme est verrouill au...
Страница 23: ...lors les 2 fonds de 90 Remettez le bouton dans sa position initiale 2 En cas d utilisation comme balan oire apposez la protection sur la tube comme illustr l image 2 3 En cas d utilisation comme porte...
Страница 24: ...Pour pr venir des br lures gardez l enfant distance de fours radiateurs po les feus ouverts etc N utilisez pas le porteur aux environs d all es de rues de piscines ou d autres lieux non s rs N utilise...
Страница 25: ...du feu Piles non rechargeables ne doivent pas tre recharg es Diff rents types de piles ou des piles neuves et usag es ne peuvent pas tre utilis s ensemble Seules les batteries du m me type peuvent tre...
Страница 26: ...hmen Sie Kontakt auf mit Ihr lokaler H ndler bei dem Sie das Produkt gekauft haben Ihr lokaler H ndler kann Sie am besten vor Ort unterst tzen DIE ABBILDUNGEN IN DIESER ANLEITUNG DIENEN LEDIGLICH DER...
Страница 27: ...ruktur des Produkts Methode A oder B A Die dekorativen Teile in den L chern des oberen Rahmens stecken B Die dekorativen Teile in den L chern des oberen Rahmens stecken wie in der Abbildung 2 gezeigt...
Страница 28: ...n Die Wei en Plastikhaken um 90 Grad drehen Vergewissern Sie sich dass der Sitz sicher am Rahmen befestigt ist und nicht herausgezogen werden kann MONTAGE DES SPIELBRETTES ABB 4 Wh len Sie abh ngig vo...
Страница 29: ...t es vier Fast fix Komponenten a b sowohl auf der Vorder und R ckseite 2 Die R ckseite des Spielzeugs passt auf dem Plateau der walker Abbildung 2 Legen Sie das Spielzeug Set auf der Plateau der walke...
Страница 30: ...em Rahmen um 90 Grad Um die H he einzustellen die Taste hochschieben Beim Loslassen geht die Taste hochschieben Beim Loslassen geht die Taste wieder in ihre urspr ngliche Position zur ck Der Mechanism...
Страница 31: ...urspr ngliche Position bringen 2 Wenn das Laufger t als Schaukelstuhl verwendet wird befestigen Sie die Schutztasche am Rohr wie in der Abbildung 2 gezeigt 3 Wenn das Produkt als Laufger t verwendet...
Страница 32: ...beide F e des Kindes den boden ber hren Heben oder tragen Sie das Lauflernger t niemals wenn zich das kind darin befindet Zur Vermeidung von Brandverletzungen halten Sie Ihr Kind fern von Herden Heizk...
Страница 33: ...Gleitrollen korrekt eingesetzt sind und funktionieren Die Montage des Produktes darf ausschlie lich von einem Erwachsenen vorgenommen werden Das Produkt vor Hitze und feuer sch tzen Nicht wiederaufla...
Страница 34: ...Voortstraat 12 2490 Balen Belgium www baninni com Find us on Facebook Instagr am Imported by Baninni LIVING THE FIRST STEPS TO KNOWLEDGE...