background image


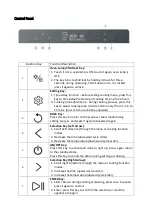
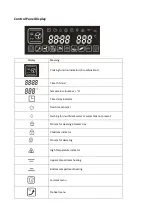
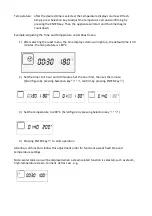
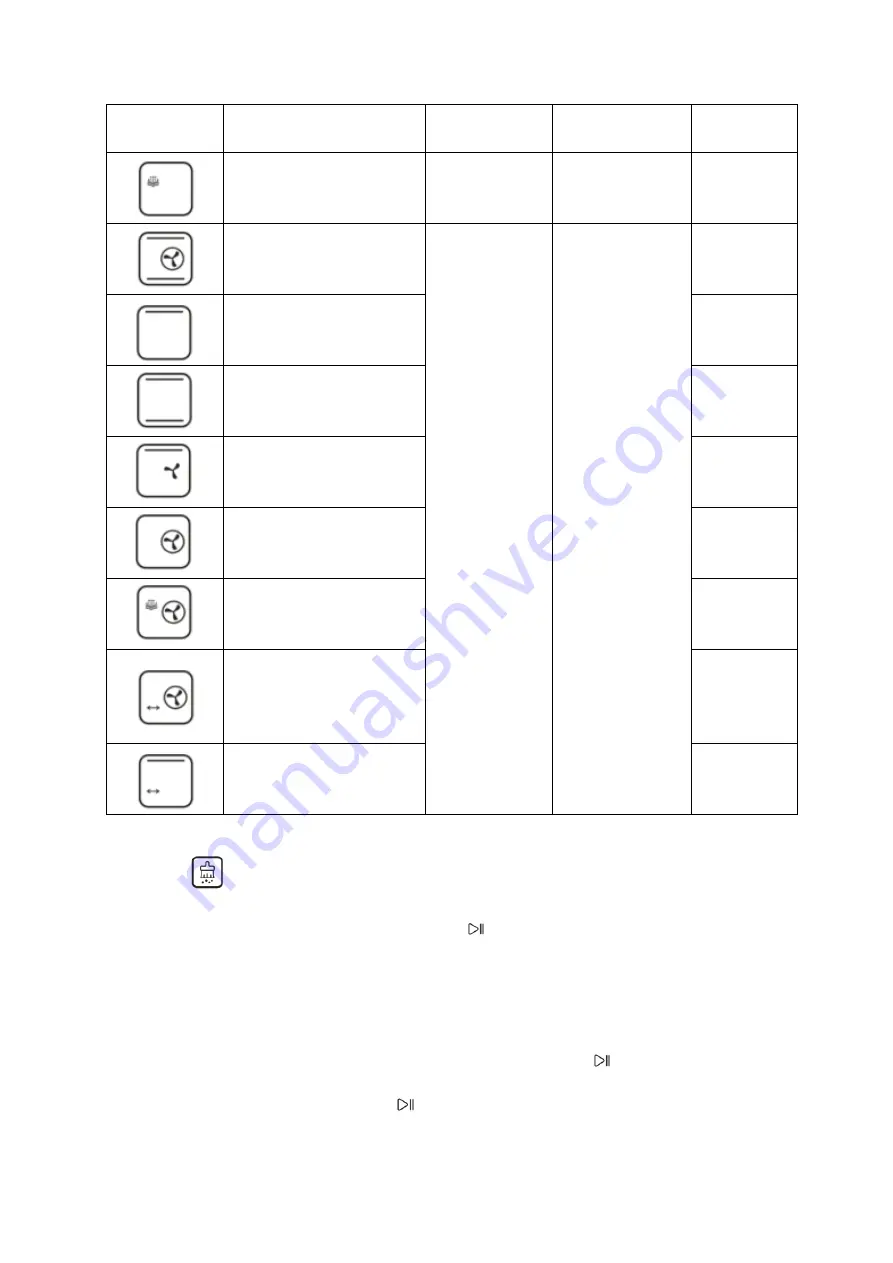
Display Icon 

Cooking Function 

Adjustable Time 

Adjustable 

Temperature 

Cooking 
Method 


Steam Mode 

5 mins ~ 

6 hour 59mins 

50°C ~ 100°C 

Steaming 


(Convection model + Upper 
grill mode + Lower grill 
model) 

5 mins ~ 

6 hour 59mins 

100°C ~ 230°C 


Upper grill mode 

Ferment, 

Roasting 


Dual grill mode 

Dring, 

Roasting, 

Baking 


Upper grill mode + 
Convection fan 


Back grill convection mode 
(back grill mode + 
Convection fan) 

Preheat, 

Airfryer, 

Dryer, Roast 


Steam + back grill convection 
mode 

Braising, 

Stewing 


Roti Back grill 
convection mode 

Airfryer 

Rotisserie 


Upper grill mode + Rotisserie 

Roasting 

Rotisserie 


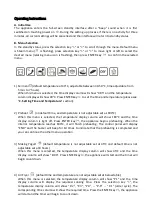
10)


Descaling

  (no heating, and default time is not adjustable set at 50 min.) 

When this menu is selected, the  time display column will show “0:50” and the temperature 
display column is light off. Press the ENTER key

, the appliance will start removing the scale 

and the timer begins to count down.   

 
C.


Setting Time and Temperature (for Ferment menu and DIY menu only)   

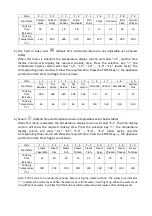
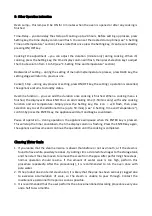
Timer:    after the desired menu (and function model if needed) is selected, confirm by pressing 

the ENTER key. The hour column of time display will flash, simply press Selection key “>” 
“<” to adjust the hour, confirming by pressing the ENTER key

. The minute column of 

time display will flash, simply press Selection key “>“ ”<” to adjust the minute(s), 
confirming by pressing ENTER key


Содержание ZKX40A1

Страница 1: ...STEAM OVEN User Manual Model ZKX40A1 ...

Страница 2: ...revent the damage to the door glass 8 The appliance cannot be operated when connected to an external timer or an independent remote control system 9 Please do not share an outlet with other high power electrical devices to avoid the fire caused by the overload of the circuit 10 Please check whether all cooking utensils are suitable for this product before it is used It is recommended to hold the f...

Страница 3: ...be reserved on the back and two sides and over the product when the product is placed Do not place any item on the product 12 The product in use must be watched 13 A high temperature steam or high temperature airflow will be released when you open its door during or after the operation of the product A safe distance shall be maintained when the door of the product is opened to avoid the scalding y...

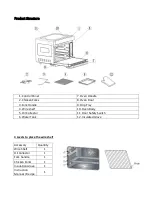
Страница 4: ... Fork Handle 9 Drip Tray 4 Wire shelf 10 Oven Body 5 Oil Collector 11 Door Safety Switch 6 Water Tank 12 Insulated Glove 4 Levels to place the wire shelf Accessory Quantity Wire Shelf 1 Oil Collector 1 Fork handle 1 Chicken Forks 1 Insulation Glove 1 Instruction Manual Recipe 1 ...

Страница 5: ... return to the previous status mode during setting process and press it again to backward again 4 Selection Key Left Arrow 1 Scroll left direction through the menu or cooking function modes 2 Decrease the time downward cycle order 3 Decrease the temperature downward cycle order 5 ON OFF Key Press this key to activate all icons to light up press again return to the standby status Press this key to ...

Страница 6: ...mperature number C Time delay indicator Overtime prompt Flashing for insufficient water or water tank not present Prompt for cleaning of water tray Child lock indicator Prompt for descaling High Temperature indicator Upper compartment heating Bottom compartment heating Ferment menu Preheat menu ...

Страница 7: ...rtation Take the water tank out of the steam oven Rinse the water tank thoroughly by hand using hot water Do not use any washing up liquid or detergent Do not clean the water tank in the dishwasher Remove all accessories from the oven compartment Wash the accessories except insulated glove in a mild solution of washing up liquid and hot water or in the dishwasher The interior of the steam oven has...

Страница 8: ...le set as 180 C When this menu is selected the temperature display column will show 180 C and the time display column is light off Press ENTER key the appliance begins preheating When the interior temperature reaches 180 C it will finish preheating The control panel will display END and the buzzer will beep for 10 times to indicate that the preheating is completed and you can continue the other me...

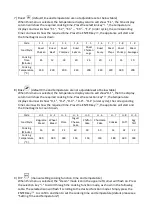
Страница 9: ...60 360 420 360 360 10 12 12 12 Cooking Temperature C 65 65 90 65 65 140 160 160 160 6 Steam default time and temperature are not adjustable set at below table When this menu is selected the temperature display column will show E 1 the time display column will show the required cooking time Press the selection key the temperature display column will show E 1 E 2 E 3 E 9 E 1 order cycle and the corr...

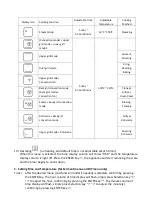
Страница 10: ...ture display column will show H 1 the time display column will show the required cooking time Press the selection key the temperature display column will show H 1 H 2 H 3 H 9 H 1 order cycle the corresponding time column will show the required time Press the ENTER key the appliance will start and the timer begins to count down Code H 1 H 2 H 3 H 4 H 5 H 6 H 7 H 8 H 9 Food Style Baguette Bread Whea...

Страница 11: ...otisserie Roasting Rotisserie 10 Descaling no heating and default time is not adjustable set at 50 min When this menu is selected the time display column will show 0 50 and the temperature display column is light off Press the ENTER key the appliance will start removing the scale and the timer begins to count down C Setting Time and Temperature for Ferment menu and DIY menu only Timer after the de...

Страница 12: ...ht up the default time is 30 minutes the temperature is 180 C 2 Set the timer to 1 hour and 40 minutes Set the hour first then set the minute Scroll figure by pressing Selection key confirm by pressing ENTER key 3 Set the temperature to 200 C Scroll figure by pressing Selection key 4 Pressing ENTER key to start operation Attention all functions follow this adjustment order for functions except fix...

Страница 13: ... set temperature Simply press the Setting key this icon will flash then press Selection key to set the additional time up to 59 mins see C Setting Time and Temperature confirm by press the ENTER key the appliance will start and begins countdown Pause of operation during operation the appliance will pause when the ENTER key is pressed This will stop the timer countdown the time display column is fl...

Страница 14: ...he water tank shall be taken out horizontally The water tank must be cleaned and wiped gently with a soft cloth After the wiping or cleaning of the inner wall the water tank shall be put back to its original place 6 After the cooking is completed the residual water in the water holder shall be removed 7 The sealing surface of the oven door shall be cleaned frequently and wiped with a soft dry clot...

Страница 15: ...eck whether the power supply plug is plugged 2 Display panel in poor contact 1 Re start 2 Contact the customer service for repair Oven lamp does not light up 1 Oven lamp is damaged 2 Poor contact 1 Replace or contact the customer service for repair 2 Contact the customer service for repair Exhaust fan does not work 1 Poor contact 2 Fan is damaged 1 Replace or contact the customer service for repai...

Страница 16: ...company therefore reserves the right to change the specification of its model at any time ENVIRONMENT FRIENDLY DISPOSAL Do not throw away the appliance with the normal household waste at the end of its life but hand it in at an official collection point for recycling By doing this you help to preserve the environment www balzano com ...

Отзывы: