oxy.IQ User’s Manual
5
Chapter 2. Installation
Chapter 2. Installation
2.1
Mounting the oxy.IQ
To install the
oxy.IQ
into the process or sample system, refer to
or
below and proceed to
the next page.
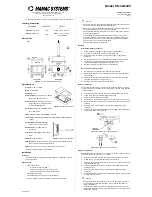
Figure 2: Outline and Installation Drawing
Note:
To avoid collecting condensate that may damage the oxygen sensor, mount the oxy.IQ in an upright
position, with the sensor manifold below the electronics module.
Install the oxy.IQ by completing the following steps:
1.
Remove the oxy.IQ and the separately-packaged oxygen sensor (see
below) from the shipping
container. Keep the shipping container and packaging material for possible future use.
IMPORTANT:
DO NOT open the oxygen sensor package until you are ready to install the sensor.
Connector
1.58
[40.3]
2.05
[52.1]
B
C
2.75
[69.8]
4.10
[104.2]
1.33
[33.9]
A
0.32
[8.25]
1.03
[26.27]
0.53
[13.57]
1.00
[25.40]
2X
1/8-27NPT-2B
.27 [6.9]
2X
8-32 UNC-2B
.51 [12.9] MAX
Ø1.75
[44.3]
Note: All dimensions are inches [mm].
Содержание Panametrics oxy.IQ
Страница 1: ...panametrics com BH024C11 EN G oxy IQ Panametrics Oxygen Transmitter User s Manual...
Страница 2: ......
Страница 4: ...ii no content intended for this page...
Страница 12: ...Chapter 1 Features and Capabilities 4 oxy IQ User s Manual no content intended for this page...
Страница 26: ...Chapter 5 The Service Menu 18 oxy IQ User s Manual no content intended for this page...
Страница 30: ...Chapter 6 Specifications 22 oxy IQ User s Manual no content intended for this page...
Страница 38: ...Appendix A Outline and Installation Drawings 30 oxy IQ User s Manual no content intended for this page...
Страница 42: ...Appendix C Order String 34 oxy IQ User s Manual no content intended for this page...
Страница 50: ...Appendix E Cell Models 42 oxy IQ User s Manual no content intended for this page...
Страница 54: ...Warranty 48 oxy IQ User s Manual no content intended for this page...
Страница 55: ......


