Copyright 2005 Baker Hughes Company.
10 | DPI880 Instruction Manual–English
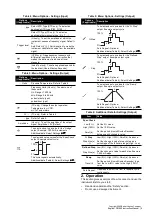
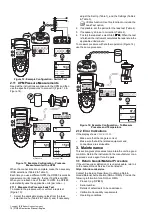
Figure
12: Example Configuration - Switch Test
2.11 UPM Pressure Measurements
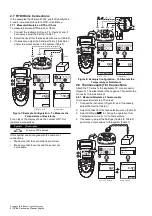
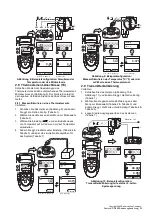
Read all the instructions supplied with the UPM and then
use the specified procedures to connect it (Figure
13 &
14).
Figure
13: Example Configuration - Pressure
Measurement with a UPM
When the connections are complete, make the necessary
IDOS selections (Table
3).
Each time you use a different UPM, the DPI880 records its
measurement units (capacity: the last 10 different UPM).
When you re-attach one of the last 10 UPM, the DPI880
automatically uses the applicable units (psi, mbar …).
2.11.1 Measure the Pressure/Leak Test
To measure the pressure with or without a leak test
13):
1. Select the applicable pressure task from the task
selection menu (Table
3) and, if necessary,
adjust the Set Up (Table
& Table
5).
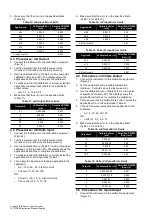
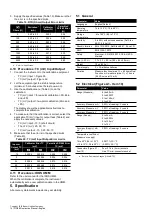
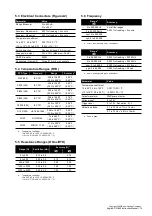
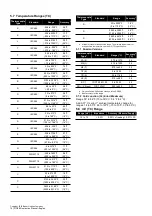
Utilities function: Use this function to include the
Leak Test option.
2. If applicable, set the period for the leak test (Table
4).
3. If necessary, do a zero correction (Table
4).
4. To start the leak test, select Start (
). When the test
is finished, the instrument calculates the leak rate in the
applicable units/minute.
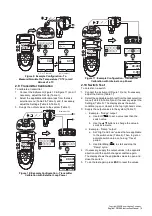
To measure pressure with another operation (Figure
14),
use the same procedure.
Figure
14: Example Configuration - To Measure
Pressure and Temperature
2.12 Error Indications
If the display shows <<<< or >>>>
:
•
Make sure that the range is correct.
•
Make sure that all the related equipment and
connections are serviceable.
3. Maintenance
This section gives procedures to maintain the unit in a good
condition. Return the instrument to the manufacturer or an
approved service agent for all repairs.
3.1 Return Goods/Material Procedure
If the unit requires calibration or is unserviceable, return it
to the nearest Druck Service Centre listed at:
https://druck.com/service
.
Contact the Service Department to obtain a Return
Goods/Material Authorization (RGA or RMA). Provide the
following information for a RGA or RMA:
•
Product (e.g. DPI880)
•
Serial number.
•
Details of defect/work to be undertaken.
•
Calibration traceability requirements.
•
Operating conditions.
30V MAX
Vin
24Vo
mA
-mA (24Vo)+
MENU
OK
HOLD
ESC
1
2
100.0
1372°C
K
CJ=25.4
-
+
MENU
OK
+VE
-VE
1
2
102.0
100.0
-
+
,
-
+
TC
mA +
3W
MAX
30V
COM
V
Hz
mA -
4W
RTD
Edit
Settings
1
MENU
OK
15.88
15.74
0.14
2.76
MENU
OK
5.03
30 ... g
MENU
OK
HOLD
ESC
1
2
… /min
15.03
30 ... g
MENU
OK
Start
Settings
a) Pressure
b) Leak Test
Settings
1
MENU
OK
MENU
OK
HOLD
ESC
5.03
30 … g
87.9
1372°C
K
CJ=25.4
2
1
2
TC
mA +
3W
MAX
30V
COM
V
Hz
mA -
4W
RTD
Settings
Содержание Druck DPI 880
Страница 2: ......
Страница 4: ...Copyright 2005 Baker Hughes Company ii DPI880 Instruction Manual English B1...
Страница 38: ...Copyright 2005 Baker Hughes Company 34 DPI880 Bedienungsanleitung Deutsch...
Страница 56: ...Copyright 2005 Baker Hughes Company 52 Manual de instrucciones DPI880 Espa ol...
Страница 110: ...Copyright 2005 Baker Hughes Company 106 Manual de Instru es do DPI880 Portugu s...
Страница 130: ...2005 Baker Hughes 126 DPI880...
Страница 166: ...Copyright 2005 Baker Hughes Company 162 DPI880...
Страница 167: ......


