


Instruction 19-9326
23
Monoxor III
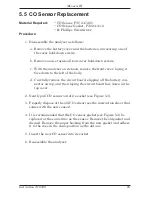
5.5 CO Sensor Replacement
Material Required:
• CO Sensor, P/N 24-7265
• CO Sensor Gasket, P/N 24-1112
• #1 Phllps Screwdrver
Procedure:
1. Dsassemble the analyzer as follows:
a. Remove the battery cover and the batteres, uncoverng one of
the cover hold-down screws.
b. Remove and set aside all four cover hold-down screws.
c. Wth the analyzer on ts back, remove the front cover, layng t
face down to the left of the body.
d. Carefully remove the crcut board, slppng off the battery con
-
nector on top, and then layng the crcut board face down n the
top cover.
2. Gently pull CO sensor out of its socket (see Figure 5-3).
3. Properly dspose of the old CO sensor (see the nstructon sheet that
comes wth the new sensor).
4. It is recommended that the CO sensor gasket (see Figure 5-4) be
replaced at the same tme as the sensor. Remove the old gasket and
dscard. Remove the paper backng from the new gasket and adhere
t to the case n the same poston as the old one.
5. Insert the new CO sensor nto ts socket.
6. Reassemble the analyzer.
Содержание 19-8104
Страница 4: ...Monoxor III Instruction 19 9326 ii Notes ...
Страница 6: ...Instruction 19 9326 Monoxor III Notes ...
Страница 8: ...Instruction 19 9326 Monoxor III Notes ...
Страница 16: ...Instruction 19 9326 12 Monoxor III Notes ...
Страница 22: ...Instruction 19 9326 18 Monoxor III Notes ...
Страница 29: ...Instruction 19 9326 25 Monoxor III Figure 5 3 CO Sensor Located on Backside of Printed Circuit Board ...
Страница 30: ...Instruction 19 9326 26 Monoxor III Figure 5 4 Back Case Component Locations ...
Страница 34: ...Monoxor III Instruction 19 9326 30 Notes ...
Страница 35: ...Monoxor III Instruction 19 9326 31 Notes ...