146
Basic Design Center Operations
Step 1
Original Image Stage
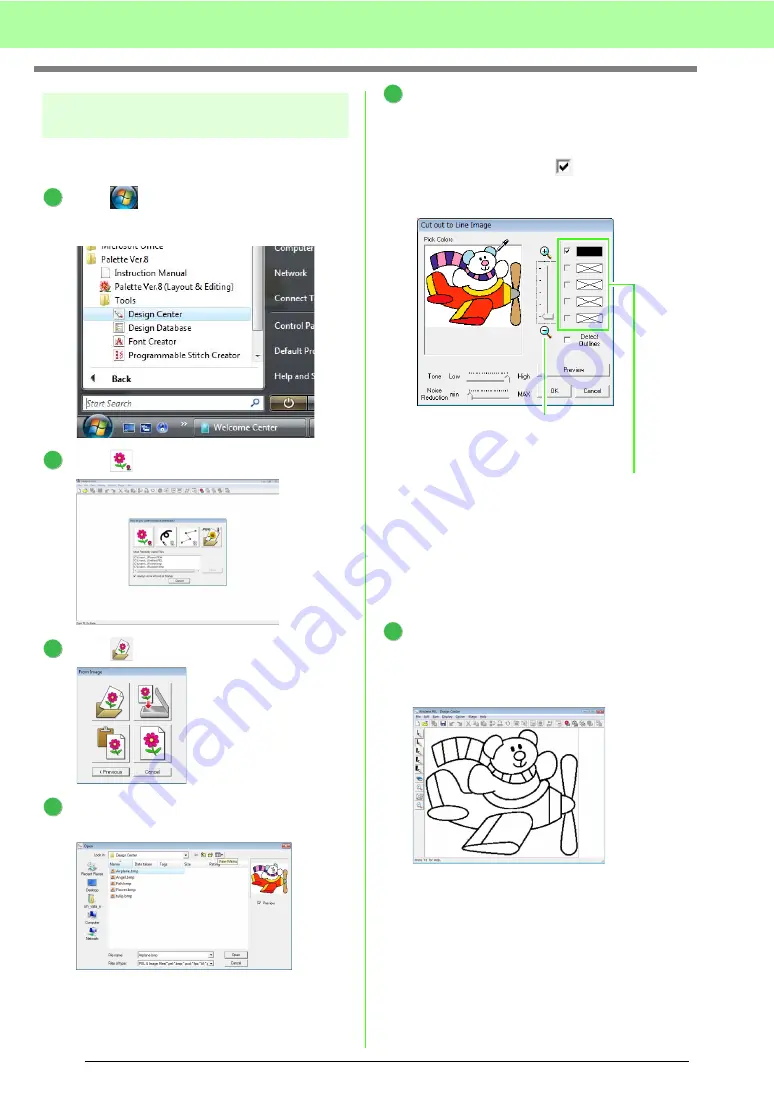
We will import an image and convert it to a line
image.
Click
, and then select
All Programs
,
then
Palette Ver.8
, then
Tools
, then
Design
Center
.
Click .
Click .
Select the desired image file, and then click
Open
.
In the
Cut out to Line Image
dialog box, click
the colors to be used for the outlines
(embroidery lines).
→
The selected color appears in a box on
the right side, and
appears in the
check box to show that the color is
selected.
c
For details on other settings in the
Cut
out to Line Image
dialog box, refer to
“Extracting the outlines of an image” on
page 156.
After selecting the colors to be used for the
outlines, click
OK
.
→
The line image appears in the Design
Page.
1
2
3
4
5
If a color other than that for the
outline was selected, clear the
check box beside the color to
deselect it.
The desired color can be selected
more easily if the
Zoom
slider is
used to enlarge the image.
6
Содержание Palette
Страница 1: ......
Страница 146: ...144 Arranging Embroidery Designs Layout Editing ...
Страница 200: ...198 Managing Embroidery Design Files Design Database ...
Страница 218: ...216 Creating Custom Stitch Patterns Programmable Stitch Creator ...
Страница 244: ...242 Tips and Techniques ...
Страница 264: ...262 Menus Tools ...
Страница 266: ...264 Troubleshooting ...
Страница 271: ...English ...


