Dokumentation
INTERCOM
MODULE
Configuration examples
INTERCOM
MODULE
BAB TECHNOLOGIE GmbH 33
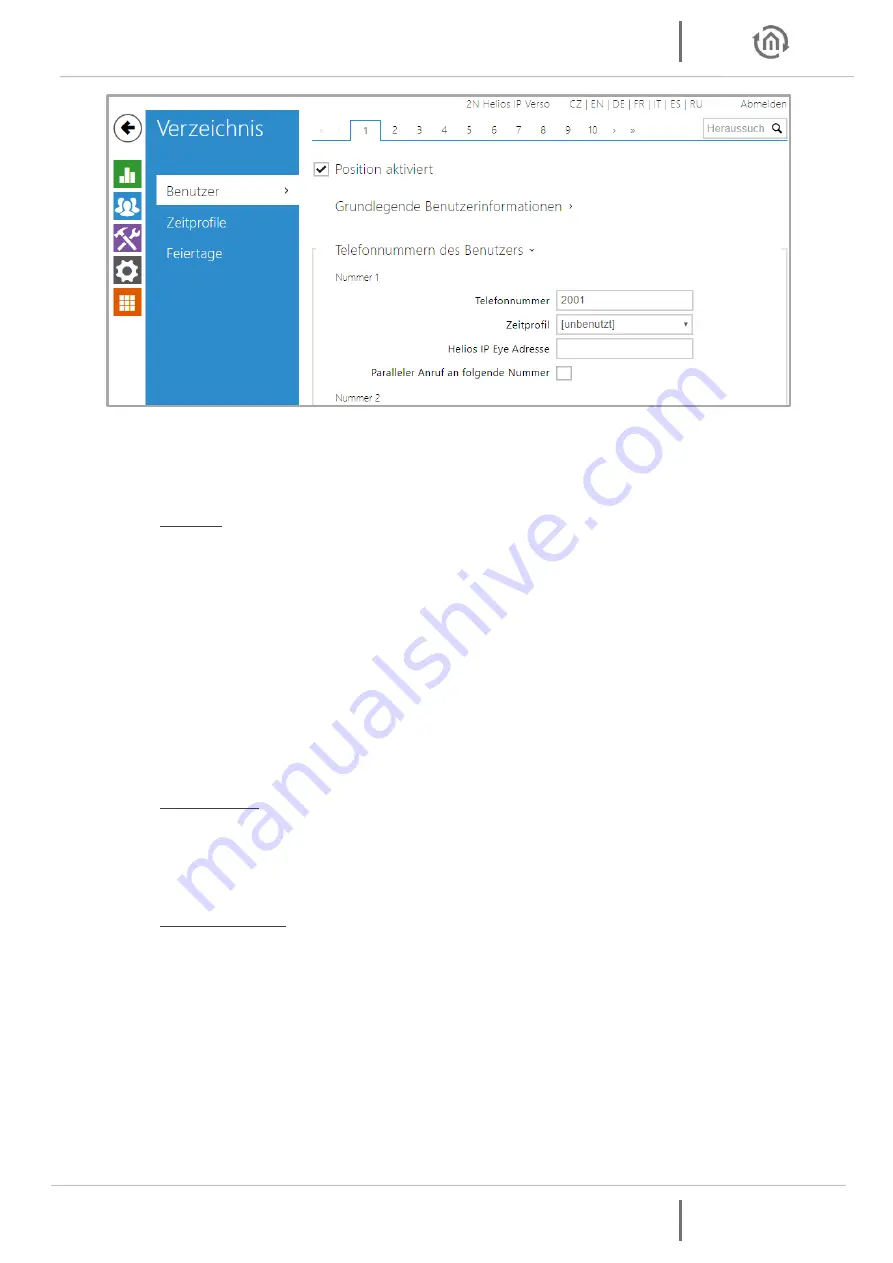
Figure 27: Phone numbers of the user
3.
Navigate to directory / user (see figure 27: User phone numbers) and assign each bell button its
own 1-9 digit phone number. In this example, the 2N system has only one bell button. For each
additional button you have to jump up one tab at the top.
Number:
Phone number:
Enter any 1-9-digit phone number here:
Be sure to assign a separate phone number to each bell button.
Time profile:
A time profile isn’t necessary for using the
INTERCOM
MODULE.
Please note that a time profile has an influence on the behaviour of the 2N. If, for
example, you limit the time of the SIP phone calls, that no SIP call is forwarded to the
INTERCOM
MODULE during this time.
Helios IP Eye address:
Isn’t necessary for the operation of the
INTERCOM
MODULE.
Parallel call for the following number:
Activation for the parallel call to several clients
isn’t necessary at this item; you can also configure this function in the
INTERCOM
MODULE.
4.
Navigate to the HTTP API and enable an account (see Figure 28: Configuration HTTP API). These
settings are important for video transmission in CONTROL
T
2.
User settings:
Username: This name is required for authenticating the client where CONTROL
T
2 is
installed.
Password: The password is required for authenticate the client where CONTROL
T
2 is
installed.
User permissions:
Here you must activate the camera access for monitoring. All other settings are not
necessary for video transmission.


