Dokumentation
INTERCOM
MODULE
Configuration examples
INTERCOM
MODULE
BAB TECHNOLOGIE GmbH 29
6
CONFIGURATION EXAMPLES
CONFIGURATION EXAMPLE ON A DOORBIRD
6.1
OUTDOOR STATION WITH THREE BUTTONS
Prerequisite is that the DoorBird was set up in the network and works with the DoorBird app (iOS,
Android).
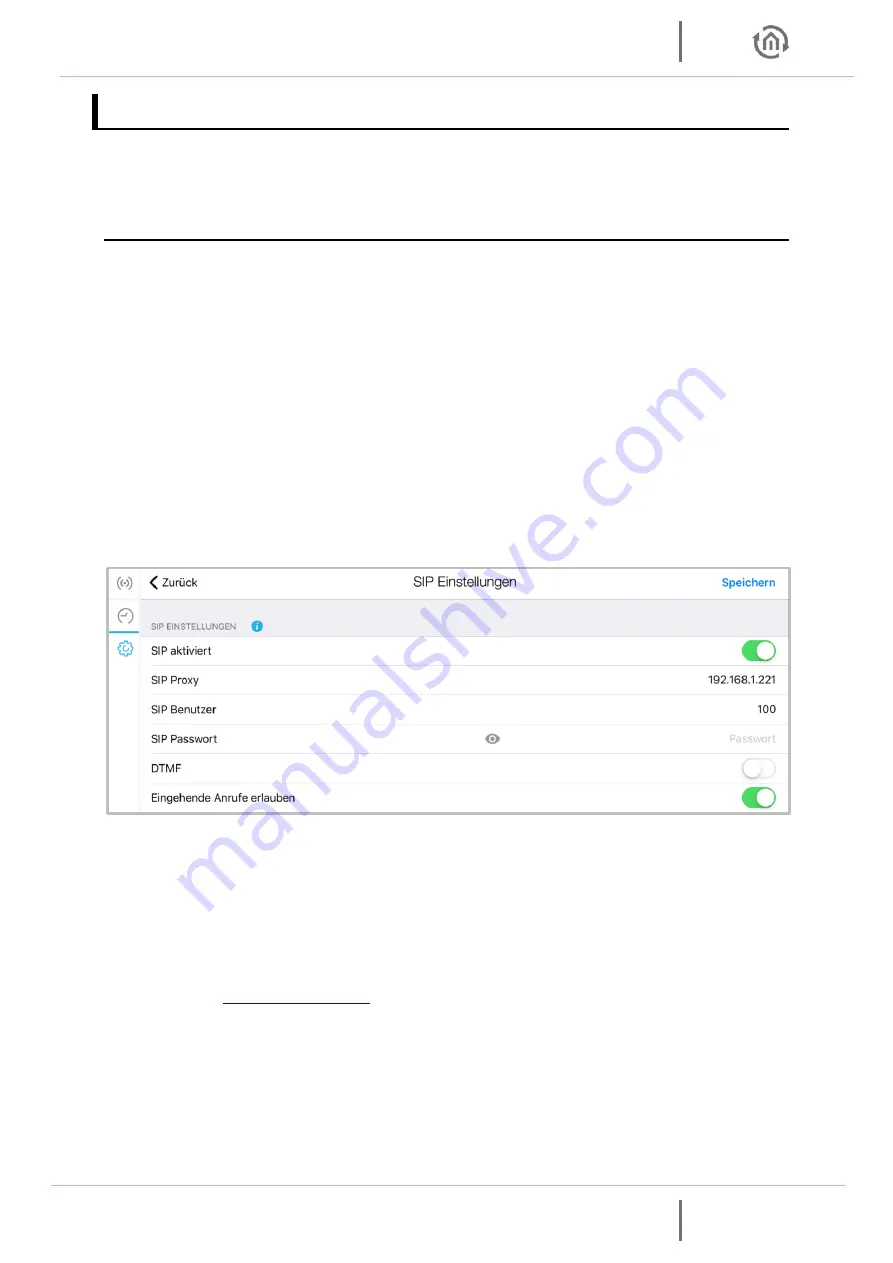
The following settings must now be done in the DoorBird APP.
1.
Enter to the settings and log into administrations account.
2.
Navigate to the SIP settings and open them.
3.
Activate SIP
4.
Enter the IP address of the
INTERCOM
MODULE under SIP Proxy.
5.
For SIP user enter a freely selectable 1-9-digit number, which is comparable to a telephone
number. That SIP account will be needed later in CONTROL
T
2
6.
A SIP password is not required.
7.
Allow incoming calls
Other settings are not required for the
INTERCOM
MODULE. Save the settings.
Figure 24: SIP settings DoorBird
8.
Navigate to SIP numbers and open the settings.
9.
Click Add.
10.
Enter a freely selectable 1-9-digit number in the "name" field. This number may not be the
same number that was entered under SIP user, see in Fig. 16.
11.
Enter the number in the "SIP address" field as it was previously entered in the "name" field
followed by a @ and the IP address of the
INTERCOM
MODULE, then save the settings.
Example:
For each bell button must have configured its own freely selectable 1-9-digit number that does not
match with another number and the SIP address, as described in point 10 and point 11.


