background image

AXIS M3007-P Network Camera

Detectors

Detectors

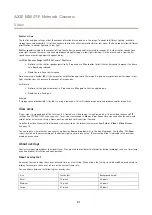
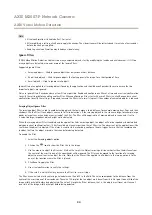
About camera tampering

Camera Tampering can generate an alarm when the camera is repositioned, or when the lens is covered, spray-painted or severely
de-focused. To send an alarm, for example via email, an action rule must be set up.

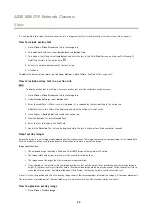
How to configure tampering detection

1. Go to

Detectors > Camera Tampering

.

2. Set the

Minimum duration

, that is the time that must elapse before an alarm is generated. Increase time to prevent

false alarms for known conditions that affect the image.

3. Select

Alarm for dark images

if an alarm should be generated when lights are dimmed or turned off, or if the lens is

sprayed, covered, or rendered severely out of focus.

4. Click

Save

.

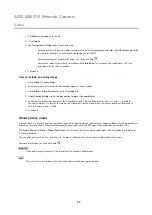
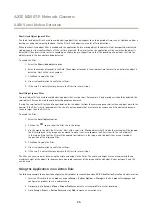
How to configure an action rule for tampering alarm

1. Go to

Events > Action Rules

.

2. Click

Add

to set up a new action rule.

3. Enter a

Name

for the action rule.

4. Under

Condition

, select

Detectors

from the

Trigger

list.

5. Select

Tampering

from the list of detectors.

6. Optionally, select a schedule and set additional conditions.

7. Select the action.

Example:

To send an email, select

Send Notification

and select a

Recipient

from the list of defined

recipients.

Note

The

While the rule is active

option under

Duration

cannot be used with camera tampering, since camera tampering does not

have a duration and once it has been triggered it will not automatically return to its untriggered state.

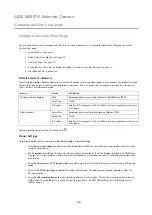
For more information on actions rules, see

Events on page 37

.

29

Содержание M3007-P

Страница 1: ...AXIS M3007 P Network Camera User Manual ...

Страница 2: ...th Also miniSD microSD miniSDHC microSDHC microSDXC are all trademarks or registered trademarks of SD 3C LLC in the United States other countries or both Regulatory Information Europe This product complies with the applicable CE marking directives and harmonized standards Electromagnetic Compatibility EMC Directive 2014 30 EU See Electromagnetic Compatibility EMC on page 2 Low Voltage LVD Directiv...

Страница 3: ...orrect disposal of this waste Europe This symbol means that the product shall not be disposed of together with household or commercial waste Directive 2012 19 EU on waste electrical and electronic equipment WEEE is applicable in the European Union member states To prevent potential harm to human health and the environment the product must be disposed of in an approved and environmentally safe recy...

Страница 4: ...erlays 21 About privacy masks 23 Configure the Live View Page 24 PTZ Pan Tilt Zoom 26 About preset positions 26 About guard tours 27 Advanced 27 Detectors 29 About camera tampering 29 Applications 30 Application Licenses 30 Upload Application 30 Application Considerations 30 AXIS Video Motion Detection 32 Considerations 32 Start and Stop the Application 32 Configure Application 32 Using the Applic...

Страница 5: ...7 P Network Camera Table of Contents Troubleshooting 58 Check the Firmware 58 Upgrade the Firmware 58 Symptoms Possible Causes and Remedial Actions 59 Technical Specifications 62 Performance Considerations 62 5 ...

Страница 6: ...rview Hardware Overview 1 Cover 2 Control button 3 Status LED 4 microSD Card slot 5 Network conector PoE comes attached with product 6 Focus ring Connectors and Buttons Network Connector RJ45 Ethernet connector with Power over Ethernet PoE 6 ...

Страница 7: ...oSDHC microSDXC cards not included For SD card recommendations see www axis com Control Button For location of the control button see Hardware Overview on page 6 The control button is used for Resetting the product to factory default settings See page 57 Connecting to an AXIS Video Hosting System service See page 49 To connect press and hold the button for about 3 seconds until the Status LED flas...

Страница 8: ...ssign an IP address see the document Assign an IP Address and Access the Video Stream on Axis Support web at www axis com techsup Note To show Bonjour as a browser bookmark go to Safari Preferences 3 Enter your user name and password If this is the first time the product is accessed the root password must first be configured For instructions see Set the Root Password on page 9 4 The product s Live...

Страница 9: ...TPS connection follow these steps 1 Click Use HTTPS A temporary certificate valid for one year is created enabling encryption of all traffic to and from the product and the password can now be set securely 2 Enter a password and then re enter it to confirm the spelling 3 Click OK The password has now been configured Camera Orientation This setting is defined the first time the product is accessed ...

Страница 10: ...ed here may differ from those displayed in your own Live View page The following provides an overview of each available control Controls on the Live View Page Click the View size buttons to show the image in full size right button or to scale down the image to fit the browser window left button Select a stream profile for the Live View page from the Stream Profile drop down list For information ab...

Страница 11: ... current video stream on your computer The location where the recording is saved can be specified in the AMC Control Panel Enable this button from Live View Config Viewer Settings Note PTZ controls are only available for view areas With the PTZ Control Queue enabled the time each user is in control of the PTZ settings is limited Click the buttons to request or release control of the PTZ controls T...

Страница 12: ...ork Camera Access the Product Zoom bar Use the arrows to zoom in and out or click on a position on the bar to zoom to that position The PTZ controls can be disabled under PTZ Advanced Controls see Controls on page 27 12 ...

Страница 13: ...affic on the network until a client connects and requests the stream Note that there are a maximum of 20 simultaneous unicast connections Multicast RTP This method RTP over UDP should be used for live multicast video The video stream is always up to date even if some frames are dropped Multicasting provides the most efficient usage of bandwidth when there are large numbers of clients viewing simul...

Страница 14: ...m You can also access video and images from the Axis product in the following ways Motion JPEG server push if supported by the client Chrome or Firefox for example This option maintains an open HTTP connection to the browser and sends data as and when required for as long as required Windows Media Player This requires AXIS Media Control and the H 264 decoder to be installed The following paths can...

Страница 15: ...e View page Administrators have unrestricted access to all settings Operators have restricted access to settings see Users on page 45 See also the online help Basic Setup Basic Setup provides shortcuts to the settings that should be made before using the Axis product 1 Users See page 45 2 TCP IP See page 48 3 Date Time See page 47 4 Video Stream See page 16 The Basic Setup menu can be disabled fro...

Страница 16: ... is a specific size requirement for example in face recognition The pixel counter can be used When setting up a video stream see Set Up Video Streams on page 16 Under Preview click Open and select the Show pixel counter option to enable the rectangle in the image Use the mouse to move and resize the rectangle or enter the number of pixels in the Width and Height fields and click Apply When accessi...

Страница 17: ...view that is suitable for corner installations to the right Define the settings for this view from Setup Video Video Stream Panorama C See Set Up Video Streams on page 16 Double Panorama Corner In this view there are two 135 corner views To define the settings for this view go to Setup Video Video Stream Double Pan C See Set Up Video Streams on page 16 Image The default image settings can be confi...

Страница 18: ...line Use the Baseline profile if the client does not support CABAC entropy coding Main The Main profile uses CABAC and provides a better compression with maintained video quality It requires a larger amount of processing power to decode than the Baseline profile About bitrate control Bitrate control is useful to make sure the video streaming does not take up too much bandwidth About variable bitra...

Страница 19: ... profiles A stream profile is a set of predefined stream settings including resolution compression frame rate and overlay settings Stream profiles can be used When setting up recording using action rules See Events on page 37 When setting up continuous recording See Continuous Recording on page 43 In the Live View page select the stream profile from the Stream profile drop down list To create a ne...

Страница 20: ...xposure control Exposure Settings Exposure is the amount of light the camera s sensor captures for a scene Too much light results in a washed out image and too little light results in a dark image Exposure value Use the Exposure value slider to adjust the overall brightness of the image Exposure control Select a suitable option to control exposure For most scenes the Automatic option will provide ...

Страница 21: ...idth is limited try using a lower gain This will reduce image noise and produce smaller image files View areas A view area is a cropped part of the full view It is treated as a video source in Live View and has its own video stream and PTZ settings See PTZ Pan Tilt Zoom on page 26 To set up a view area go to Video View Areas Here you can define the name and resolution for a view area set up a Home...

Страница 22: ...From the Actions list select Overlay Text 6 Enter the text to display in the Text field 7 Specify the Duration The text can be displayed while the rule is active or for a fixed number of seconds About overlay images An overlay image is a static image superimposed over the video stream The image for example a company logo is first uploaded to the Axis product and then used to provide extra informat...

Страница 23: ...ol the image s position enter the X horizontal and Y vertical coordinates The X 0 and Y 0 position is the top left corner If a part of the image is positioned outside the video image the overlay image will be moved so that the whole image is visible 6 Click Save About privacy masks A privacy mask is a user defined area that covers parts of the monitored area Privacy masks appear as blocks of solid...

Страница 24: ...er Push Recommended viewer for other browsers Motion JPEG QuickTime H 264 Other browsers Still image Displays still images only Click the Refresh button in your browser to view a new image For more information please see the online help Viewer Settings To configure options for the viewer go to Live View Config Viewer Settings Select Show viewer toolbar to display the AXIS Media Control AMC or the ...

Страница 25: ...t in the background in a hidden frame Defining the link as a web link will open the link in a new window Output Buttons External I O devices connected to the Axis product s output ports can be controlled directly from the Live View page To display output buttons in the Live View page 1 Go to Setup Live View Config 2 Under Output Buttons select the type of control to use Pulse activates the output ...

Страница 26: ...ion 3 Write a name in the Current position field 4 Click Add to save the preset position How to include the preset position name in an overlay text 1 Go to Video 2 Select Include overlay text 3 Write the modifier P in the field 4 Click Save Set the Home Position The entire view area is treated as the Home position which is readily accessible by clicking the Home button on the Live View page and in...

Страница 27: ...ecify the View Order of the preset positions or select Random view order 8 Click Save How to edit a guard tour 1 Go to Setup PTZ Guard Tour 2 Select the guard tour in the Guard Tour List 3 Click Modify How to delete a guard tour 1 Go to Setup PTZ Guard Tour 2 Select the guard tour in the Guard Tour List 3 Click Remove Advanced Controls Advanced PTZ settings can be configured under PTZ Advanced Con...

Страница 28: ...etwork Camera PTZ Pan Tilt Zoom Note Disabling PTZ controls will not affect preset positions For example if the tilt control is disabled the product can still move to preset positions that require a tilt movement 28 ...

Страница 29: ...or if the lens is sprayed covered or rendered severely out of focus 4 Click Save How to configure an action rule for tampering alarm 1 Go to Events Action Rules 2 Click Add to set up a new action rule 3 Enter a Name for the action rule 4 Under Condition select Detectors from the Trigger list 5 Select Tampering from the list of detectors 6 Optionally select a schedule and set additional conditions ...

Страница 30: ...ck Upload Package 3 Install the license if applicable For instructions see the documentation provided by the application vendor 4 Start the application Go to page Applications select the application in the list of installed applications and click Start 5 Configure the application For instructions see the documentation provided by the application vendor Note Applications can be uploaded by product ...

Страница 31: ...twork Camera Applications If the Axis product is reset to factory default uploaded applications and their settings are removed For information about factory default see Reset to Factory Default Settings on page 57 31 ...

Страница 32: ...se false detections Start and Stop the Application To start the application select it in the Installed Applications list on the Applications page and click Start To stop the application select it in the list and click Stop Configure Application The application is available from Setup Applications Motion Detection 3 Go to Settings and then click AXIS AXIS AXIS Video Video Video Motion Motion Motion...

Страница 33: ...a rectangle placed in the center of the image Use the mouse to move reshape and resize the area so that it covers the desired part of the image The default square can be changed to a polygon with up to 20 points corners To move the exclude area place the mouse pointer inside the area When the pointer becomes a cross drag the area to the new position To add a new point click on the exclude area bor...

Страница 34: ...ample large ponds or large trees use exclude areas instead of the filter The filter will be applied to all moving objects in scene and if set to a value too large important objects might not be detected When the swaying object filter is enabled and the application finds a moving object the object will not be reported as detected red polygon in visual confirmation until it has travelled a distance ...

Страница 35: ... the camera appears smaller than an object close to the camera If the filter is set to ignore objects the size of a person people that are close to be camera can still be detected because they are larger than the filter size To enable the filter 1 Select the Small objects option 2 Click on the icon to show the filter size in the image 3 Use the mouse to adjust the filter size Start with a small si...

Страница 36: ...ly record video during certain time periods select a Schedule 6 Under Actions select Record Video from the Type drop down list 7 Select the stream profile and storage device to use and configure the pre and post trigger times 8 Make sure that the rule is enabled and then click OK Note To appear in the Trigger list the application must be started and its status must be Idle or Running 36 ...

Страница 37: ...from the Trigger drop down list and then select VMD3 4 Optionally select a Schedule and Additional conditions See below 5 Under Actions select Record Video from the Type drop down list 6 Select a Stream profile and configure the Duration settings as described below 7 Select Network Share from the Storage drop down list To use more than one trigger for the action rule select Additional conditions a...

Страница 38: ...he camera view moves due to a PTZ operation Preset Reached Trigger the rule when the camera stops at a preset position This can be for example be used with the Send Images action to upload images from the preset position Storage Disruption Trigger the rule if storage problems are detected for example if the storage device is unavailable removed full locked or if other read or write problems occur ...

Страница 39: ...Types on page 39 To add a recipient 1 Go to Events Recipients and click Add 2 Enter a descriptive name 3 Select a recipient Type 4 Enter the information needed for the recipient type 5 Click Test to test the connection to the recipient 6 Click OK Recipient Types The following recipients are available Recipient Use with action Notes Email Send Images Send Notification Send Video Clip An email recip...

Страница 40: ...ail accounts To set up an email recipient using one of the listed providers 1 Go to Events Recipients and click Add 2 Enter a Name and select Email from the Type list 3 Enter the email addresses to send emails to in the To field Use commas to separate multiple addresses 4 Select the email provider from the Provider list 5 Enter the user ID and password for the email account 6 Click Test to send a ...

Страница 41: ...every 5 minutes or every hour To set up a recurrence 1 Go to Events Recurrences and click Add 2 Enter a descriptive name and recurrence pattern 3 Click OK To use the recurrence in an action rule first select Time from the Trigger drop down list in the Action Rule Setup page and then select the recurrence from the second drop down list To modify or remove recurrences select the recurrence in the Re...

Страница 42: ...gured under System Options Date Time see Date Time on page 47 To find a recording follow these steps 1 Go to Recordings List 2 To reduce the number of recordings displayed select the desired options under Filter Recording time List recordings that started between the From and To times Event List recordings that were triggered by a specific event Select continuous to list continuous recordings Stor...

Страница 43: ...e Export Recording dialog opens 4 By default the complete recording is selected To export a part of the recording modify the start and stop times 5 Optionally enter a file name for the recording 6 Click Export Note Recordings can also be exported from the playback window Continuous Recording The Axis product can be configured to continuously save video to a storage device For information about sto...

Страница 44: ...g the product to factory default settings will erase any uploaded language files and reset the product language to English Clicking the Restore button on the Maintenance page will not affect the language A firmware upgrade will not affect the language used However if you have uploaded a new language to the product and later upgrade the firmware it may happen that the translation no longer matches ...

Страница 45: ... that do not support encryption or if you upgraded the firmware and existing clients support encryption but need to log in again and be configured to use this functionality Under User Settings select the Enable anonymous viewer login option to allow anonymous users access to the Live View page Deselect the Enable Basic Setup option to hide the Basic Setup menu Basic Setup provides quick access to ...

Страница 46: ...ased Network Admission Control providing secure authentication of wired and wireless network devices IEEE 802 1X is based on EAP Extensible Authentication Protocol To access a network protected by IEEE 802 1X devices must be authenticated The authentication is performed by an authentication server typically a RADIUS server examples of which are FreeRADIUS and Microsoft Internet Authentication Serv...

Страница 47: ... Create a self signed certificate see How to create a self signed certificate on page 47 2 Go to Setup System Options Security Certificates 3 Click Create certificate signing request and provide the requested information 4 Copy the PEM formatted request and send to the CA of your choice 5 When the signed certificate is returned click Install certificate and upload the certificate How to install ad...

Страница 48: ...age 57 and then perform the installation again To use a static IP address check Use the following IP address and specify the IP address subnet mask and default router IPv6 Address Configuration If IPv6 IP version 6 is enabled the Axis product will receive an IP address according to the configuration in the network router To enable IPv6 go to System Options Network TCP IP Basic Other settings for I...

Страница 49: ...om any location For more information and help to find a local AVHS Service Provider go to www axis com hosting The AVHS settings are configured under System Options Network TCP IP Basic The possibility to connect to an AVHS service is enabled by default To disable clear the Enable AVHS box One click enabled Press and hold the product s control button see Hardware Overview on page 6 for about 3 sec...

Страница 50: ...dress and enter the host name or IP address of the NTP server Host Name Configuration The Axis product can be accessed using a host name instead of an IP address The host name is usually the same as the assigned DNS name The host name is configured under System Options Network TCP IP Advanced Select Obtain host name via IPv4 DHCP to use host name provided by the DHCP server running on IPv4 Select ...

Страница 51: ... selected Alternative HTTP port Select this option to manually define an external HTTP port Enter a port in the range 1024 65535 If the port field is empty or contains the default setting which is 0 a port number is automatically selected when enabling NAT traversal Note An alternative HTTP port can be used or be active even if NAT traversal is disabled This is useful if your NAT router does not s...

Страница 52: ...nagement system on important events and status changes Check Enable traps and enter the IP address where the trap message should be sent and the Trap community that should receive the message Note If HTTPS is enabled SNMP v1 and SNMP v2c should be disabled Traps for SNMP v1 v2 are used by the Axis product to send messages to a management system on important events and status changes Check Enable t...

Страница 53: ...on the card from the Windows operating system a third party ext4 driver or application is required vFAT supported by most operating systems for personal computers The SD card is managed on the System Options Storage page Click SD Card to open Storage Management If the card s status shows as failed click Check disk to see if the problem can be found and then try Repair This option is only available...

Страница 54: ...d file systems To manually format the SD card follow these steps 1 Insert the SD card in the SD card slot 2 Open the Axis product s webpages and go to Setup System Options Storage 3 Click SD Card 4 Click Format and select the desired file system 5 Click OK to start formatting the card Encrypt SD Card Data To prevent unauthorized individuals and systems from accessing recorded video the SD card con...

Страница 55: ...ddress DNS or Bonjour name to the host server in the Host field 4 Enter the name of the share in the Share field Sub folders cannot be used 5 If required select The share requires login and enter the user name and password 6 Click Connect To clear all recordings and data from the Axis product s folder on the designated share click Clear under Storage Tools To avoid filling the share it is recommen...

Страница 56: ... The System Options Support Logs Reports page generates logs and reports useful for system analysis and troubleshooting If contacting Axis Support please provide a valid Server Report with your query System Log Provides information about system events Access Log Lists all failed attempts to access the product The Access Log can also be configured to list all connections to the product see below Se...

Страница 57: ... Advanced Plain Config Axis Support does not provide assistance Reset to Factory Default Settings Important Reset to factory default should be used with caution A reset to factory default will reset all settings including the IP address to the factory default values Note The installation and management software tools are available from the support pages on www axis com techsup To reset the product...

Страница 58: ...ions and release notes available with each new release before upgrading the firmware To upgrade the product s firmware 1 Download the latest firmware file to your computer available free of charge at www axis com techsup 2 Go to Setup System Options Maintenance in the product s webpages 3 Under Upgrade Server click Browse and locate the file on your computer 4 Click Upgrade 5 Wait approximately 10...

Страница 59: ...ss bytes 32 time 10 this means that the IP address may already be in use by another device on the network Obtain a new IP address from the network administrator and reinstall the product If you receive Request timed out this means that the IP address is available for use with the Axis product Check all cabling and reinstall the product Possible IP address conflict with another device on the same s...

Страница 60: ...the product need to be configured The TTL Time To Live value may need to be increased No multicast H 264 displayed in the client Check with your network administrator that the multicast addresses used by the Axis product are valid for your network Check with your network administrator to see if there is a firewall preventing viewing Poor rendering of H 264 images Ensure that your graphics card is ...

Страница 61: ...System Log under System Options Support Logs Reports Depending on the problem it might be necessary to re mount the storage device For information on how to set up a storage disruption alarm see Events on page 37 Video cannot be recorded Check that the SD card is not write protected that is read only SD card cannot be mounted Reformat the SD card and then click Mount NO NO NOTICE TICE TICE Formatt...

Страница 62: ...result in images containing more data Bandwidth affected Access by large numbers of Motion JPEG and or unicast H 264 clients Bandwidth affected Simultaneous viewing of different streams resolution compression by different clients Effect on frame rate and bandwidth Accessing Motion JPEG and H 264 video streams simultaneously Frame rate and bandwidth affected Heavy usage of event settings affect the...

Страница 63: ...User Manual Ver M8 7 AXIS M3007 P Network Camera Date July 2016 Axis Communications AB 2012 2016 Part No 1474602 ...

Отзывы: