


Advanced Setup: WebUI Input Settings
After verifying good signal path from source to sync now it is time to go through the rest of the settings to
maximize the setup� Starting with the input side with the EDID and Audio Mode settings�
12
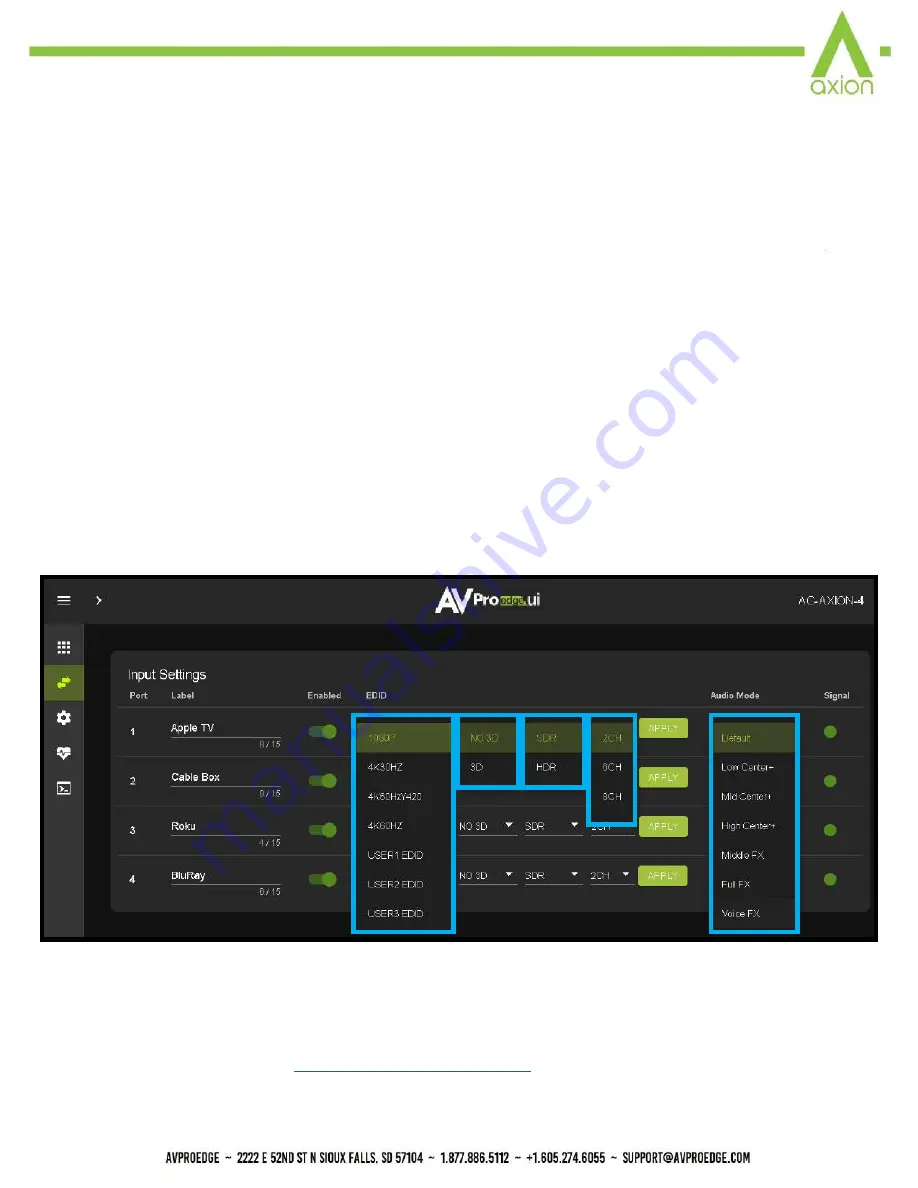
1� With the WebUI open, navigate to the I/O Conifg tab and focus on the Input Settings section at the
top�
2�
Set the EDID on each input by selecting the resolution drop-down first (default is set to 1080P). The
options are 1080P, 4K30Hz, 4K60Hz Y420, and 4K60Hz� If you select USER1 EDID, then the drop-
downs change to allow you to select from and output to copy from� You can select any of the 4 HDMI
outputs, or any of the 4 HDBaseT outputs, then click the COPY button� This will save that outputs EDID
to the USER1 slot�
3� Next use the drop-down to select NO 3D, or 3D depending on the displays capability�
NOTE: Currently the only resolution you can choose NO 3D for is 1080P�
4� Next drop-down select either SDR (standard dynamic range) or HDR (High Dynamic Range)�
5� The fourth drop-down in the EDID section is for the audio, you can select 2 CH, 6CH, or 8CH�
6� Click the APPLY button to set the EDID�
7� Verify you are still getting that source to all your displays and that the image looks correct�
NOTE: Some older displays may take an HDR signal and display correctly (ignoring the HDR Metadata)
others will not ignore the HDR part of the signal and may display incorrectly�
Audio Mode - see Page 19
for more info�
Содержание AC-AXION-4
Страница 5: ...Specifications 5...
Страница 7: ...7 Front and Rear Panel Overview...
Страница 42: ...42 Command List Baudrate 57600 Checksum None Bit Num 8 Stop Bit 1...
Страница 43: ...43 Command List Continued...
Страница 44: ...44 Command List Continued...
Страница 52: ...52...
Страница 53: ...53...


