


Page 5-5
Next, bring the thread straight through the tension peg section in-
between the larger adjustable tension pegs and the smaller stationary
pegs or just above the smaller stationary pegs if you have removed the
larger ones.
Next, thread the end through the two sets of heddles. The first thread
goes through the front set of heddles and the next thread goes through
the rear set of heddles. Repeat this alternating heddle threading for the
rest of the ends. The heddle system will be used later to create the
threading cross.
Now thread the end through the front pivoting reed. Here you have a
choice of using an eight dent or ten dent reed. Pick the one that can be
sleyed evenly and as close to the desired section width. If you can not get
the exact width of the section, sley your reed slightly wider. This will
make it just slightly wider than the space between the pegs. The section
will be narrowed down by pivoting the reed. Never sley the reed
narrower than the section on the beam. There is no way to expand it.
After the tension box is completely threaded, the larger pegs are moved
downward to apply tension. The further down they are moved, the more
tension will be applied to the yarn. This is an adjustable system as
different yarns require more or less tension. With a heavy wool the pegs
may only need to be moved half way down, whereas with a fine silk, the
pegs may need to be moved all the way down and the yarn wrapped an
extra time around one of the stationary pegs to get the proper tension.
Once you have adjusted the tension correctly, do not change it during the
winding of the beam, as long as you are using the same type of yarn.
Once the tension box has been threaded, it is not always necessary to
rethread it. If you need to change spools or cones, simply tie the new
ends on to the old ends just before the rear stationary reed, then gently
pull on the old ends until the new ends have come all the way through
the box.
WINDING THE WARP
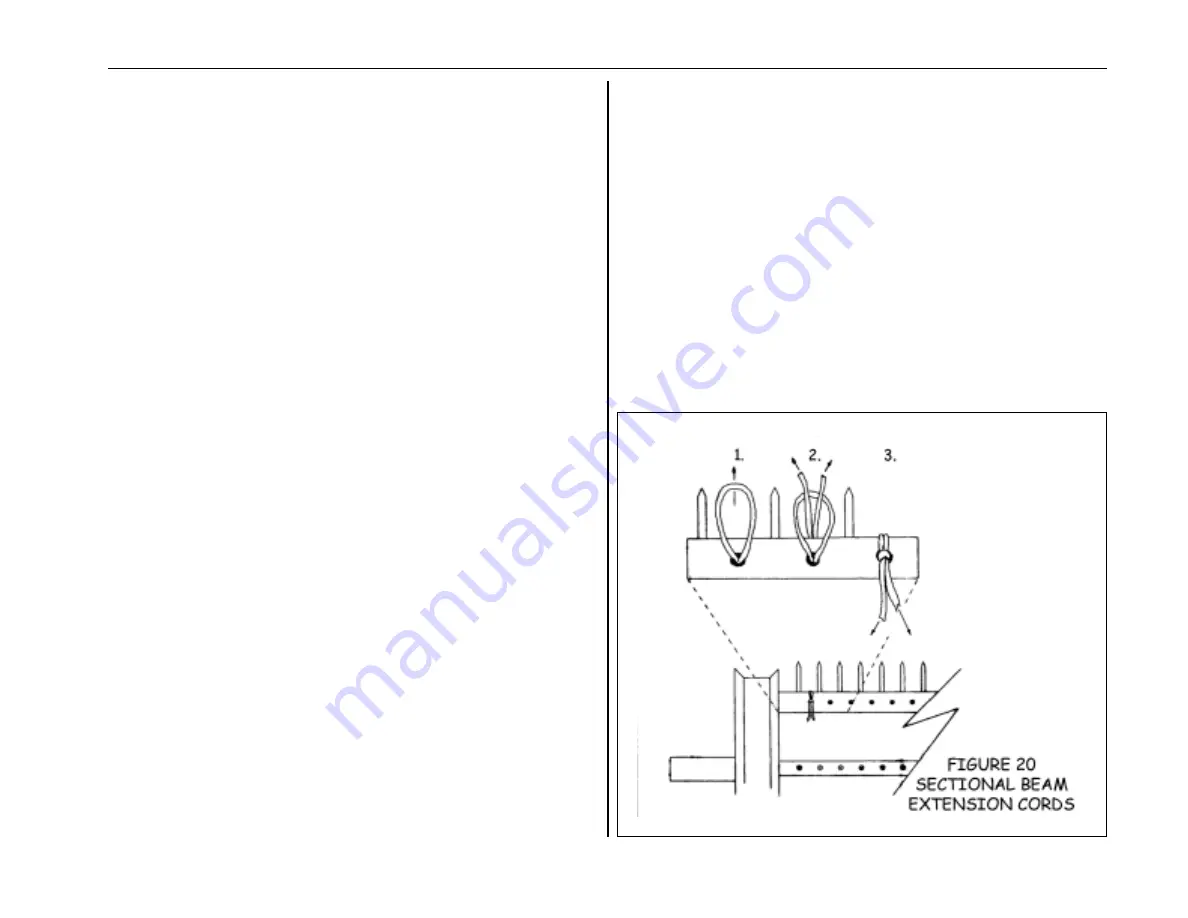
Before you start winding the warp, attach the extension cord to the beam
and the section of the warp to an extension cord, tie an overhead knot in
the warp threads from one section and slip that knot into the opening of
the larkshead knot you created in the extension cord.
Pull it tight.


