


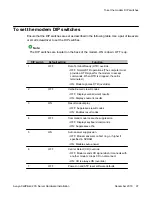


DIP switch
Default setting
Function
• OFF: Loads Y or Y1 configuration from user-
defined nonvolatile memory (NVRAM)
• ON: Loads &F0-Generic template from read-only
memory (ROM)
8
ON
AT command set recognition
• OFF: Disables command recognition (dumb mode)
• ON: Enables recognition (smart mode)
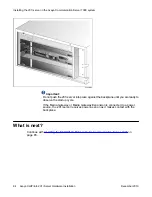
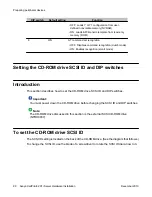
Setting the CD-ROM drive SCSI ID and DIP switches
Introduction
This section describes how to set the CD-ROM drive SCSI ID and DIP switches.
Important:
You must power down the CD-ROM drive before changing the SCSI ID and DIP switches.
Note:
The CD-ROM drive discussed in this section is the external SCSI CD-ROM drive
(NTRH9037).
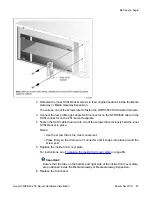
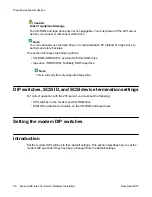
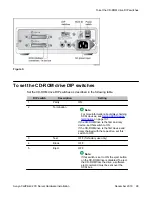
To set the CD-ROM drive SCSI ID
The SCSI ID setting is located on the back of the CD-ROM drive. (See the diagram that follows.)
To change the SCSI ID, use the blade of a screwdriver to rotate the SCSI ID dial arrow to 3.
Preparing peripheral devices
98 Avaya CallPilot
®
201i Server Hardware Installation
December 2010
Содержание CallPilot 201i
Страница 1: ...Avaya CallPilot 201i Server Hardware Installation 5 0 NN44200 301 01 03 December 2010 ...
Страница 8: ...8 Avaya CallPilot 201i Server Hardware Installation December 2010 ...
Страница 28: ...About the 201i server 28 Avaya CallPilot 201i Server Hardware Installation December 2010 ...
Страница 106: ...Preparing peripheral devices 106 Avaya CallPilot 201i Server Hardware Installation December 2010 ...
Страница 128: ...Connecting peripheral devices to the 201i server 128 Avaya CallPilot 201i Server Hardware Installation December 2010 ...