


Phase Properties for Elements
Each element that you add to a project has a Phase Created property and a Phase Demolished property.
■
The Phase Created property identifies the phase in which the element was added to the building model.
The default value for this property is the same as the Phase value for the current view. You can specify
a different value as needed.
■
The Phase Demolished property identifies the phase in which the element was demolished. The default
value is None. When you demolish an element, this property updates to the current phase of the view
in which you demolished the element. You can also demolish an element by setting the Phase Demolished
property to a different value. See
on page 1338.
Creating Phases
1
Click Manage tab
➤
Manage Project panel
➤
Phases.
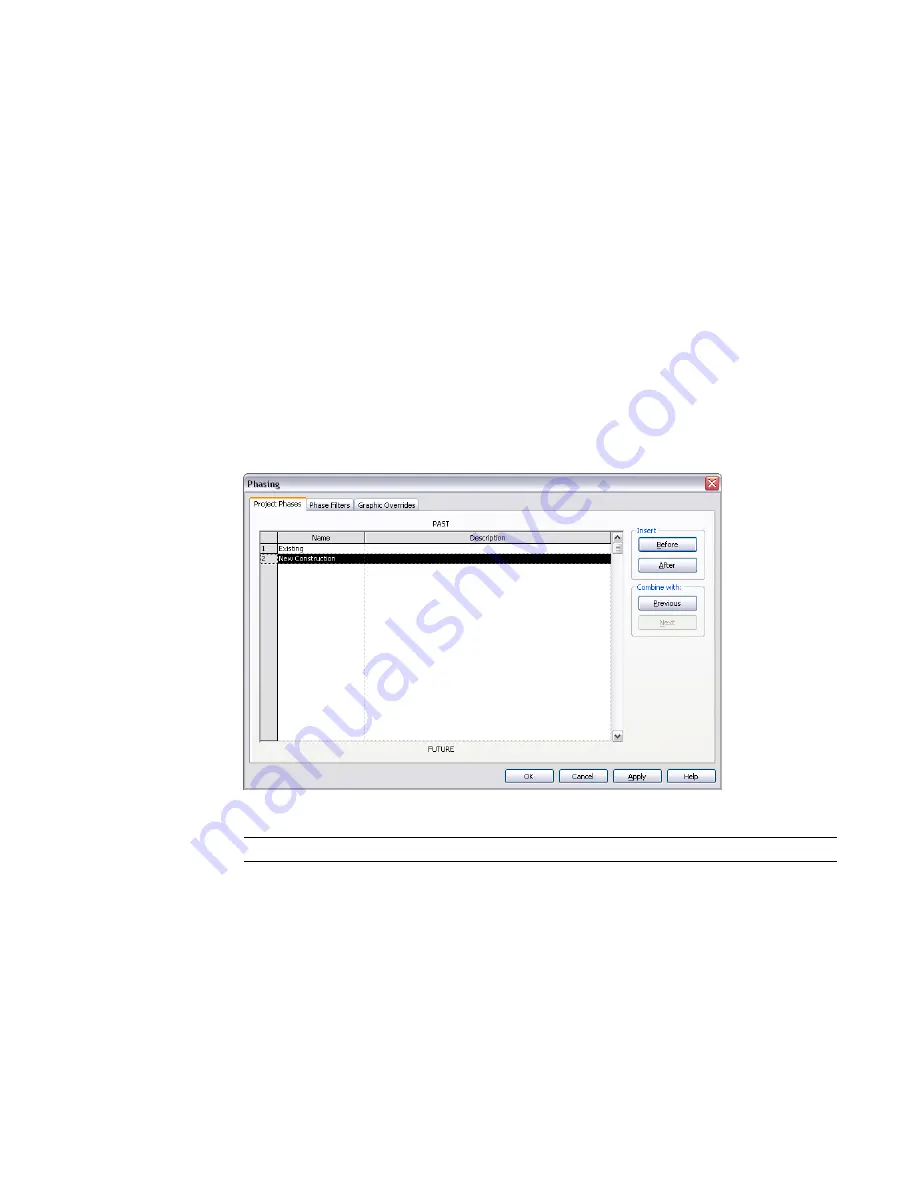
The Phasing dialog opens, displaying the Project Phases tab. By default, each project has phases
called Existing and New Construction.
2
Click the number box adjacent to a phase.
Revit Architecture selects the entire phase row. The following image shows the New Construction
phase selected.
3
Insert a phase.
IMPORTANT
You cannot rearrange the order of phases after you add them, so be aware of placement.
To insert a phase before or after the selected phase, under Insert, click Before or After.
Revit Architecture names the phases sequentially as you add them. For example: Phase 1, Phase
2, Phase 3, and so on.
4
If desired, click the Name text box of a phase to rename it. Similarly, click the Description text
box to edit the description.
5
Click OK.
1332 | Chapter 23 Project Phasing
Содержание 256B1-05A761-1301 - AutoCAD Revit Structure Suite 2010
Страница 1: ...Revit Architecture 2010 User s Guide March 2009 ...
Страница 4: ......
Страница 42: ...xlii ...
Страница 84: ...42 ...
Страница 126: ...84 ...
Страница 166: ...124 ...
Страница 229: ...Schedule Field Formatting Calculating Totals Specifying Schedule Properties 187 ...
Страница 230: ...Schedule with Grid Lines Schedule with Grid Lines and an Outline 188 Chapter 5 Project Views ...
Страница 304: ...262 ...
Страница 427: ...Defining the first scale vector Defining the second scale vector Resizing Graphically 385 ...
Страница 454: ...Before painting applying material to stairs 412 Chapter 8 Editing Elements ...
Страница 456: ...414 ...
Страница 486: ...444 ...
Страница 674: ...632 ...
Страница 802: ... Attachment Style Cut Column Attachment Justification Intersect Column Midline 760 Chapter 13 Architectural Design ...
Страница 809: ...Curtain wall Curtain Grid Curtain Walls Curtain Grids and Mullions 767 ...
Страница 994: ...952 ...
Страница 1016: ...974 ...
Страница 1204: ...1162 ...
Страница 1290: ...1248 ...
Страница 1318: ...1276 ...
Страница 1372: ...1330 ...
Страница 1382: ...1340 ...
Страница 1462: ...1420 ...
Страница 1492: ...1450 ...


