www.austin-hughes.com
UM-PPS-03-S-Q421V5
PPS-03-S, IP dongle GUI & SNMP
InfraPower Intelligent PDU
Inspired by Your Data Center
User Manual
Designed and manufactured by Austin Hughes
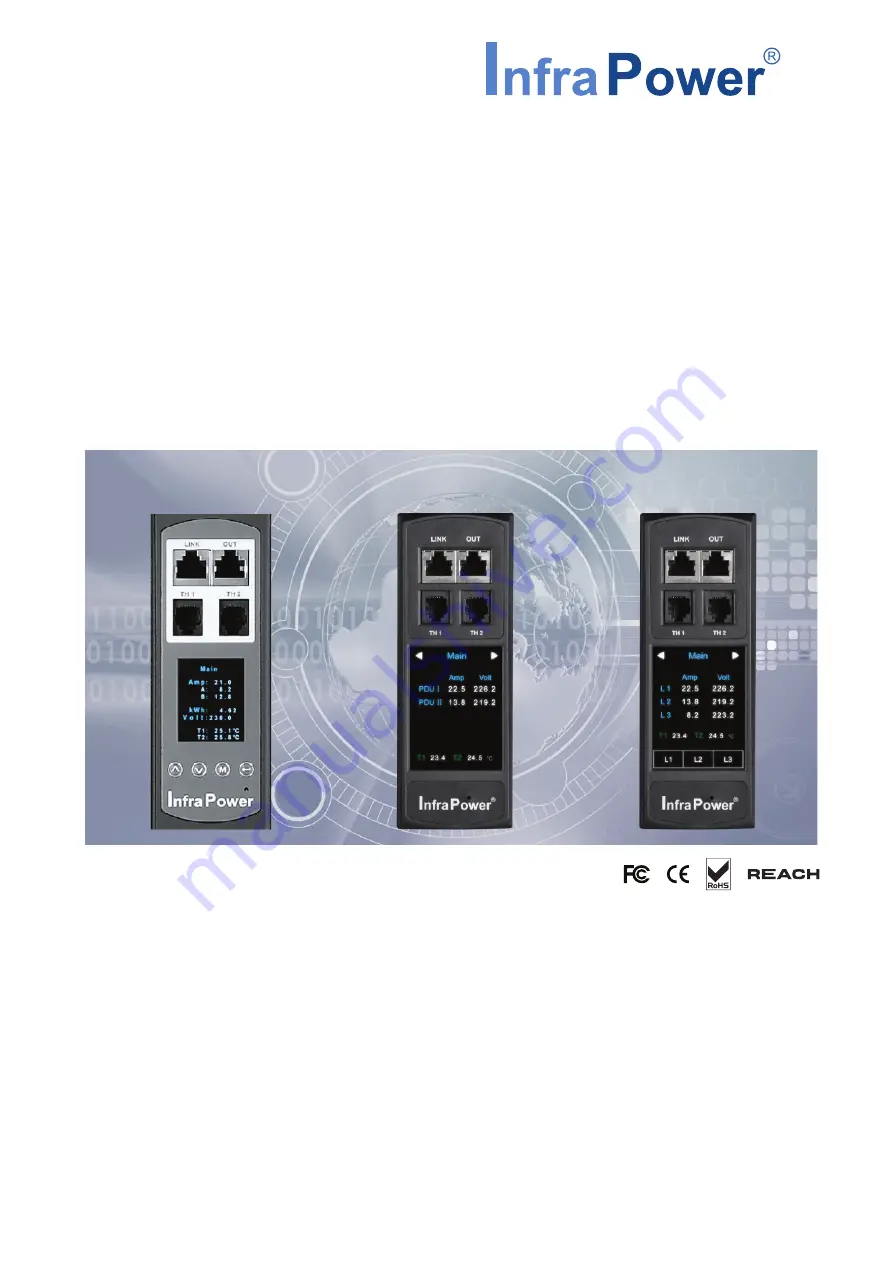
1-Phase
Dual Feed
3-Phase
Страница 1: ...stin hughes com UM PPS 03 S Q421V5 PPS 03 S IP dongle GUI SNMP InfraPower Intelligent PDU Inspired by Your Data Center User Manual Designed and manufactured by Austin Hughes 1 Phase 1 Phase Dual Feed 3 Phase ...
Страница 2: ...rvice personnel should open the chassis Opening it yourself could damage the equipment and invali date its warranty If any part of the equipment becomes damaged or stops functioning have it checked by qualified service personnel What the warranty does not cover Any product on which the serial number has been defaced modified or removed Damage deterioration or malfunction resulting from Accident mi...
Страница 3: ...gle Configuration P 5 1 5 Remote PDU Level ID Setting P 6 1 6 PPS 03 S IP Dongle GUI P 10 1 7 System P 15 1 8 Network P 16 1 9 Wifi Network Configuration P 17 1 10 Login P 24 1 11 SNMP Setup P 28 1 12 Notification P 33 1 13 Syslog P 34 1 14 IP Dongle Firmware Upgrade P 35 1 15 DHCP Setting P 37 1 16 Command Line Interface Access P 40 1 17 Optional Accessories Wifi Kit P 41 ...
Страница 4: ...ort All Single Three Phase iPDU All Single Three Phase Dual Feed iPDU All Single Three Phase inline meter All Single Three Phase Dual Feed inline meter IP Dongle Access to 32 PDU Levels Patented IP Dongle provides IP remote access to the PDUs by a true network IP address chain Only 1 x IP dongle allows access to max 32 PDUs in daisy chain which is a highly efficient application for saving not only t...
Страница 5: ...database Strong passwords and granular user user group permissions Remote Management Significantly reduce the number of Ethernet ports used in deployment by cascading a single network connection across multiple iPDUs up to 32 Simultaneous access via free management software IPM 04 web GUI SNMP V2 V3 Remote level ID setting for cascaded iPDU s Alerts Alarms Receive alerts via SNMP email SMTP and sy...
Страница 6: ... Phase 3 Phase InfraPower PDU IP dongle installation steps slide the IP dongle on the plate above the meter plug the RJ 45 connector of IP dongle into the LINK port of the 1st level PDU meter use the CAT 5e 6 cable to connect IP dongle to network device To LINK port of 1st PDU 1st level PDU meter 3rd level PDU meter 2nd level PDU meter Cat 5e 6 cable Up to 20M Cat 5e 6 cable Up to 20M To LINK port...
Страница 7: ...press to confirm Step 2 Press the button to PDU ID and press to confirm II For 2 8 LCD Meter With touchscreen function I For 1 8 LCD Meter No touchscreen function III For 2 8 LCD Meter With touchscreen function Level 16 0 Cancel Enter 8 7 9 5 4 6 2 1 3 Level 29 0 Cancel Enter 8 7 9 5 4 6 2 1 3 PDU Level 050 29 Group Level A M B Setup Level Buzzer Sensor Screen Outlet ON M I For PDU with firmware v...
Страница 8: ...ter password in Password for authentication min 8 char max 16 char Default is 00000000 Step 8 Enter new password in New password min 8 char max 16 char Step 9 Re enter new password in Confirm new password Step 10 Change the desired IP address Subnet mask Gateway then Click Save to confirm the changes Step 11 Repeat Step 4 Step 10 for Lan 2 Port of IP dongle Lan 1 The default IP setting is as below...
Страница 9: ... and know which rack the PDU is installed Step 1 Open MS Edge Step 2 Enter the configured IP Dongle address into the address bar Default IP address of LAN 1 is 192 168 11 1 Default IP address of LAN 2 is 192 168 0 1 Step 3 Enter the Login name and Password Click Login Step 4 In Status Click Search to start the PDU searching If the IP dongle is in factory default setting or the password is 00000000...
Страница 10: ...www austin hughes com UM PPS 03 S Q421V5 P 7 Step 5 After the searching is completed the following screen will display 1 5 Remote PDU Level ID Setting ...
Страница 11: ...www austin hughes com UM PPS 03 S Q421V5 P 8 Step 6 Assign a unique Level Name and Location to each PDU and ensure to check the register box Then Click Apply 1 5 Remote PDU Level ID Setting ...
Страница 12: ...www austin hughes com UM PPS 03 S Q421V5 P 9 Step 7 After the PDU level setting is complete Status page will display the PDU with proper level 1 5 Remote PDU Level ID Setting ...
Страница 13: ...n MS Edge Step 2 Enter the configured IP dongle address into the address bar Please refer to 1 4 IP dongle configuration Default IP address of LAN 1 is 192 168 11 1 Default IP address of LAN 2 is 192 168 0 1 Step 3 Enter Login name Password Click Login Please refer to 1 4 IP dongle configuration In Status Click Search to search all new installed PDUs View all installed PDUs status View latest load...
Страница 14: ...uits Click Apply Click Reset to reset peak amp or kWh of PDU s circuits Click ON OFF to swich ON OFF outlet Switched PDU only View On Off status of each PDU s outlet View aggregated current on the PDU View latest loading energy consumption of each PDU s outlet Outlet Measurement PDU only Click Time Sync update PDU s real time clock from the computer logged in the IP Dongle ...
Страница 15: ...e PDU s outlet name Change Power up sequence delay of PDU s outlet Switched PDU only Change Alarm amp Rising Alert amp Low alert amp of PDU s outlet Outlet Measurement PDU only Click Apply to finish the above settings Click Reset to reset peak amp or kWh of PDU s outlet Outlet Measurement PDU only ...
Страница 16: ...3 In Sensor Status View status location latest reading alarm setting of Temp Humid sensors View status location of Door sensor Smoke sensor The GUI will not show the status reading if sensors are NOT installed activated 1 6 PPS 03 S IP Dongle GUI ...
Страница 17: ...ngle GUI In Sensor Setting Default Sensor setting Deactivate Activate sensors ONLY when they are connected Change Location Rising alert Setting Alarm Setting of Temp Humid sensors Change Location of Door sensor Smoke sensor If no any sensor connected NEVER activate ...
Страница 18: ...le name location Change temperature unit displayed in UI Set the Date Time of the IP dongle by Manually or NTP server Default is Manually Tick Force HTTPS to provide data transmission security Default Web Access is HTTP Click Apply to finish the above settings 1 7 System ...
Страница 19: ...bnet mask Gateway For static IP setting only Enter the IP address of Primary DNS Default is 8 8 8 8 Enter the IP address of Secondary DNS Default is 0 0 0 0 Click Apply to finish the above settings Failover mode Tick Enable automatic failover to operate the failover mode Enter IPv4 address IPv6 address Subnet mask Gateway For static IP setting only Enter the IP address of Primary DNS Default is 8 ...
Страница 20: ...ptional Accessories Wifi Kit Step 2 Click Scan Wifi to search the available WiFi network I Wifi Static IP setting Preparation Make sure the network meet the security WPA2 Personal or WPA2 Enterprise PDU dongle IPD 03 S is well connected to the iPDU and powered on Login IPD 03 S web UI via LAN 1 LAN 2 to configure the WIFI network 3rd party WIFI kit is not compatible to InfraPower Make sure IPD WIF...
Страница 21: ...stin hughes com UM PPS 03 S Q421V5 P 18 1 9 Wifi Network Configuration Step 3 Select the appropriate network from the pull down menu of ESSID Step 4 Select the security type NONE WPA2 Personal WPA2 Enterprise ...
Страница 22: ... Wifi Network Configuration Step 5 Enter Username For security type WPA2 Enterprise ONLY Step 6 Enter Password Step 7 Select DHCP to OFF Default is ON Step 8 Enter IPv4 address IPv6 address Subnet mask Gateway Click Apply to finish the above settings ...
Страница 23: ...II Wifi DHCP setting Step 1 Take out the membrane from the IP dongle and the Wifi USB port will be found Then connect the USB wireless adapter to the IP dongle Details please refer to 1 17 Optional Accessories Wifi Kit Step 2 Click Scan Wifi to search the available WiFi network ...
Страница 24: ...stin hughes com UM PPS 03 S Q421V5 P 21 Step 3 Select the appropriate network from the pull down menu of ESSID Step 4 Select the security type NONE WPA2 Personal WPA2 Enterprise 1 9 Wifi Network Configuration ...
Страница 25: ...p 5 Enter Username For security type WPA2 Enterprise ONLY Step 6 Enter Password Step 7 Select DHCP to ON Default is ON Step 8 Click Apply to finish the above settings Step 9 Select Firmware from the left navigation pane 1 9 Wifi Network Configuration ...
Страница 26: ...www austin hughes com UM PPS 03 S Q421V5 P 23 Step 10 Record the MAC address of the Wifi kit Step 11 Assign an IP address of the Wifi kit from your DHCP server 1 9 Wifi Network Configuration ...
Страница 27: ...assword in Confirm password Click Apply and OK on the pop up window to make changes effective Domain LDAP Default Join Domain is Disable Enable Join Domain only when you want to login the IP dongle WEBUI by AD server Enter AD Server Account Login Password Click Apply and OK on the pop up window to make changes effective You can now go to Domain Users to assign access right to the Domain Users or the...
Страница 28: ... access Allow Deny to Domain Users and click Apply The Domain User assigned Allow access right can login the IP dongle WEBUI In Domain Users Setting Click Update domain data to update domain group list Assign access right No access Allow to Domain Group and click Apply The Users of the Domain Group assigned Allow access right can login the IP dongle WEBUI ...
Страница 29: ...in the IP dongle WEBUI by LDAP server Enter LDAP Server Select Protocol LDAP LDAPS Default is LDAP Enter Port Default is 389 Select Encrytion None SSL Default is None Enter Base DN Enter Account Login Password Click Apply and OK on the pop up window to make changes effective You can now go to LDAP Users to assign access right to the LDAP User or the LDAP Group ...
Страница 30: ... right No access Allow Deny to LDAP User and click Apply The LDAP User assigned Allow access right can login the IP dongle WEBUI In LDAP Access Setting Click Update domain data to update domain user list Assign access right No access Allow Deny to LDAP Group and click Apply The LDAP Group assigned Allow access right can login the IP dongle WEBUI ...
Страница 31: ...in hughes com resources infrapower software Step 2 Select the appropriate MIB file of the PDU series II Enabling SNMP Support i The following steps summarize how to enable the IP Dongle for SNMP v1 v2 support Step 1 Connect the IP Dongle to a computer Please refer to 1 4 IP dongle configuration Step 2 Open the MS Edge Step 3 Enter the configured IP Dongle address into the address bar Default IP ad...
Страница 32: ...ort Default is 161 Step 10 Input sysContact Default is human being nobody but you Step 11 Input sysLocation Default is Earth Step 12 Input sysName Default is A320D Step 13 Input Read Community Default is public Step 14 Input Write Community Default is private Step 15 Click Activate in Station 1 to enable the trap service Step 16 Input Trap Station IP Trap Port Trap Community of Station 1 Step 17 R...
Страница 33: ...ect the IP dongle to a computer Please refer to 1 4 IP dongle configuration Step 2 Open MS Edge Step 3 Enter the configured IP Dongle address into the address bar Default IP address of LAN 1 is 192 168 11 1 Default IP address of LAN 2 is 192 168 0 1 Step 4 Enter Login name Password Default login name password are 00000000 Step 5 Select SNMP from the left navigation pane 1 11 SNMP Setup ...
Страница 34: ...Write in User role Step 15 Input the name of USM user Default is usm_user1 Step 16 Select None MD5 SHA in Auth algorithm If you select Read Write in User role you MUST select MD5 SHA in Auth algorithm Step 17 Input the Auth password Default is 00000000 Step 18 Select None DES AES AES192 AES256 in Privacy algorithm If the Auth algorithm is NONE NO privacy algorithm can be selected Step 19 Input the...
Страница 35: ...32 III SNMP Traps Setting After enable SNMP you can click SNMP Traps to go to the SNMP Traps Setting page Below is the default setting for each PDU SNMP trap You can set the SNMP trap option and Click Apply to finish the settings 1 11 SNMP Setup ...
Страница 36: ...is Port 25 Step 3 Enable or Disable the SMTP authentication Default is Disable Step 4 Enter User name and Password when SNMP authentication is enabled Step 5 Select the secure connection None SSL TLS STARTTLS Default is None Step 6 Enter the Sender Name and Sender Email Step 7 Enter the Alarm Interval Min 10 Max 60 mins Step 8 Enter the alarm recipient email account in Recipient 01 Step 9 Repeat s...
Страница 37: ...www austin hughes com UM PPS 03 S Q421V5 P 34 In Syslog you can view the latest 2000 device and system log 1 13 Syslog ...
Страница 38: ...hughes com resources infrapower software Step 2 Select the appropriate IP Dongle firmware file of the PDU series Step 3 Connect the IP Dongle to the computer Please refer to 1 4 IP dongle configuration Step 4 Open the MS Edge Step 5 Enter the configured IP Dongle address into the Address bar Default IP address of LAN 1 is 192 168 11 1 Default IP address of LAN 2 is 192 168 0 1 Step 6 Enter Login n...
Страница 39: ... Click Browse and select the firmware file xxx zip for firmware version IPD 03 FW v1 xxx enc for firmware version IPD 03 FW V1 1 or above from the specific path in the pop up window and Click Open Step 10 Click Upgrade to start the upgrade process It takes a few minutes to complete Step 11 Once complete UI will return to the login page ...
Страница 40: ...ge Step 3 Enter the configured IP Dongle address into the address bar Default IP address of LAN 1 is 192 168 11 1 Default IP address of LAN 2 is 192 168 0 1 Step 4 Enter the Login name Password Default login name password are 00000000 Step 5 Select Network from the left navigation pane Step 6 Dual Lan Mode Select ON from DHCP of LAN 1 LAN 2 Click Apply to save the settings ...
Страница 41: ...UM PPS 03 S Q421V5 P 38 1 15 DHCP Setting Step 7 Select Firmware from the left navigation pane Step 8 Record the MAC address of LAN 1 LAN 2 Step 9 Assign an IP addressof LAN 1 LAN 2 of to the IP Dongle from your DHCP server ...
Страница 42: ...5 DHCP Setting Complete Step 10 Failover Mode Select ON from DHCP Click Apply to save the settings Step 11 Select Firmware from the left navigation pane Step 12 Record the MAC address Step 13 Assign an IP address to the IP Dongle from your DHCP server ...
Страница 43: ...gin name password The CLI session will be termi nated automatically if three unsuccessful login attempts You can change the following settings via CLI access i System settings Change temperature display unit change the temp unit to be displayed in the WEBUI Change system RTC date time set the system time of the IP Dongle Change network settings change the IP settings of the IP Dongle Change featur...
Страница 44: ...dards IEEE 802 11a b g n ac 2 4GHz 2 4835GHz 5 15GHz 5 85GHz 802 11b CCK DQPSK DBPSK 802 11b 1 2 5 5 11 Mbps 802 11a g 64 QAM 16 QAM QPSK BPSKz 802 11a g 6 9 12 18 24 36 48 54 Mbps WPA2 Enterprise 802 11n 64 QAM 16 QAM QPSK BPSK 802 11n HT20 reach up to 72 2Mbps HT40 reach up to 150Mbps 802 11ac 256 QAM 64 QAM 16 QAM QPSK BPSK BT 8DPSK π 4DQPSK GFSK 802 11ac VHT20 reach up to 86 7Mbps VHT40 reach ...
Страница 45: ... membrane from the PDU dongle and the WIFI USB port will be found Inset and screw the antenna to the USB wireless adapter Fix the antenna in place lift it up Step 1 Step 2 Step 3 Connect the USB wireless adapter with antenna to PDU dongle Antenna USB Wireless Adaptor Part II Hardware Connection ...
Страница 46: ...U dongle Affix the magnetic stand with antenna to the desirable area of rack Step 1 Step 2 Step 3 Antenna USB Wireless Adaptor Magnetic Stand with Antenna Wire Inset and screw the 1M antenna wire to USB wireless adapter and fix the adapter in place Inset and screw the antenna to the magnetic stand and fix the antenna in place 1 17 Optional Accessories Wifi Kit ...
Страница 47: ...www austin hughes com UM PPS 03 S Q421V5 P 44 Intentionally Left Blank ...
Страница 48: ...dify product specifications without prior notice and assumes no responsibility for any error which may appear in this publication All brand names logo and registered trademarks are properties of their respective owners Copyright 2021 Austin Hughes Electronics Ltd All rights reserved ...