Section 03
ENGINE
Subsection 09
(CYLINDER AND HEAD)
03-09-4
VMR2004_132_03_09A.FM
VALVE COVER
Removal
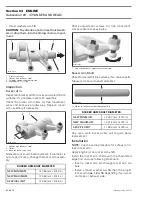
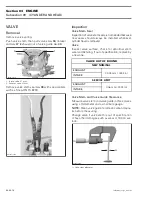
Remove:
– valve cover screws
no. 1
1. Valve cover screws
2. Water temperature switch
– valve cover
no. 2
and profile sealing ring
no. 3
.
1. Valve cover
2. Profile sealing ring
Inspection
Check the profile sealing ring
on the valve cover if
it is brittle, cracked or hard. If so, replace the profile
sealing ring.
Installation
For installation, reverse the removal procedure.
Install the valve cover screws in a criss-cross se-
quence.
VALVE ADJUSTMENT
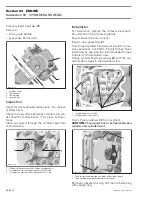
Lock crankshaft at the TDC compression position
(refer to CRANKSHAFT/BALANCER SHAFT, see
CRANKSHAFT LOCKING PROCEDURE).
Remove valve cover (refer to VALVE COVER
above).
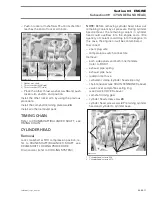
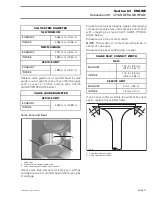
Hold adjusting screw
no. 14
and loosen locking
nut
no. 13
.
Using feeler gauge, check the valve clearance.
1. Adjustment screws
2. Locking nuts
3. Feeler gauge
NOTE:
Use mean value of exhaust/intake to en-
sure a proper valve adjustment.
Hold the adjusting screw at the proper position
and torque the locking nut.
Repeat the procedure for each valve.
Before installing valve cover, recheck all valve ad-
justments.
2
R400motr52A
1
2
1
R400motr53A
VALVE CLEARANCE
EXHAUST
0.11 to 0.19 mm
(.0043 to .0075 in)
INTAKE
0.06 to 0.14 mm
(.0024 to .0055 in)
1
R400motr54A
2
3
Содержание M-50 x 4
Страница 1: ...1 AUSA M 50 x 4 ROTAX ENGINE WORKSHOP MANUAL ...
Страница 2: ......
Страница 3: ......
Страница 7: ......
Страница 27: ......
Страница 31: ......
Страница 59: ......
Страница 85: ......
Страница 99: ......
Страница 136: ...Section 04 FUEL SYSTEM Subsection 03 CARBURETOR VMR2004_137_04_03A FM 04 03 1 CARBURETOR 0 V07F0ZS Harness assembly ...
Страница 147: ......
Страница 155: ......


