Section 03
ENGINE
Subsection 09
(CYLINDER AND HEAD)
VMR2004_132_03_09A.FM
03-09-3
GENERAL
NOTE:
When diagnosing an engine problem, always
perform a cylinder leak test. This will help pin-point a
problem. Refer to the instructions included with your
leak tester and LEAK TEST section for procedures.
Always place the vehicle on level surface.
NOTE:
For a better understanding, the many
illustrations are taken with engine out of vehicle. To
perform the following instructions, it is not necessary
to remove engine from vehicle.
Always disconnect BLACK (-) cable from the battery,
then RED (+) cable before working on the engine.
Even if the removal of many parts is not necessary
to reach another part, it is recommended to remove
these parts in order to check them.
During assembly/installation, use the torque values
and service products as in the exploded views.
Clean threads before applying a threadlocker. Re-
fer to SELF-LOCKING FASTENERS and LOCTITE
APPLICATION at the beginning of this manual for
complete procedure.
When disassembling parts that are duplicated in the
engine, (e.g.: valves), it is a strongly recommended to
note their position (PTO, MAG side) and to keep them
as a “group”. If you find a defective component, it
would be much easier to find the cause of the failure
among its group of parts (e.g.: you found a worn valve
guide. A bent spring could be the cause and it will be
easy to know which one among the springs is the
cause to replace it if you grouped them at disassem-
bly). Besides, since used parts have matched togeth-
er during the engine operation, they will keep their
matched fit when you reassemble them together
within their “group”.
Intake port/air filter contaminated (clogged) with
dirt, sand, etc. (leads to worn valves, piston rings
and finally to leak of power).
CAUTION:
In case of piston rings and/or valve
replacement, always clean the whole engine
and change oil and oil filter.
SPARK PLUG
Removal
Unplug the spark plug wire.
Clean spark plug area before disassembly.
Unscrew spark plug.
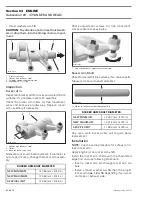
1. Spark plug on engine PTO side
Inspection
Check spark plug condition (refer to IGNITION
SYSTEM).
NOTE:
To check spark, place connected spark
plug with threads against crankcase to simulate
electrical ground and crank the engine.
Installation
For installation, reverse the removal procedure.
Pay attention to the following details.
Check spark plug gap (refer to TECHNICAL DATA).
Screw spark plug. Torque spark plug to 20 N•m
(15 lbf•ft). Reinstall the spark plug wire.
THERMOSTAT
Refer to COOLING SYSTEM.
WARNING
Always disconnect battery or starter cables
exactly in the specified order, BLACK (-) cable
first.
WARNING
Torque wrench tightening specifications must
strictly be adhered to.
Locking devices (ex.: locking tabs, elastic stop
nuts, self-locking fasteners, cotter pin, etc.)
must be installed or replaced with new ones
where specified. If the efficiency of a locking
device is impaired, it must be renewed.
1
R400motr51A
Содержание M-50 x 4
Страница 1: ...1 AUSA M 50 x 4 ROTAX ENGINE WORKSHOP MANUAL ...
Страница 2: ......
Страница 3: ......
Страница 7: ......
Страница 27: ......
Страница 31: ......
Страница 59: ......
Страница 85: ......
Страница 99: ......
Страница 136: ...Section 04 FUEL SYSTEM Subsection 03 CARBURETOR VMR2004_137_04_03A FM 04 03 1 CARBURETOR 0 V07F0ZS Harness assembly ...
Страница 147: ......
Страница 155: ......


