background image

English

- Motor

 If your satellite dish doesn’t have a motor, this function will not be 
available.

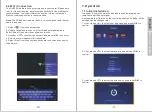
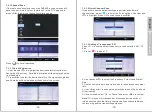
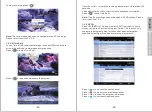
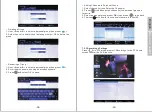
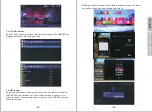
7.2.1.7 Manual Channel Scan

1. Press <       > to perform a manual scan. 
2. Some settings can be changed before performing the scan. 
3. Use <

> and <

> to select and use <

> and <

> keys to change 

the settings.

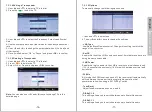
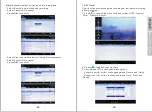
- Scan

Select between:


All TP

 to scan transponders which are in the receiver’s database 

(Recommended)


Blind

    to scan every possible frequency


One TP

    to scan only the currently selected transponder 


One TP + NIT

    to scan the currently selected transponder and the 

Network Information Table by the satellite service provider.

- Scan Type:


Select between:


All to save all scanned channels 


FTA to save only the free to air channels (Recommended)

- Service Type

Select between:


All

    to save TV and Radio channels (Recommended) 


TV

    to save only TV channels 


Radio

    to save only radio channels

-18-

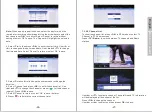
- SAT Type: 

Select between:


Single

    to search a single satellite


Multi

       to search all selected satellite. Not available if only one 

satellite is selected on the left hand side of the screen.

4.


Use <

> and <

> to select ‘Press <

OK

> to Scan’ then press <

OK

to confirm. If you wish to exit press <       > and select ‘OK’, ‘Exit’ or 
‘Cancel’.

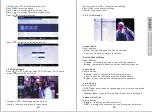
7.2.2 DTV Mode


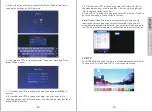
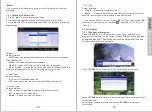
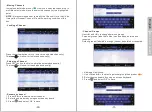
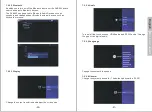
7.2.2.1Channel Information

Press <

F3/INFO

> in TV/Radio mode to show the “now and next 

program information” for the current channel/station including signal 
strength and quality. The display also shows whether subtitles and 
Teletext information are available.

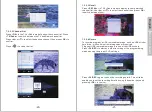
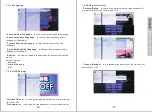
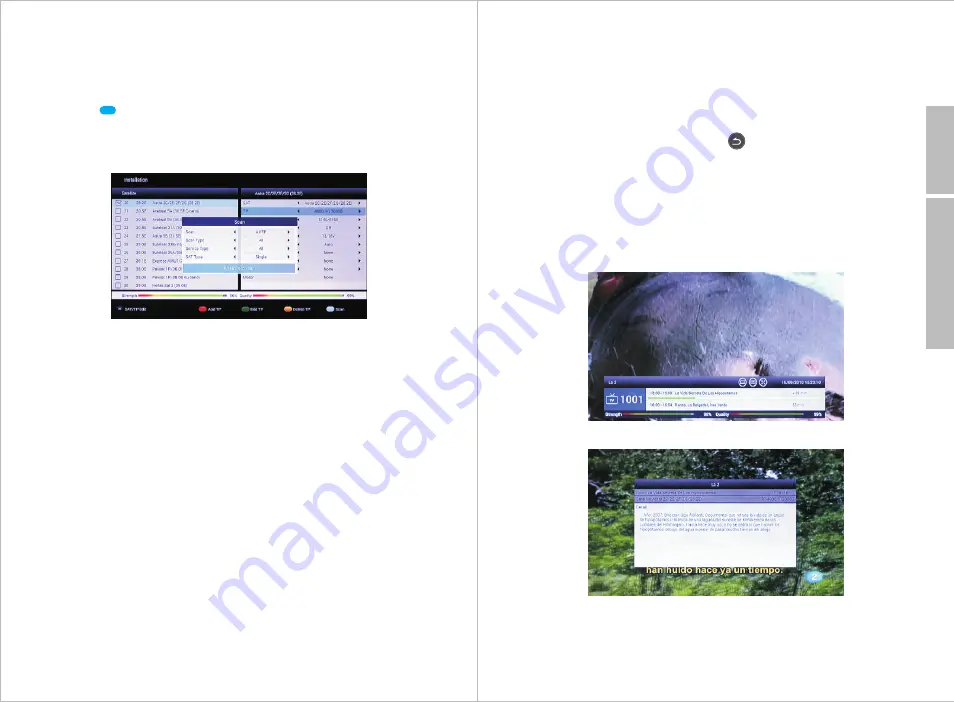
Press <

F3/INFO

> a second time to show detailed information.

Press <

F3/INFO

> a third time to show the satellite information for the 

current channel. 
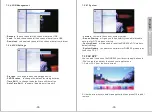
To close the channel information, press <

F3/INFO

> a last time. 

Alternately.

-19-

Back to Content

Содержание DVB600

Страница 1: ...ingdom Tel 44 0 845 250 0586 www augustint com DVB600 User Manual Android and Satellite TV Box Decoder Satellitare Android Sintonizador Sat lite y Android D codeur Satellite Android Android Box und Sa...

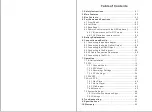
Страница 2: ...r 07 6 2 Connecting the Audio Optical Output 08 6 3 Connecting the HDMI Output 08 6 4 Connecting to the Ethernet 09 6 5 RF Cable Connection Description 09 6 6 Connecting to the Wi Fi 10 7 Operation 11...

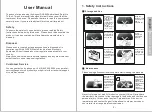
Страница 3: ...device Please take the time to read this user manual carefully even if you are already familiar with a similar product Safety To ensure the safety of you and others please read the Safety Instruction...

Страница 4: ...wer DC In D V B 6 0 0 Q u ic k S ta r t G u id e A nd ro id an d S at el lit e B ox D ec od er S at el lit ar e A nd ro id S in to ni za do r S at l ite y A nd ro id D c od eu r S at el lit e A nd ro...

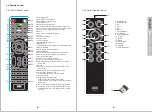
Страница 5: ...Channel List 23 Scroll Left and Right 24 F4 Function Start recording 25 F3 Function or Channel Information 26 Main Menu and List all Short Key Functions in DTV mode 27 Right 28 Confirm in General mod...

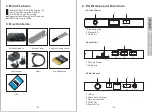
Страница 6: ...ins power socket HDMI OPTICAL LAN RF IN DC12V 1 5A Learning Button Function There is one learning button on the remote control It can record any button s function on the other IR remote control 1 Pres...

Страница 7: ...will need to manually input an IP address 6 5 RF Cable Connection HDMI OPTICAL LAN RF IN DC12V 1 5A Broadband Internet connection Internet Broadband Router Modem Wired Network HDMI OPTICAL LAN RF IN D...

Страница 8: ...Select See all to see all the available networks 3 Use or to select the network and press OK to confirm 4 Enter the network password if requested 5 Select Next from the on screen keyboard to save and...

Страница 9: ...nd to change between hour minute and AM PM Use to highlight Set then press OK to confirm 6 Select DTV to finish the settings and start DTV select Finish to go to the home page Press OK to confirm Note...

Страница 10: ...annel Scan If you wish to use the default settings to perform an automatic channel scan press to enter the Scan options Use and to highlight Press OK to scan then press OK 7 2 1 3 Adding a Transponder...

Страница 11: ...se 1 and to select one 2 Then and keys to change the settings LNB Type Low Noise Block Downconverter Change this setting to match the range of the converter SatCR Enable this to set the LNB to unique...

Страница 12: ...between All to save TV and Radio channels Recommended TV to save only TV channels Radio to save only radio channels 18 SAT Type Select between Single to search a single satellite Multi to search all s...

Страница 13: ...to select the channel then press OK to switch between them 7 2 2 4 Record To record a program a USB removable storage such as USB stick or hard drive with sufficient remaining space is required Plug...

Страница 14: ...rogram guide for the current and next program scheduled viewing or scheduled recording of programs Press to move to the next channel Press to move to the previous channel Press OK to show the program...

Страница 15: ...el this to cancel Press OK to confirm 7 2 2 7 Timer Timer function allows scheduling recordings or reminders for viewing a future program 1 Press to show the menu list then use or to select Timer Pres...

Страница 16: ...on Min and use the number keys to change the duration 6 Select Channel and press OK to enter the channel list Use and to change the channel or press to find a channel search Press OK to save 7 Select...

Страница 17: ...ord is 0000 Press TV Radio to change between TV and radio channel list Use and to change between groups use and to select channel Selecting Channels Press to switch between Single Select and Multiple...

Страница 18: ...annel s Skipping a Channel Press F1 button to skip un skip the selected channel s The icon will show for the skipped channel s Rename a channel 1 Press F2 to rename a select channel 2 Enter the new na...

Страница 19: ...screen keyboard 3 Press and select OK to save Adding Channels to Personal Group 1 Select channel s see Selecting Channels 2 Press to add selected channel s to a personal group as favourite 3 Select a...

Страница 20: ...channel only on both speakers Time Setting Select between DTV Time which can differ depending of your time zone and the satellite used Internet time which will be the time for your actual time zone C...

Страница 21: ...ubtitle to enable or disable the subtitles and select the subtitle option Select between Normal Hard of Hearing Off 7 2 4 3 OSD Settings Info Bar Timeout to change the display time of the information...

Страница 22: ...le disable auto time shift 7 2 4 7 System Version to view to the current system version Run on Startup will give you the possibility to enable disable auto run for DTV mode on start up Factory Reset w...

Страница 23: ...quired to access the Play Store When select one app icon press to list APP operation example Remove Force stop 7 4 2 Movie Player Select Movie Player to play the video file on the DVB600 or a plugged...

Страница 24: ...st Select the Miracast to send your smartphone s or tablet s screen to the DVB600 using Miracast Follow the on screen instructions in order to connect your smartphone or tablets to the DVB600 through...

Страница 25: ...or Select to see the box settings and preferences This menu lists the main options Use the arrow keys to select between the options and press OK to enter For each option use and to select one setting...

Страница 26: ...eakers and Headphones or Bluetooth external devices such as keyboard or mouse 7 5 2 3 Display Change the output resolution and adjust the screen size 7 5 2 4 Audio Turn on off the touch sounds HDMI au...

Страница 27: ...updating the software of your DVB600 Local update Local update enable you to update the software version from a local source such as SD card or USB stick 1 Download the update file from our website 2...

Страница 28: ...51 50 9 Specifications Android Version Android 4 4 OS Video resolution Audio Decoding File System USB Ports Power Adaptor Connections Bluetooth Version Dimensions Net Weight 1080p 1080i 720p 576i 480p...

Страница 29: ...n the country where the product is purchased The product must be correctly installed and operated in accordance to the instructions given in this user manual The product must be used solely for domest...

Отзывы: