1. Before Installing
Ensure that you have:
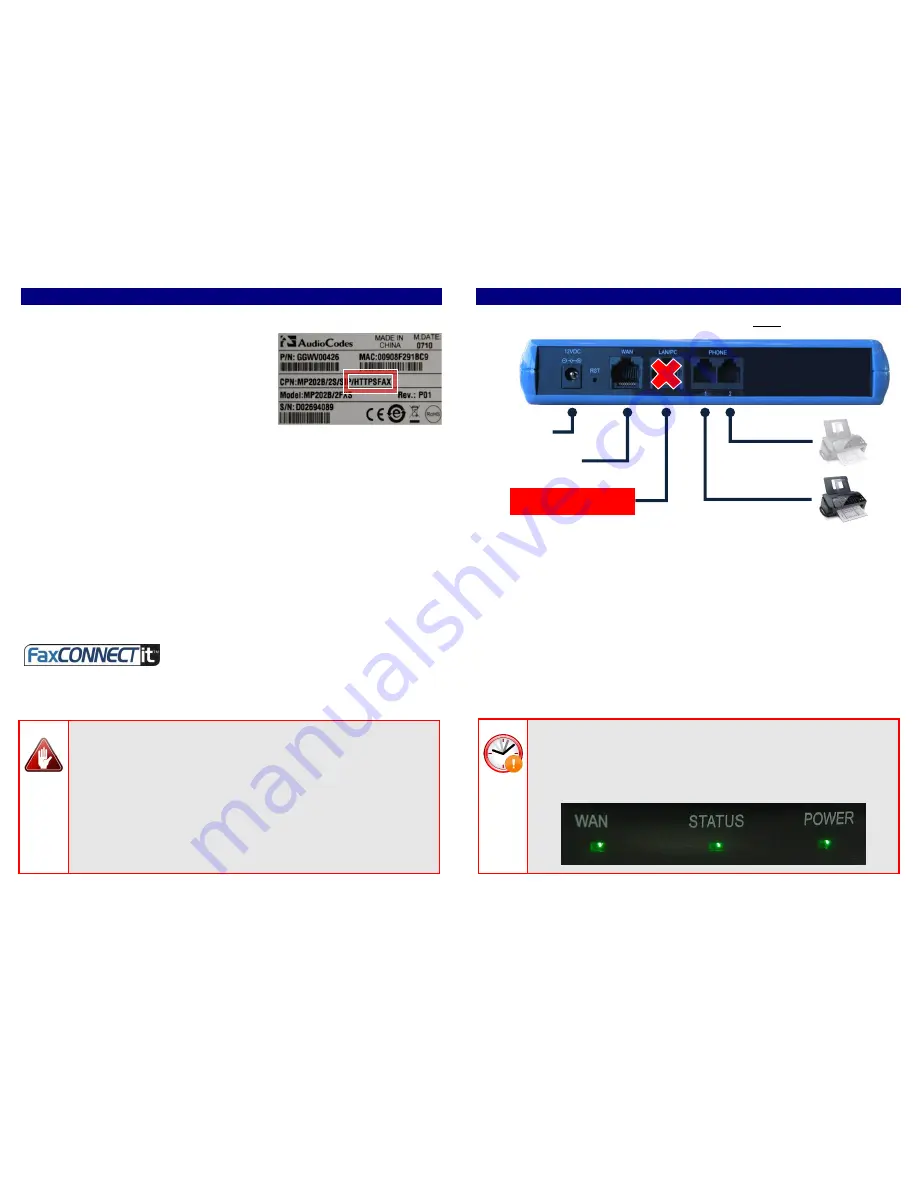
AudioCodes Fax ATA, model
MP-202B
HTTPSFAX
Included 12V power adapter (use only
the one supplied for your country)
Local network (LAN) with DHCP and
Internet connection
Fax Machine or fax-capable MFP
YOUR FAX SOLUTION
The Fax ATA can be connected to either online service providers or to
premise-based fax servers. You may have received additional steps or
separate instructions with your Fax ATA so please check with your specific
provider or fax server manager before proceeding.
CREATE YOUR ACCOUNT
Depending on what fax provider or fax solution to which you are connecting
your Fax Machine, you may have to first create your account. Refer to your
provider supplied instructions that came with the Fax ATA or their web site for
additional steps or details.
If you are connecting your Fax Machine through
FaxCONNECTit to your own fax service provider
account, make sure you sign up and create your account before continuing
at:
www.faxconnectit.com
.
CHECK FAX MACHINE SETTINGS
Turn off your Fax Ma
chine’s success notifications. Your fax
provider or premise-based fax server will automatically send
delivery notifications to your Fax Machine or directly to you via
email.
If you are going to be receiving faxes at your Fax Machine, set your
fax machine to auto-answer by default. Some Fax Machines do not
retain this setting after being turned on or restarted.
2. Connecting
1.
Connect the Ethernet Connector labeled
“WAN”
to your network.
Fax Machine
2
nd
Fax Machine
(optional)
Do
NOT
use LAN/PC
for network connection
Power
Network
Connection
in
WAN
Port
2.
Connect the Telephone Port labeled
PHONE 1
to the Fax Machine.
Check with your provider whether the second PHONE 2 port is
enabled for use.
3.
Connect the Power. There is no ON/OFF (I/O) switch so the Fax
ATA turns on as soon as you connect the power. The
POWER
LED
is lit (green) and when initialization completes (~1 minute), the
STATUS
LED changes from red to green.
Getting Help:
Go to
www.faxata.com
for additional help and documentation.
INITIALIZATION
Wait for all 3 status lights to go green. Usually within a minute,
however could be more than 5 minutes if an automatic upgrade is
needed and can also vary depending on your Internet speed.


