


SAM9N12/CN11-EK User Guide
3-1
11186A–ATARM–29-Nov-12
Section 3
Power Up
3.1
Power up the Board
Unpack the board, taking care to avoid electrostatic discharge. Unpack the power supply, select the right
power plug adapter corresponding to that of your country, and insert it in the power supply.
Connect the power supply DC connector to the board and plug the power supply to an AC power plug.
The board LCD should light up and display a graphic demo program. Then, click or touch icons dis-
played on the screen and enjoy the demo.
3.2
Battery
The SAM9N12/CN11-EK ships with a 3V coin battery.
This battery is not required for the board to start up.
The coin battery is provided for user convenience in case the user would like to exercise the date and
time backup function of the SAM9N12/CN11 devices when the board is switched off.
3.3
Sample Code and Technical Support
After boot-up, designers can run sample code or their own application on the development kit. Users can
download sample code and get technical support from the Atmel web site:
http://www.atmel.com/.
3.4
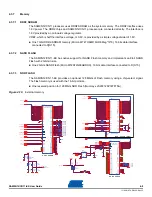
Recovery Procedure
All boards of Evaluation Kit have passed strict test procedures before shipment. The demo software
boots from SPI DataFlash
®
and stores the binary image in the NAND Flash. If the contents of either of
the Flash have been deleted, follow the instructions below to recover it to the state as it was when
shipped by Atmel.
Under the web page of SAM9N12/CN11-EK, find the test package of AT91SAM9N12/CN11-
EK_test_xx_public.zip (xx is the version number), which is the file for Flash content burning. A step-by-
step instruction is available in name of SAM9N12/CN11_EK_Test_Software on how to recover the con-
tents and how to make test for each section of the boards.


