38
Chapter 3: Work hard, play harder
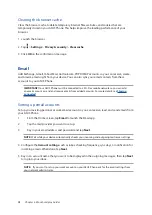
Clearing the browser cache
Clear the browser cache to delete temporary Internet files, websites, and cookies that are
temporarily stored in your ASUS Phone. This helps improve the loading performance of your
browser.
1. Launch the browser.
2. Tap >
Settings
>
Privacy & security
>
Clear cache
.
3. Click
OK
on the confirmation message.
Add Exchange, Gmail, Yahoo! Mail, Outlook.com, POP3/IMAP accounts so you can receive, create,
and browse emails right from your device. You can also sync your email contacts from these
accounts to your ASUS Phone.
IMPORTANT!
Your ASUS Phone must be connected to a Wi-Fi or mobile network so you can add
an email account or send and receive emails from added accounts. For more details, see
.
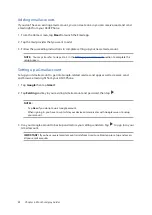
Setting up email accounts
Set up your existing personal or work email account so you can receive, read, and send emails from
your ASUS Phone.
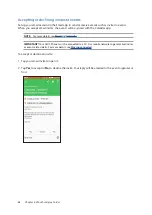
1.
From the Home screen, tap
to launch the Email app.
2.
Tap the mail provider you want to set up.
3.
Key in your email address and password and tap
Next
.
NOTE:
Wait while your device automatically checks your incoming and outgoing mail server settings.
4. Configure the
Account settings
such as inbox checking frequency, sync days, or notification for
incoming emails. When done, tap
Next
.
5. Key in an account name that you want to be displayed in the outgoing messages, then tap
Next
to log into your inbox.
NOTE:
If you want to set up your work account on your ASUS Phone, ask for the email settings from
your network administrator.
Содержание ZenFone Selfie ZD551KL
Страница 1: ...ASUS_Z00UD ZD551KL User Guide ...

